
Square-in-a-Square Block - Paper Piecing tutorial
An in-depth tutorial providing step-by-step instructions and my tips for successful paper piecing the Square-in-a-square block for your Cosmic Cactus quilt. There are also are plenty of photos so you can easy follow along and complete your square-in-a-square block.
What is paper piecing?
Paper piecing is usually done with paper that can be removed after stitching.
This is not to be confused with foundation piecing. Foundation piecing is where you sew onto a background fabric, usually muslin and it stays on.
The square-in-a-square block can be completed in various ways. I prefer to use this paper piecing method for the following reasons:
Only a small amount of wastage. Other methods waste more fabric!
Greater accuracy when piecing the block.
Abbreviations:
RST - Right sides together.
My tips for successful paper piecing:
When cutting your fabric use labels, as the two different size squares will look similar in size.
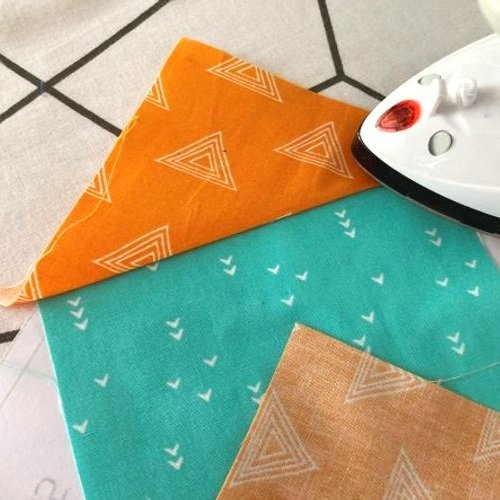
Handle the 2 smaller squares with care. When cut in half they will have bias edges. Use a hot iron with no steam. Take particular care when pressing. Press your seam by lift and lowering the iron in one spot. Do not iron back and forth as this will cause distortion and stretching along the bias edge.
You can use regular printer paper!
When printing your templates, ensure you print at 100% size. Don’t select ‘scale to page’ when printing. Check the printed template is the correct size measuring the 1” scale box.
Shorten your stitch length to 1 to 1.3. This will allow the paper to tear off easily.
Place your fabric square on the non-printed side of the paper, with the right side of the fabric facing towards you.
Use a glue stick (water-soluble) to hold main centre square in place (but don't use too much) and pins for the outer triangles.
Sew directly through the printed paper from the printed side (fabric will be on the underside).
How to make a viewing window to fussy cut your motifs:
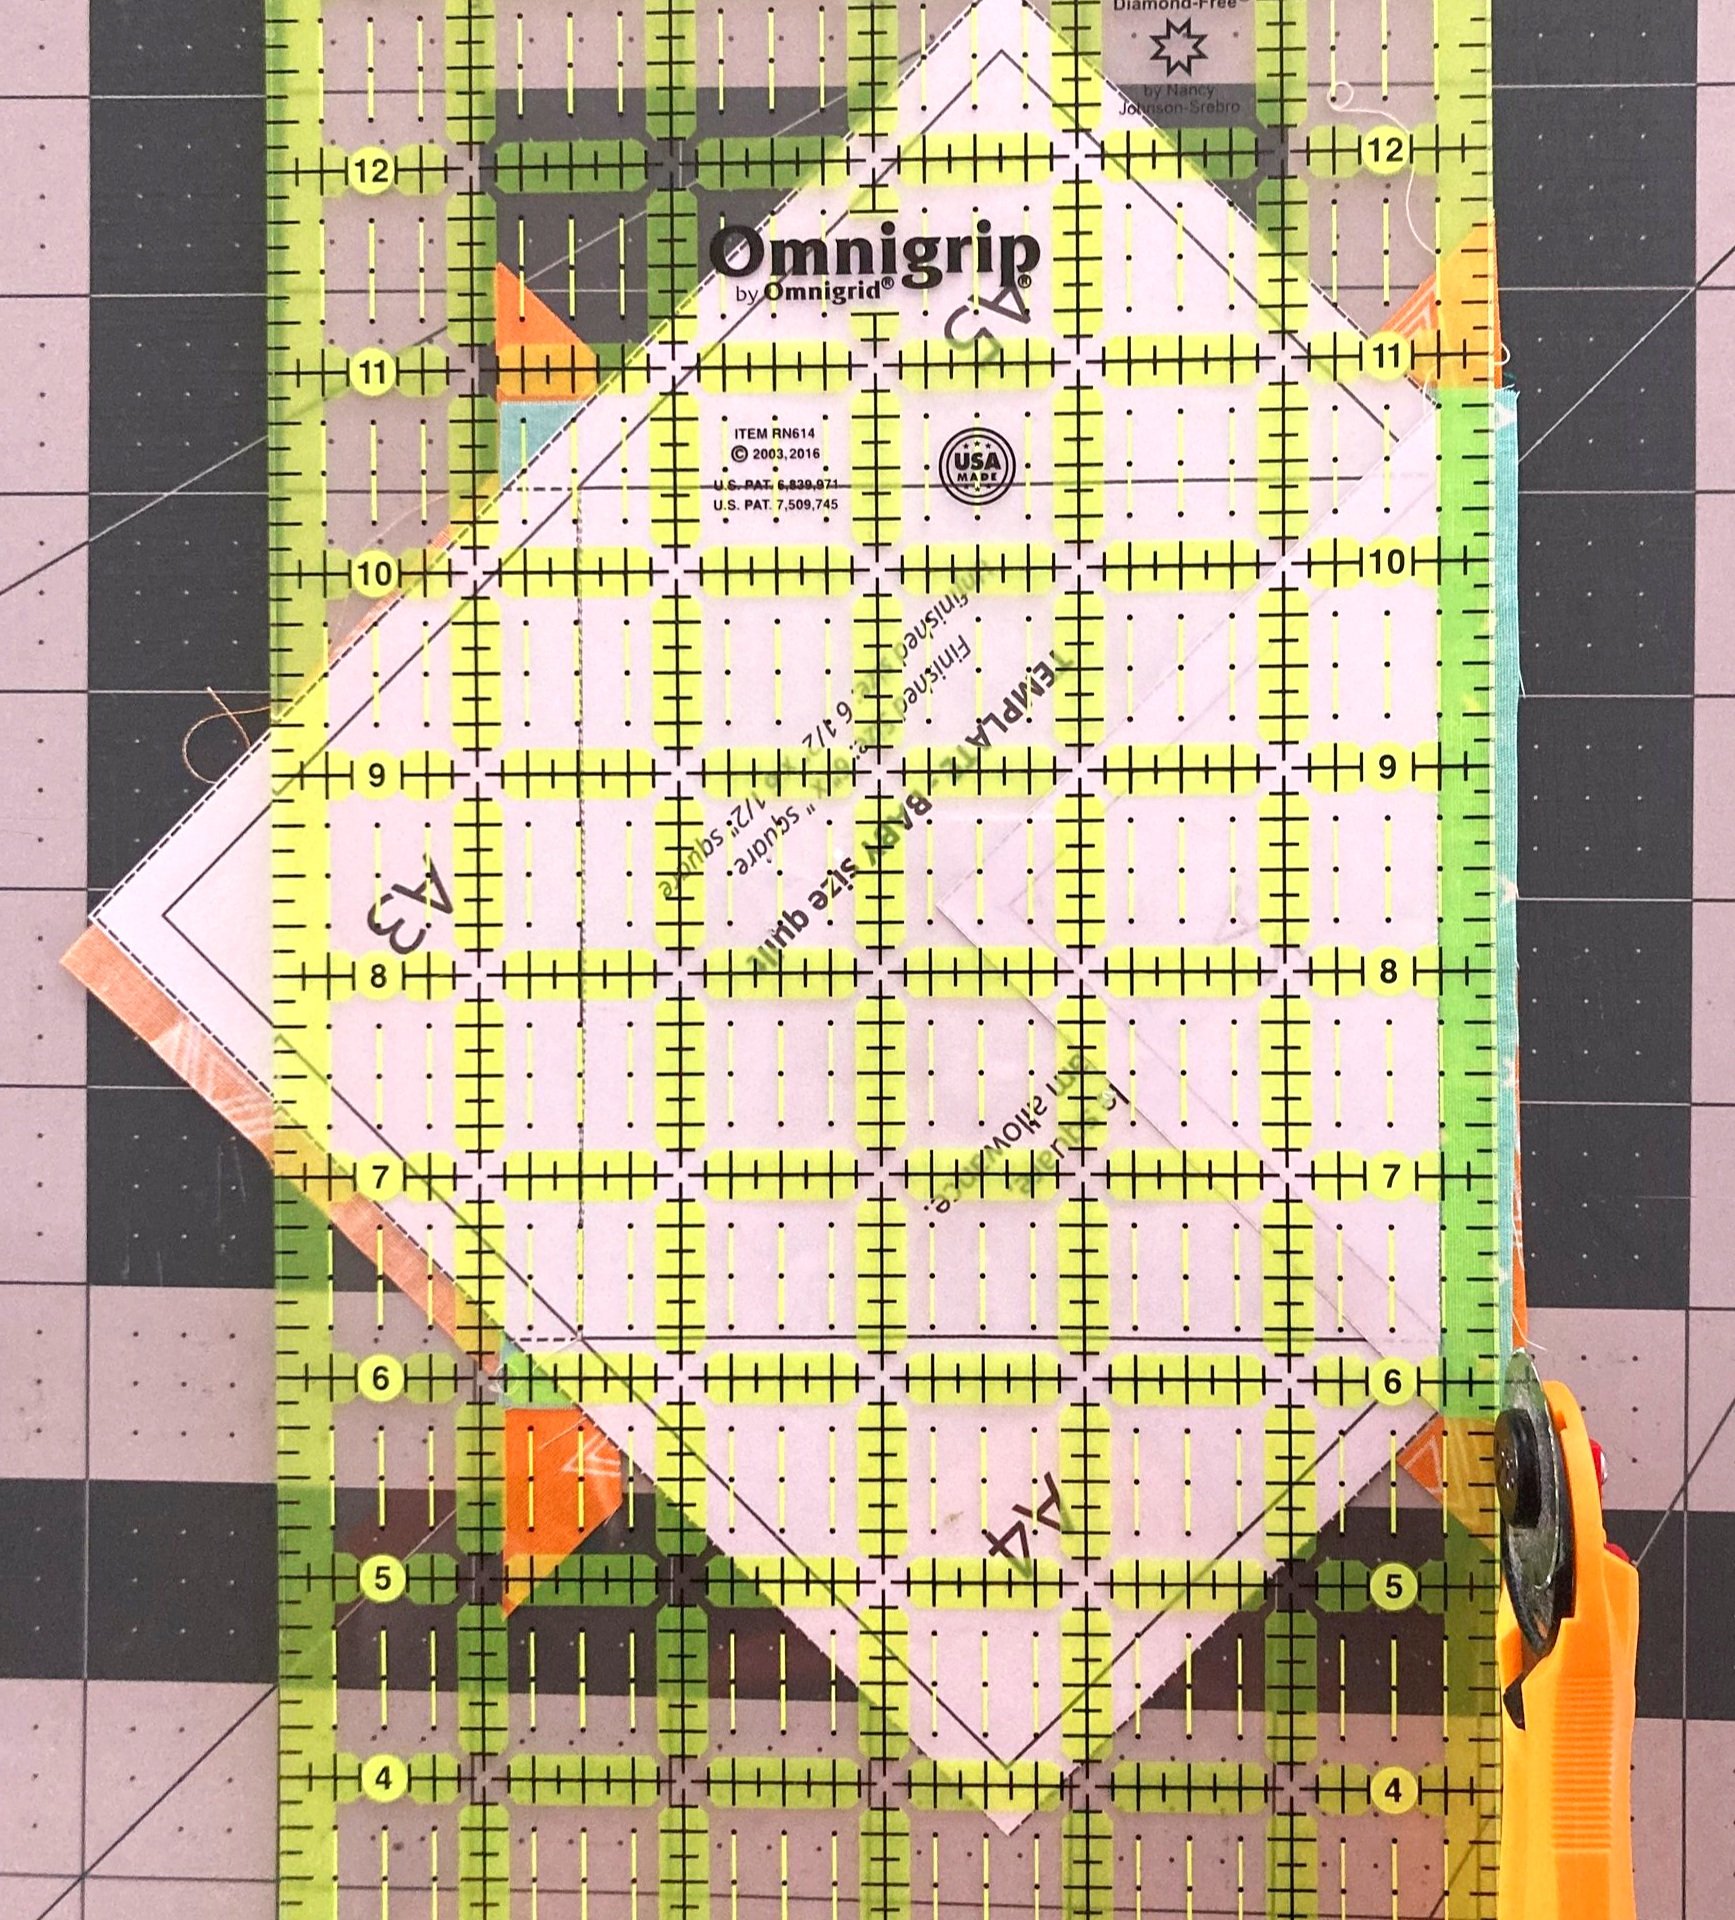
1. Take an acrylic square ruler and washi tape.
2. Use washi tape to mark the S2 square size you need to cut: BABY - 5” square; THROW - 6.5” square. Fig.1
3. Move the ruler around the fabric to see if the size of the print allows a nice feature within the shape.
4. Check the motif does not come within the 1/4″ seam allowance included on all the edges.
5. Note the motif orientation in the square needs to be centred on the diagonal. Fig. 2

Fig. 1

Fig. 2
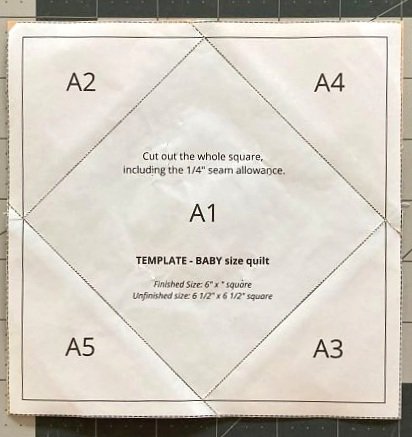
PREPARE THE TEMPLATE
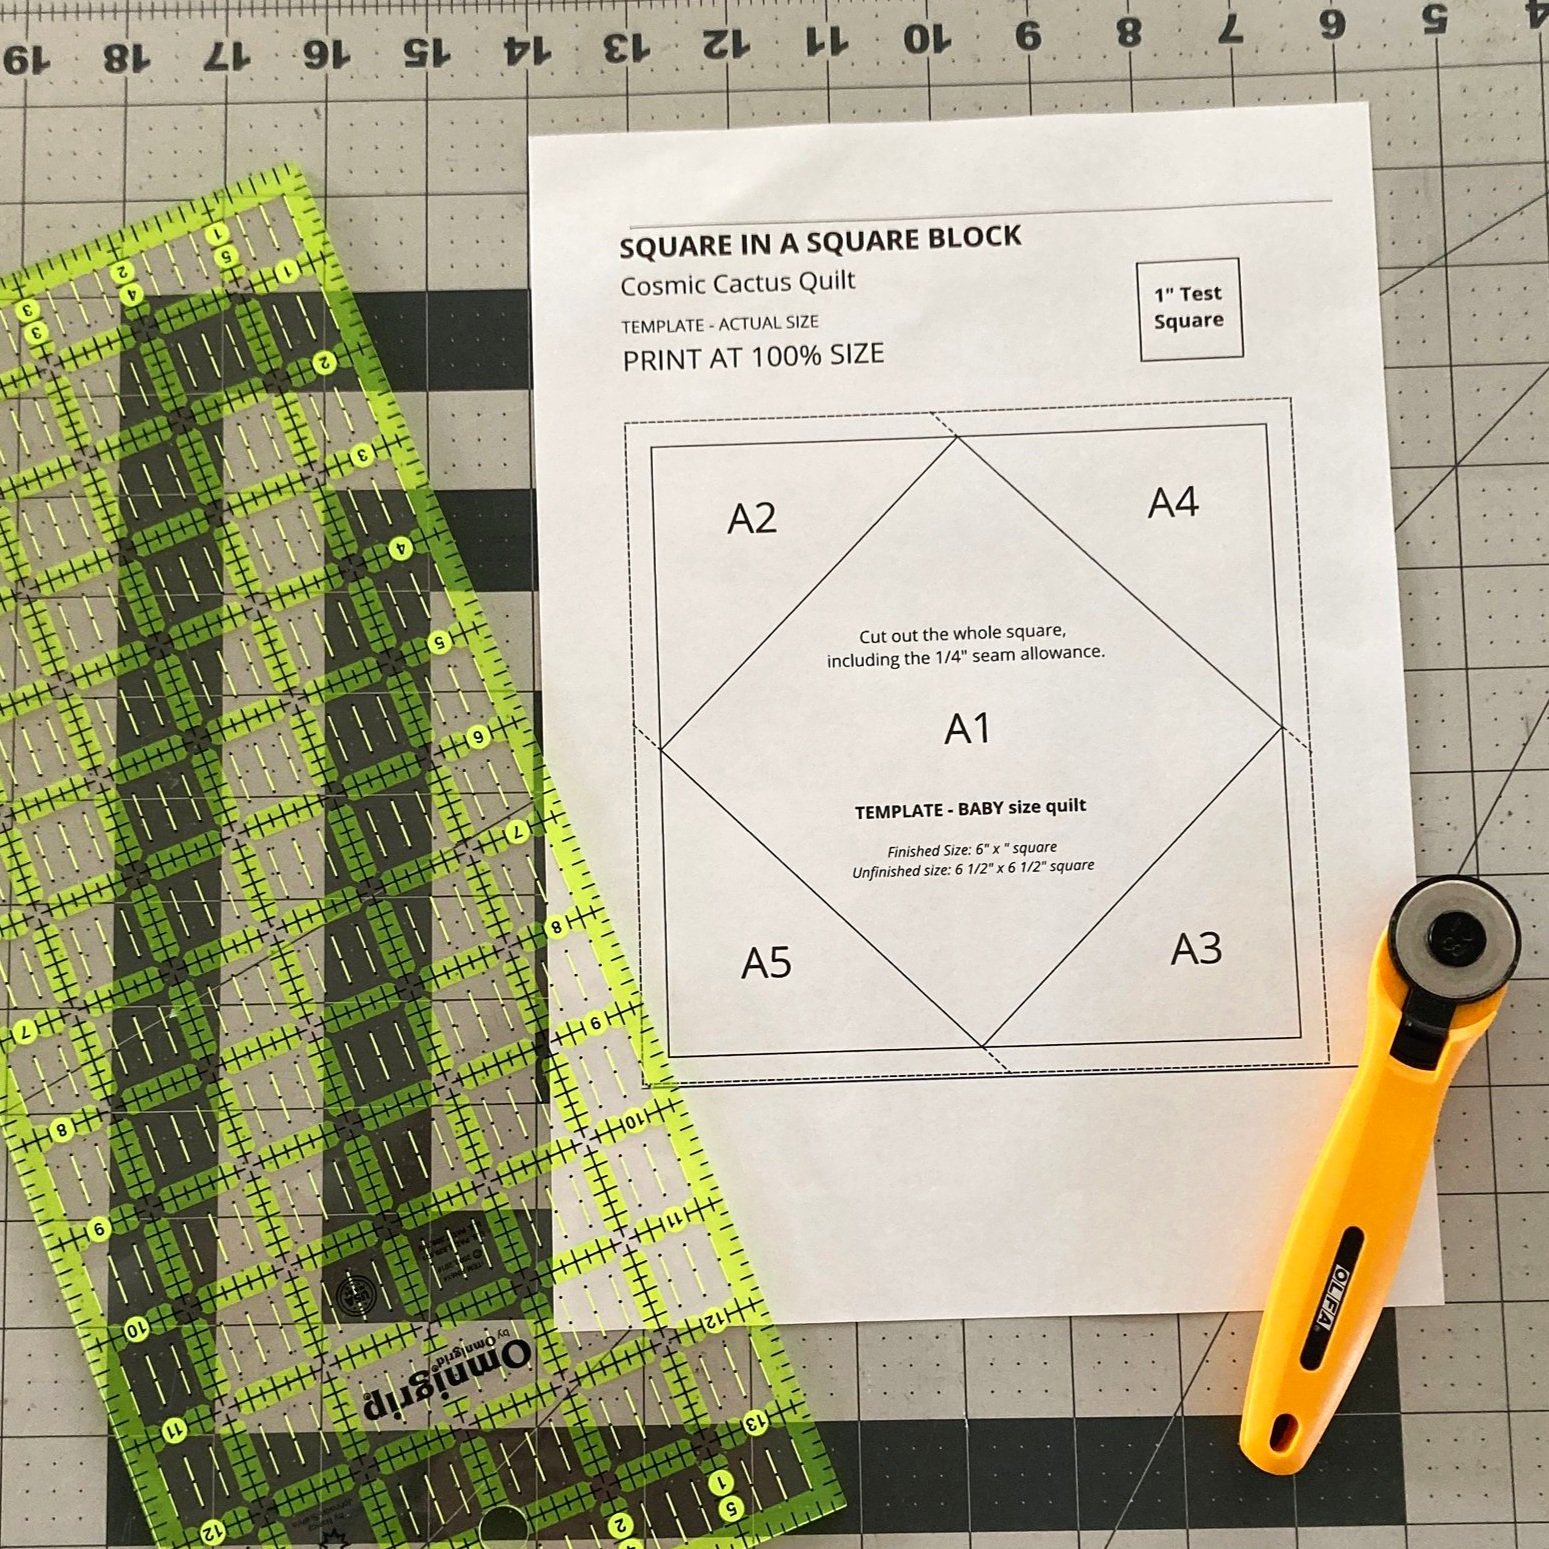
1. Print the templates at 100% size (do not scale to page).

2. Check the printed template is the correct size by measuring the 1" scale box and checking the finished size of the block is correct.

3. For accurate cutting, use a rotary cutter, ruler and line up the inner 1/4 inch solid line.

JOINING TEMPLATES (Throw size only)

When cutting out the larger template (as pictured on the LHS), cut along the dotted line that runs along the edge of the page.
Then cut remainder of the template out along the outer border.
Take the remaining half of the template (as pictured on the RHS) and cut around the template to join the two pages.

Line up the template block and use tape to secure the pages together.
Tip: I prefer to use Scotch Magic Tape as you can unstick tape and make minor adjustments if you didn’t link up properly!
PIECING THE BLOCK

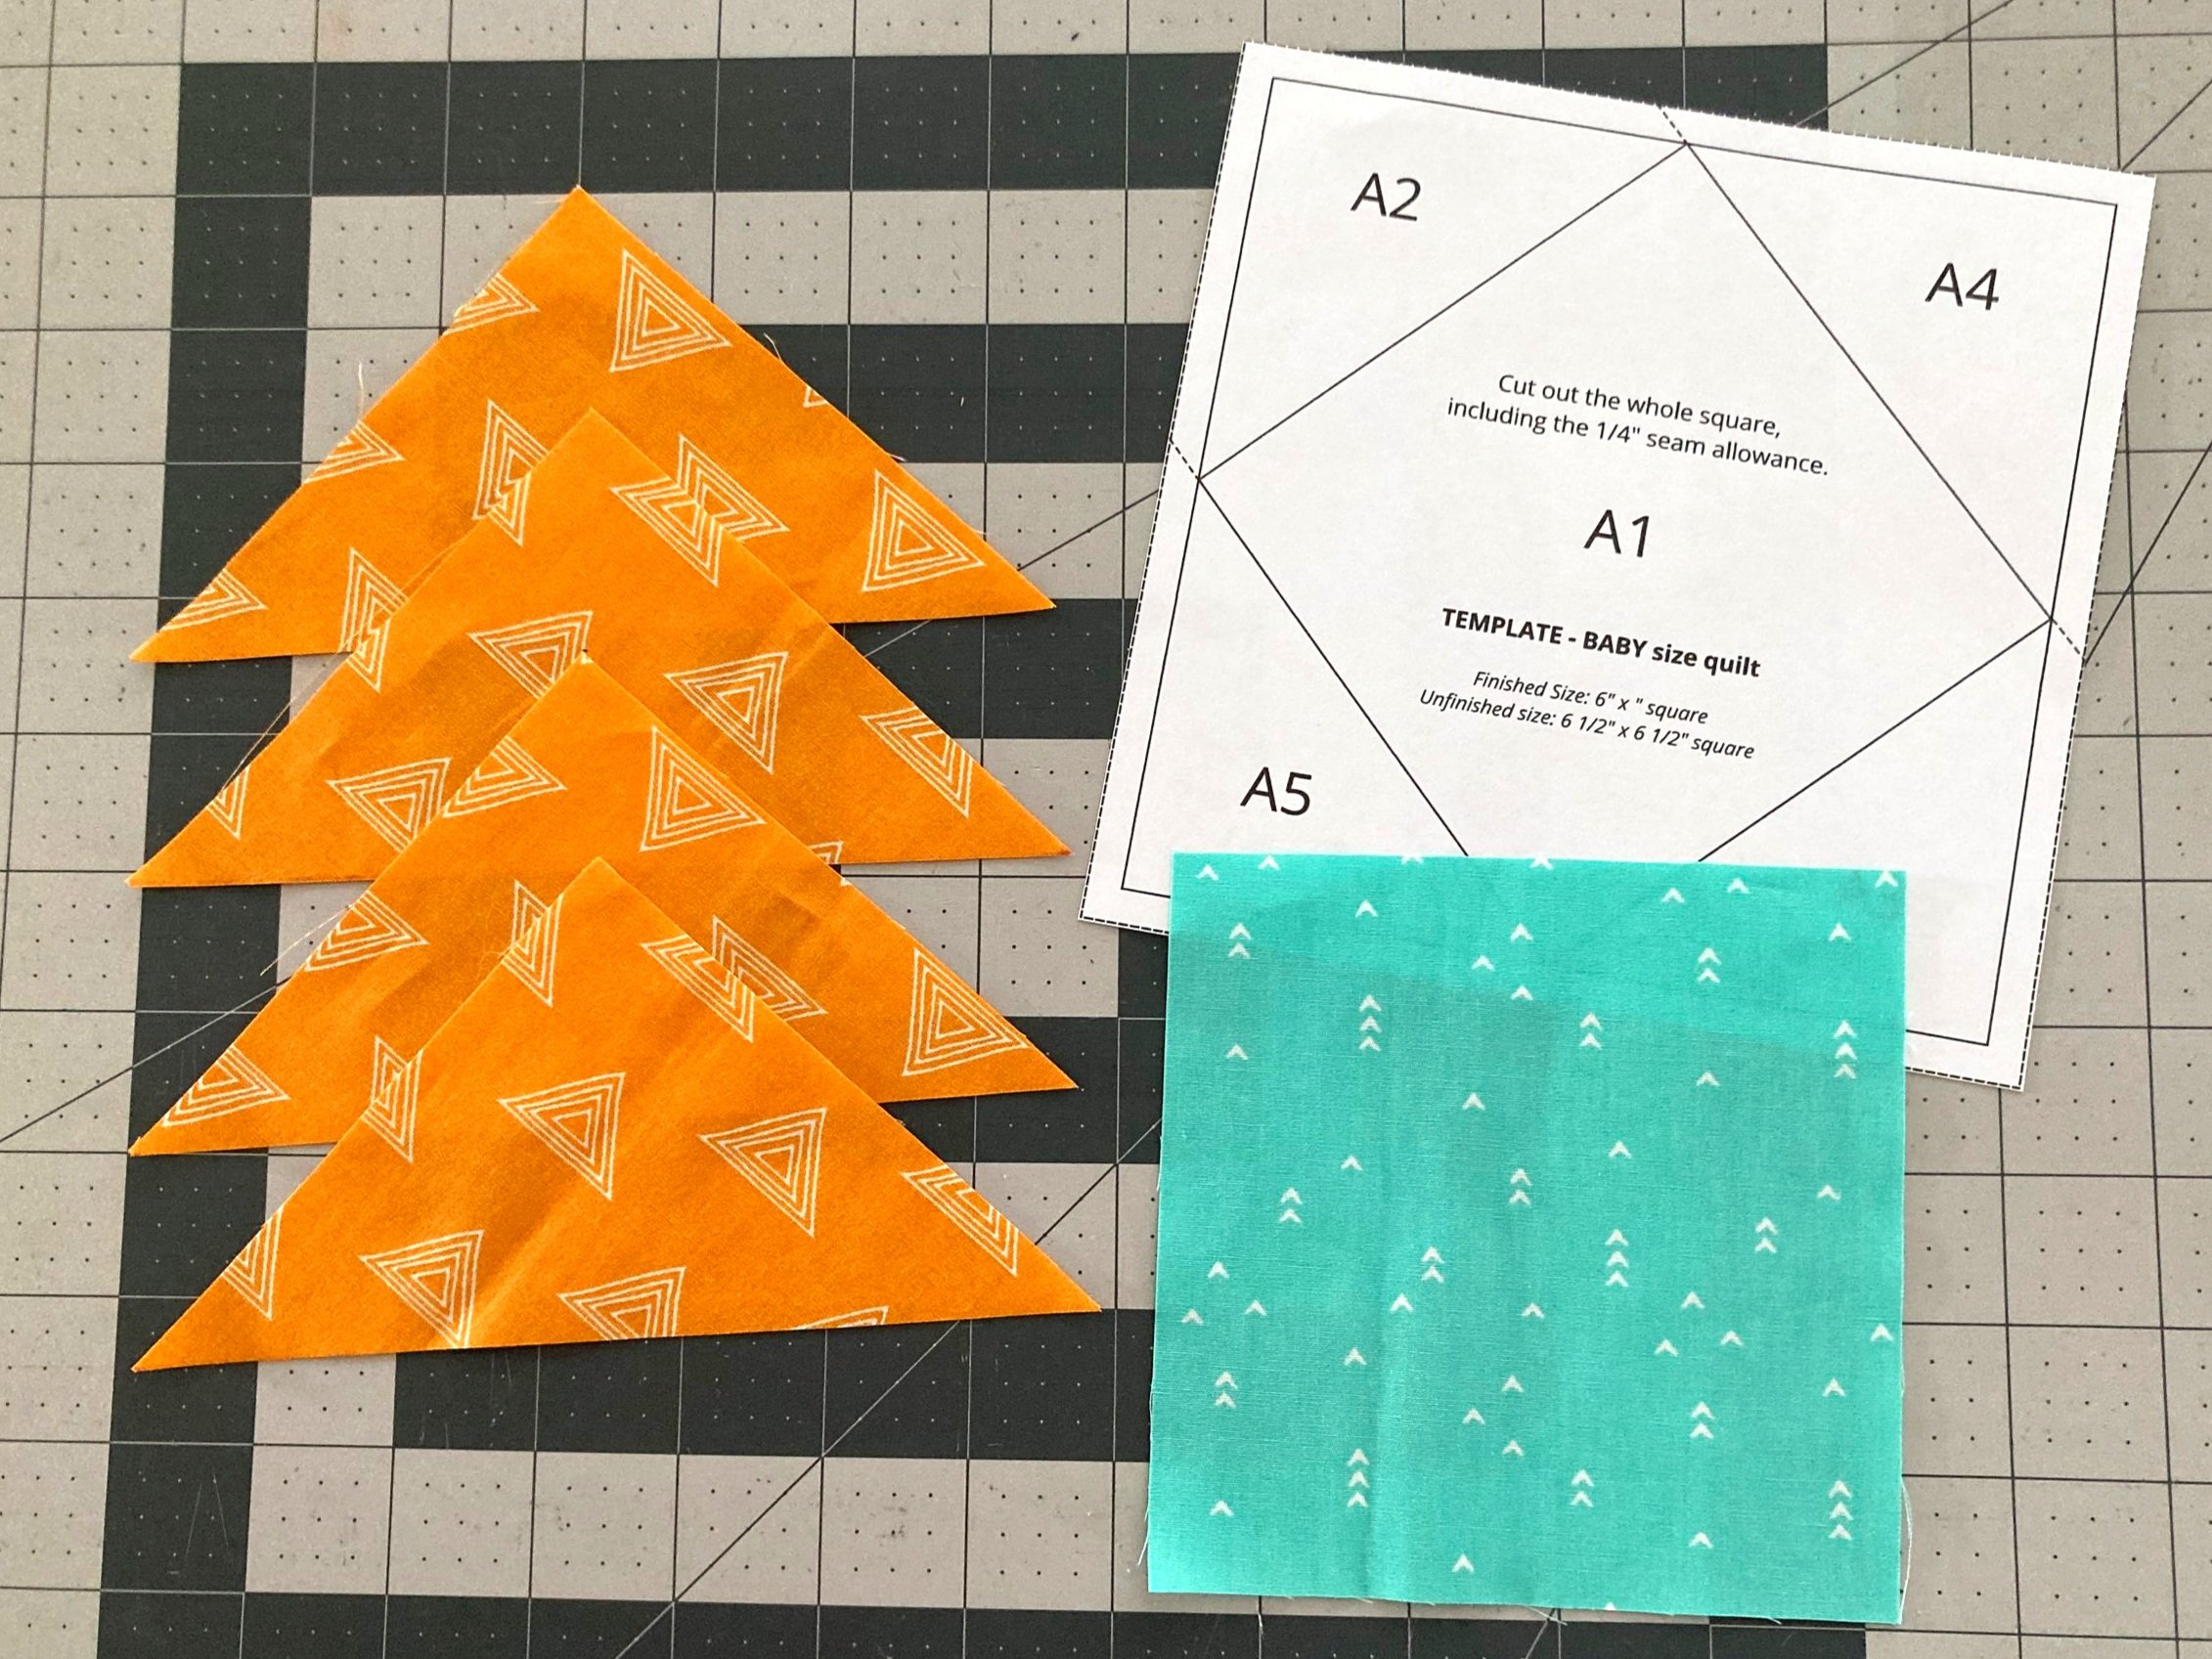
1. Cut your fabric squares as directed in the pattern.
You can roughly cut the fabric to size especially if you’re using scraps, as the block will be trimmed. Just ensure your fabric is larger than it needs to be.
As outlined in the pattern, each block you will require:
1 large square
2 smaller squares

2. Take the 2 smaller squares and cut in half diagonally, taking care not to stretch the bias edges

3. Take template, large square and water-soluble glue stick.

4. Place the paper template printed side down.
Position the square right side up on the A1 centre square.
Hold the template up to the light (or use a light box) to help position the square and ensure the edges overlap on all four sides.
Use a dot of the glue stick to secure the fabric square.
TIP: For fussy cut S2 square placement check the motif fits within the lines of inner square as desired.
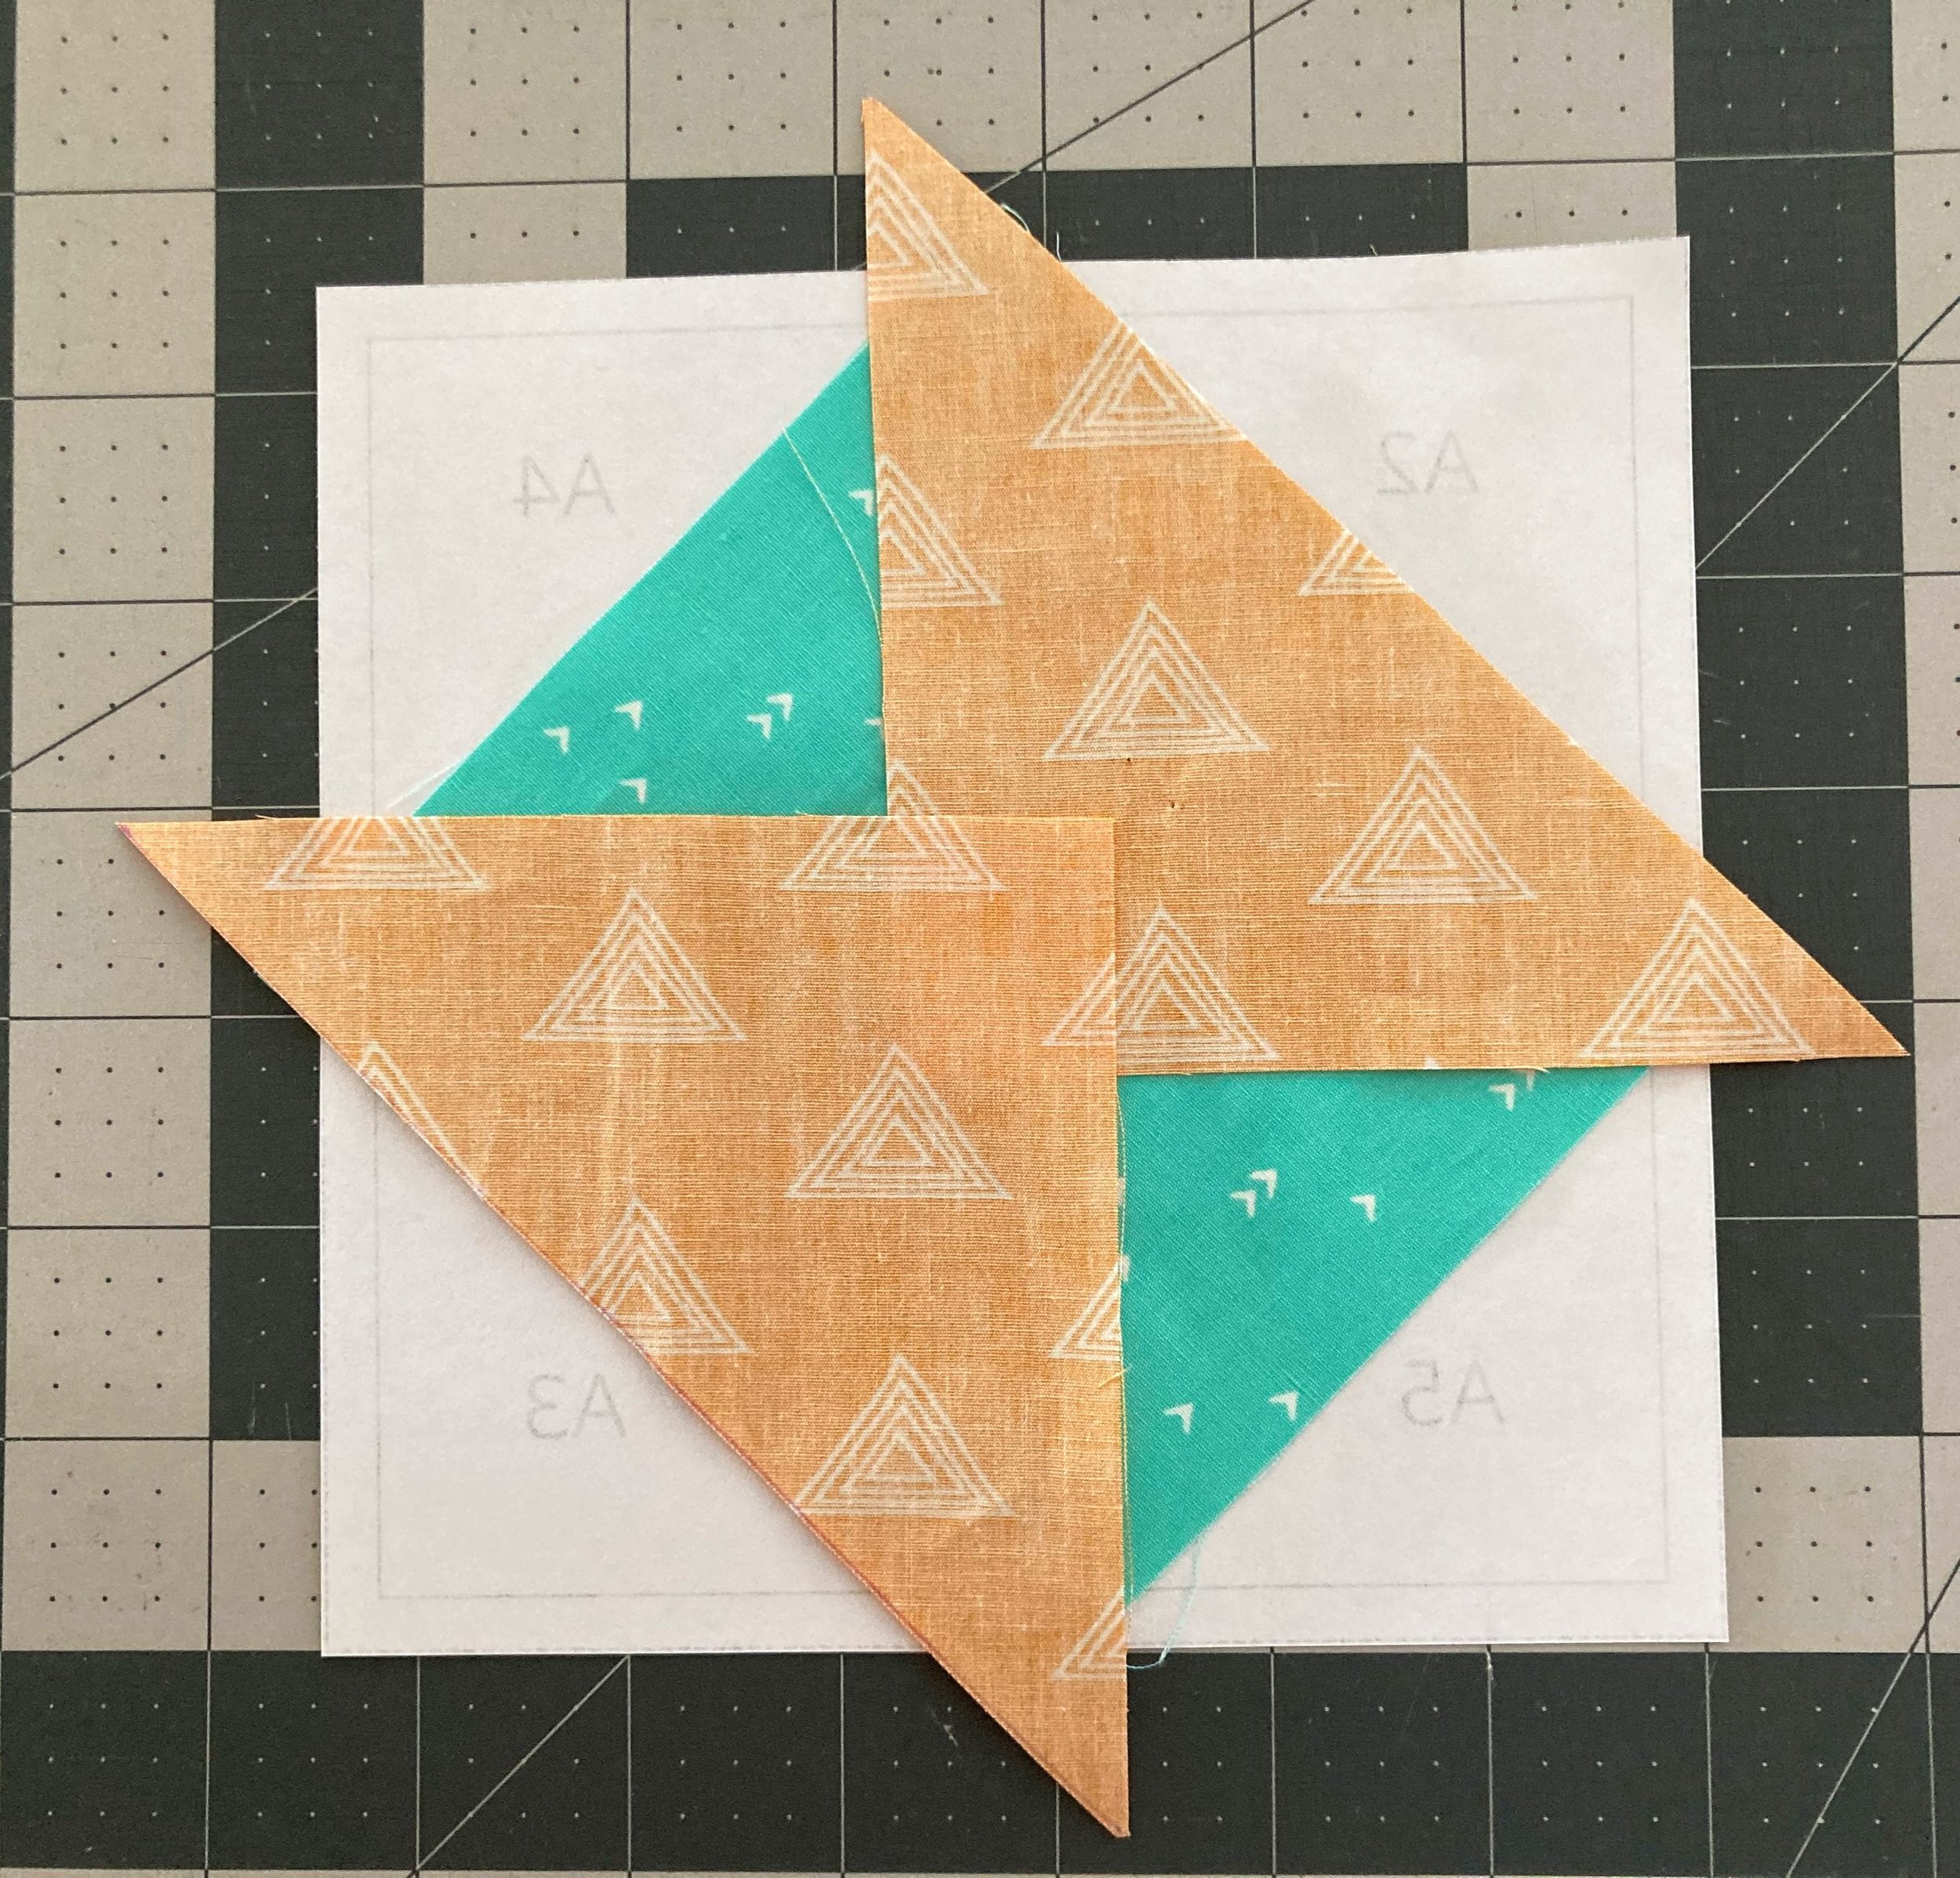
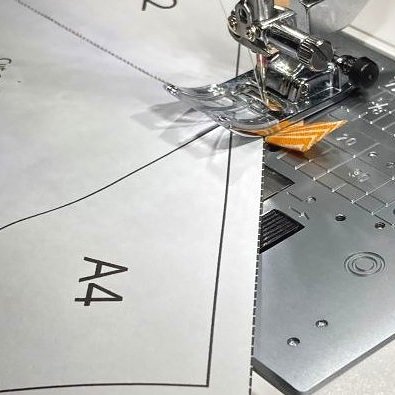
5. Take 2 triangles and with RST place on top the centre square, opposite the A2 and A3 spaces, matching the raw edges.

6. Pin in place.
Initially I was pinning from the top of the template (as pictured), but I found it tricky to keep turning the template over.
I recommend pinning from the other side, positioning the pin heads towards the centre of the square. Allowing enough room for sewing along the printed line so you can leave the pins in place while sewing and remove them after.

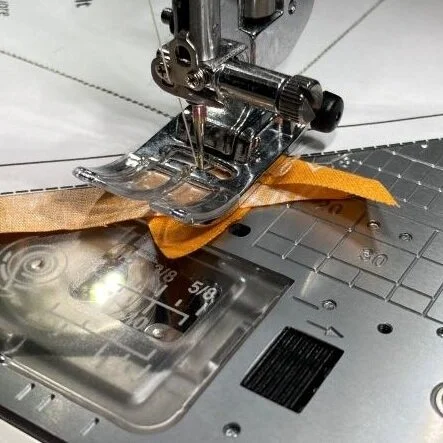
7. Change your stitch length to 1 to 1.3 before sewing.
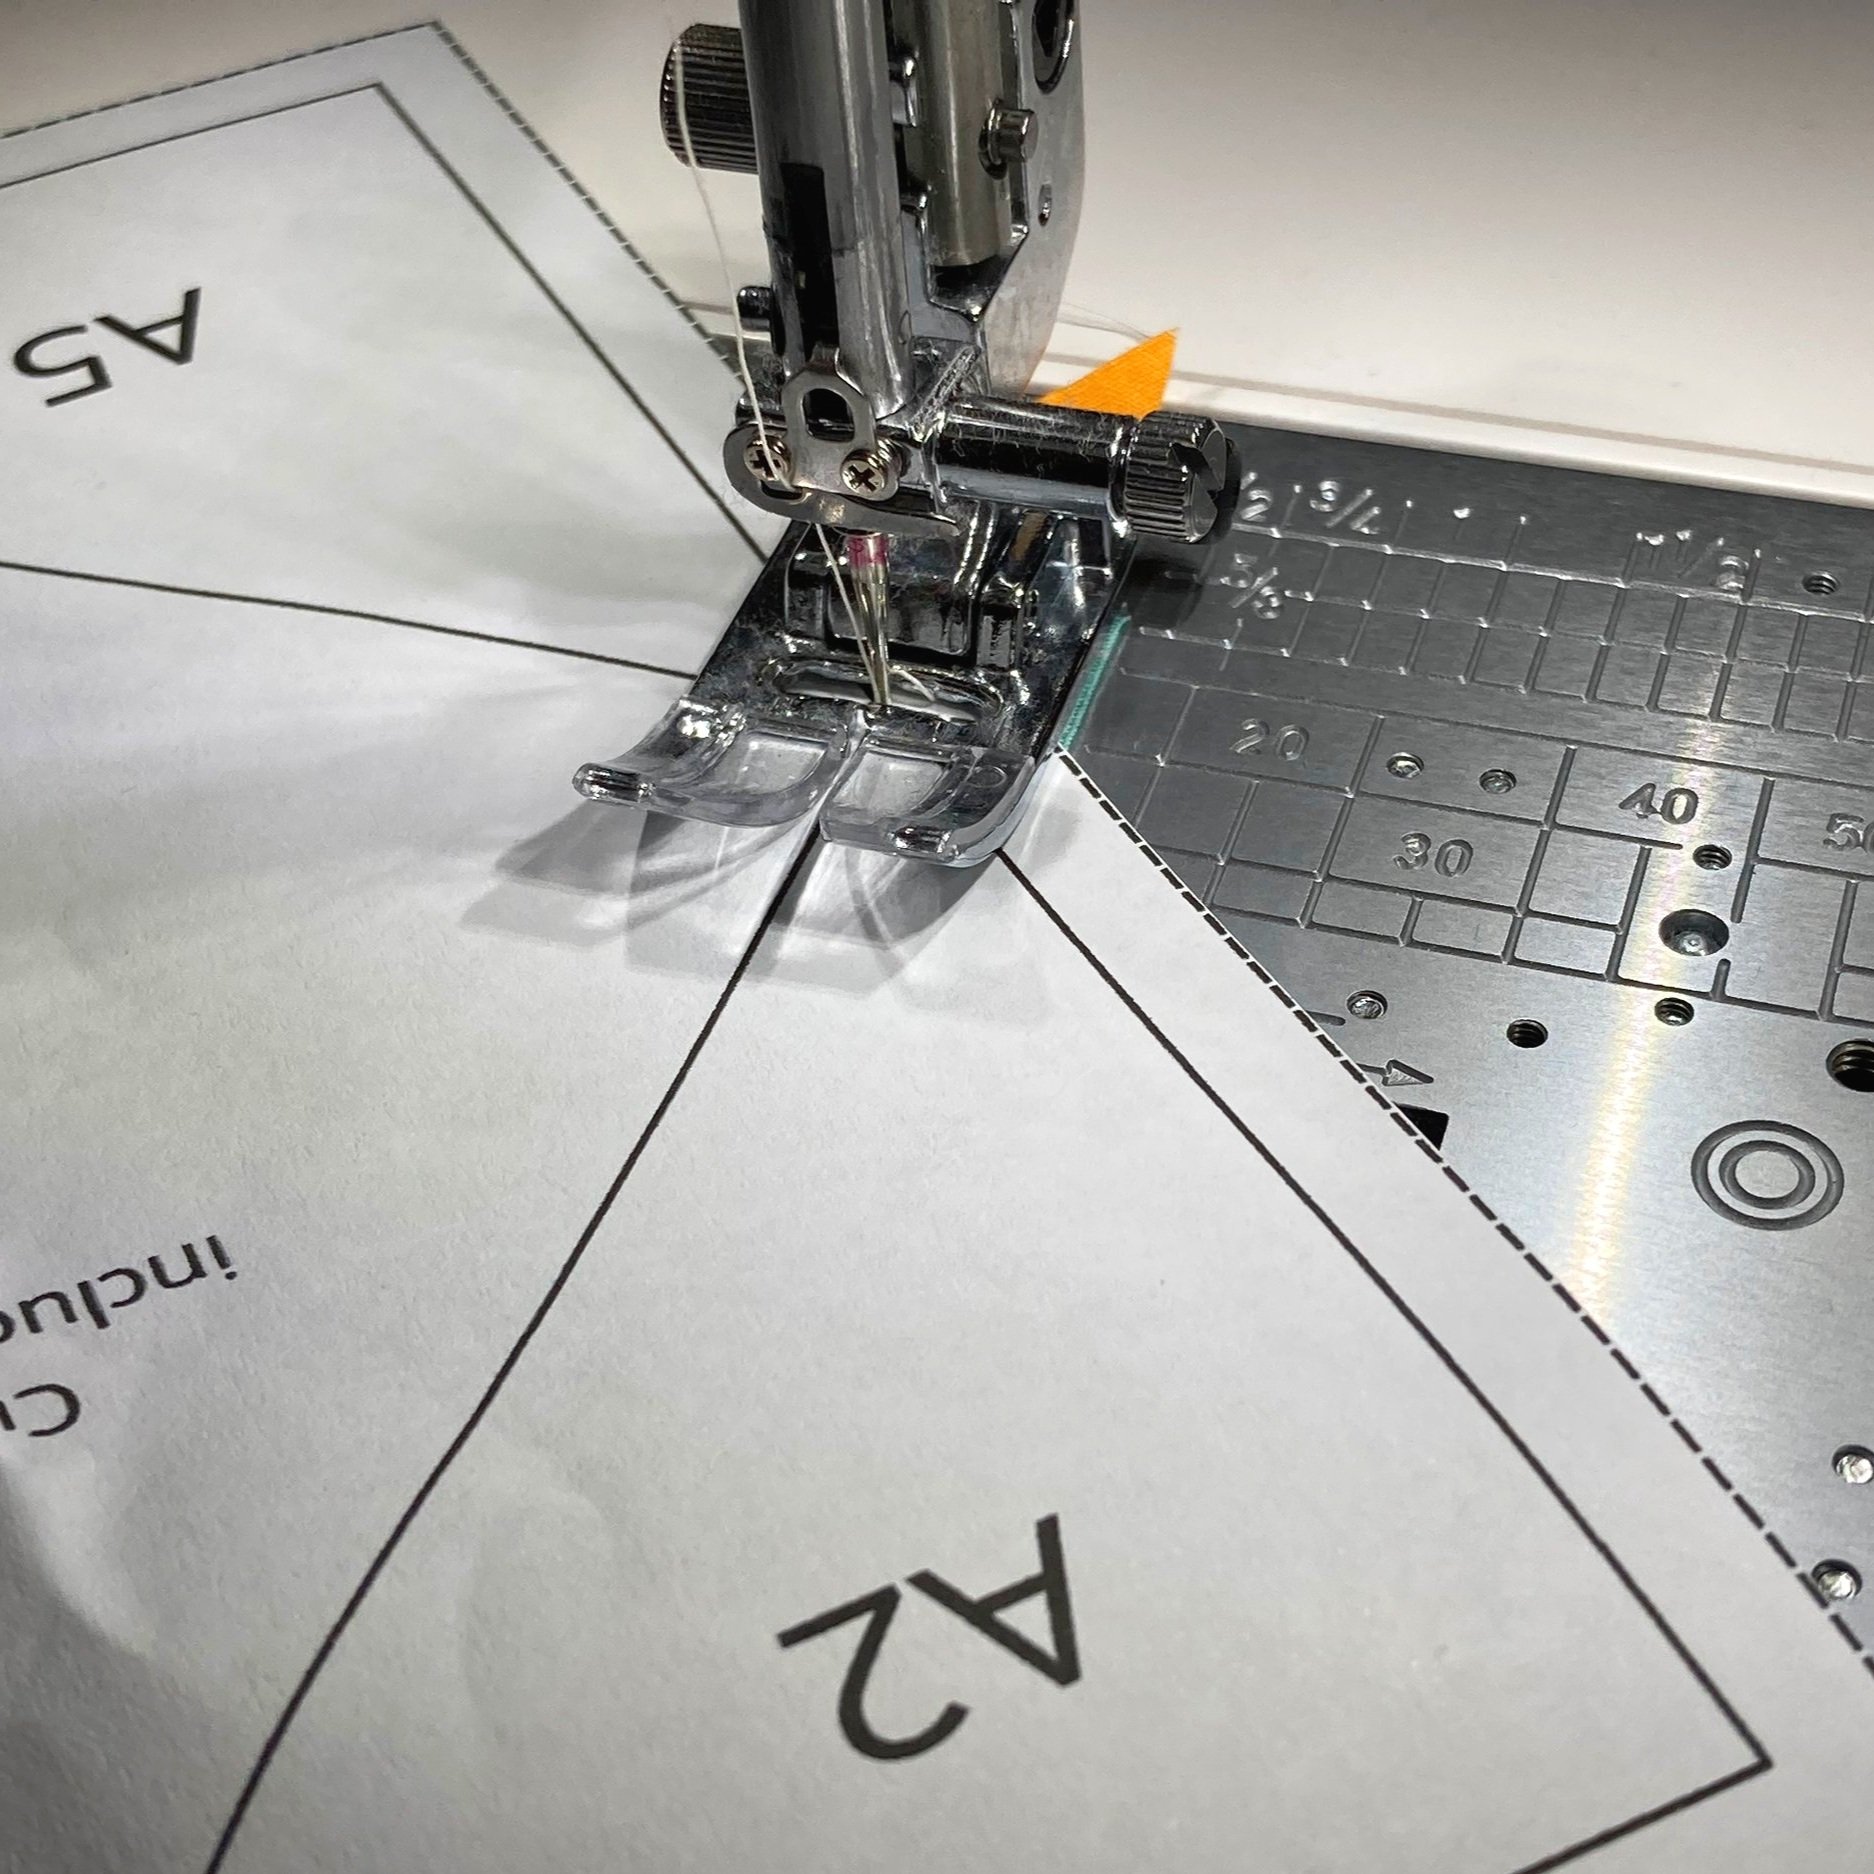
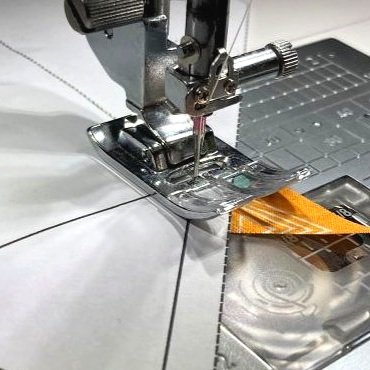
8. Turn the paper over and stitch on the printed side of the paper on the inner solid line next to the A2 and A3 spaces, starting your first stitch at the inner square point. Back stitching at the start and finish.
Tip: Ensure the triangle underneath is sitting flat and doesn’t fold over before sewing (don’t ask how I know).

9. From the right side of the template, fold over the A2 and A3 paper corners along the sewn seam and trim the seam allowance to 1/4 inch.

10. Press the seam in the closed position to set seam'.
11. Next, press the triangle open.
12. Repeat steps 8-11 for the remaining A4 and A5 corners, except start and finish stitching from the edge of your template along the dotted line.


13. A final trim and press.

14. Turn over to the printed side. With a rotary cutter and ruler trim around the outer square along the dotted line.
Tip: For best trimming accuracy, line up you ruler with the inner sold line and trim off 1/4 inch.


15.
Removing paper: Here comes the fun part! Carefully tear the paper away from the stitching. As you’ve done small stitches, the paper should easily tear away. Ensure you carefully remove the paper without stretching the fabric.


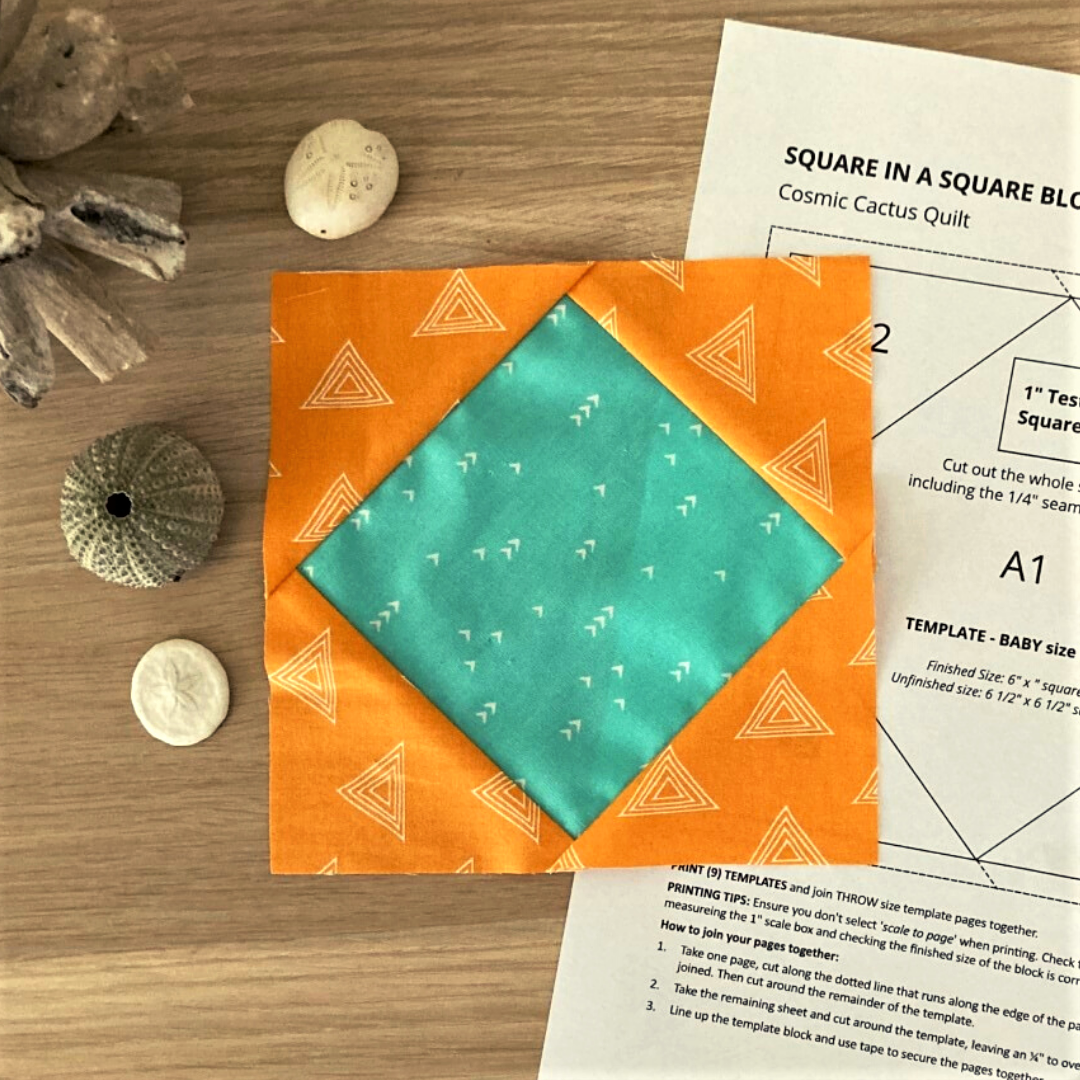
15. Voila! You have completed a perfect Square in a square block.