
How to make a Simple Quilt Design Wall
Disclosure: This page contains affiliate links, which means if you make a purchase through these links, we may receive a small commission at no extra cost to you. All of the product opinions and suggestions are unbiased. As an Amazon Associate, I earn from qualifying purchases. This is one of the ways I’m able to support myself and continue writing free content.
Easy to make and cost effective, you’ll wonder how you ever lived without one!
This quilt design wall gives you the flexibility to leave it there or remove it as required. No tools are required and no need to make any permanent changes to your wall, which is awesome for anyone that rents or doesn’t want their design wall permanently mounted. When removed it’s easily stored, by folding it up and putting away in your cupboard. You can customise your design wall and make it any size to fit the space available.
What is a quilt design wall?
A quilt design wall is basically somewhere you can preview your quilt as it’s coming together and organise the pieces of your blocks before you sew them together. You can leave it there as long as you like, making it a better option than using your floor.
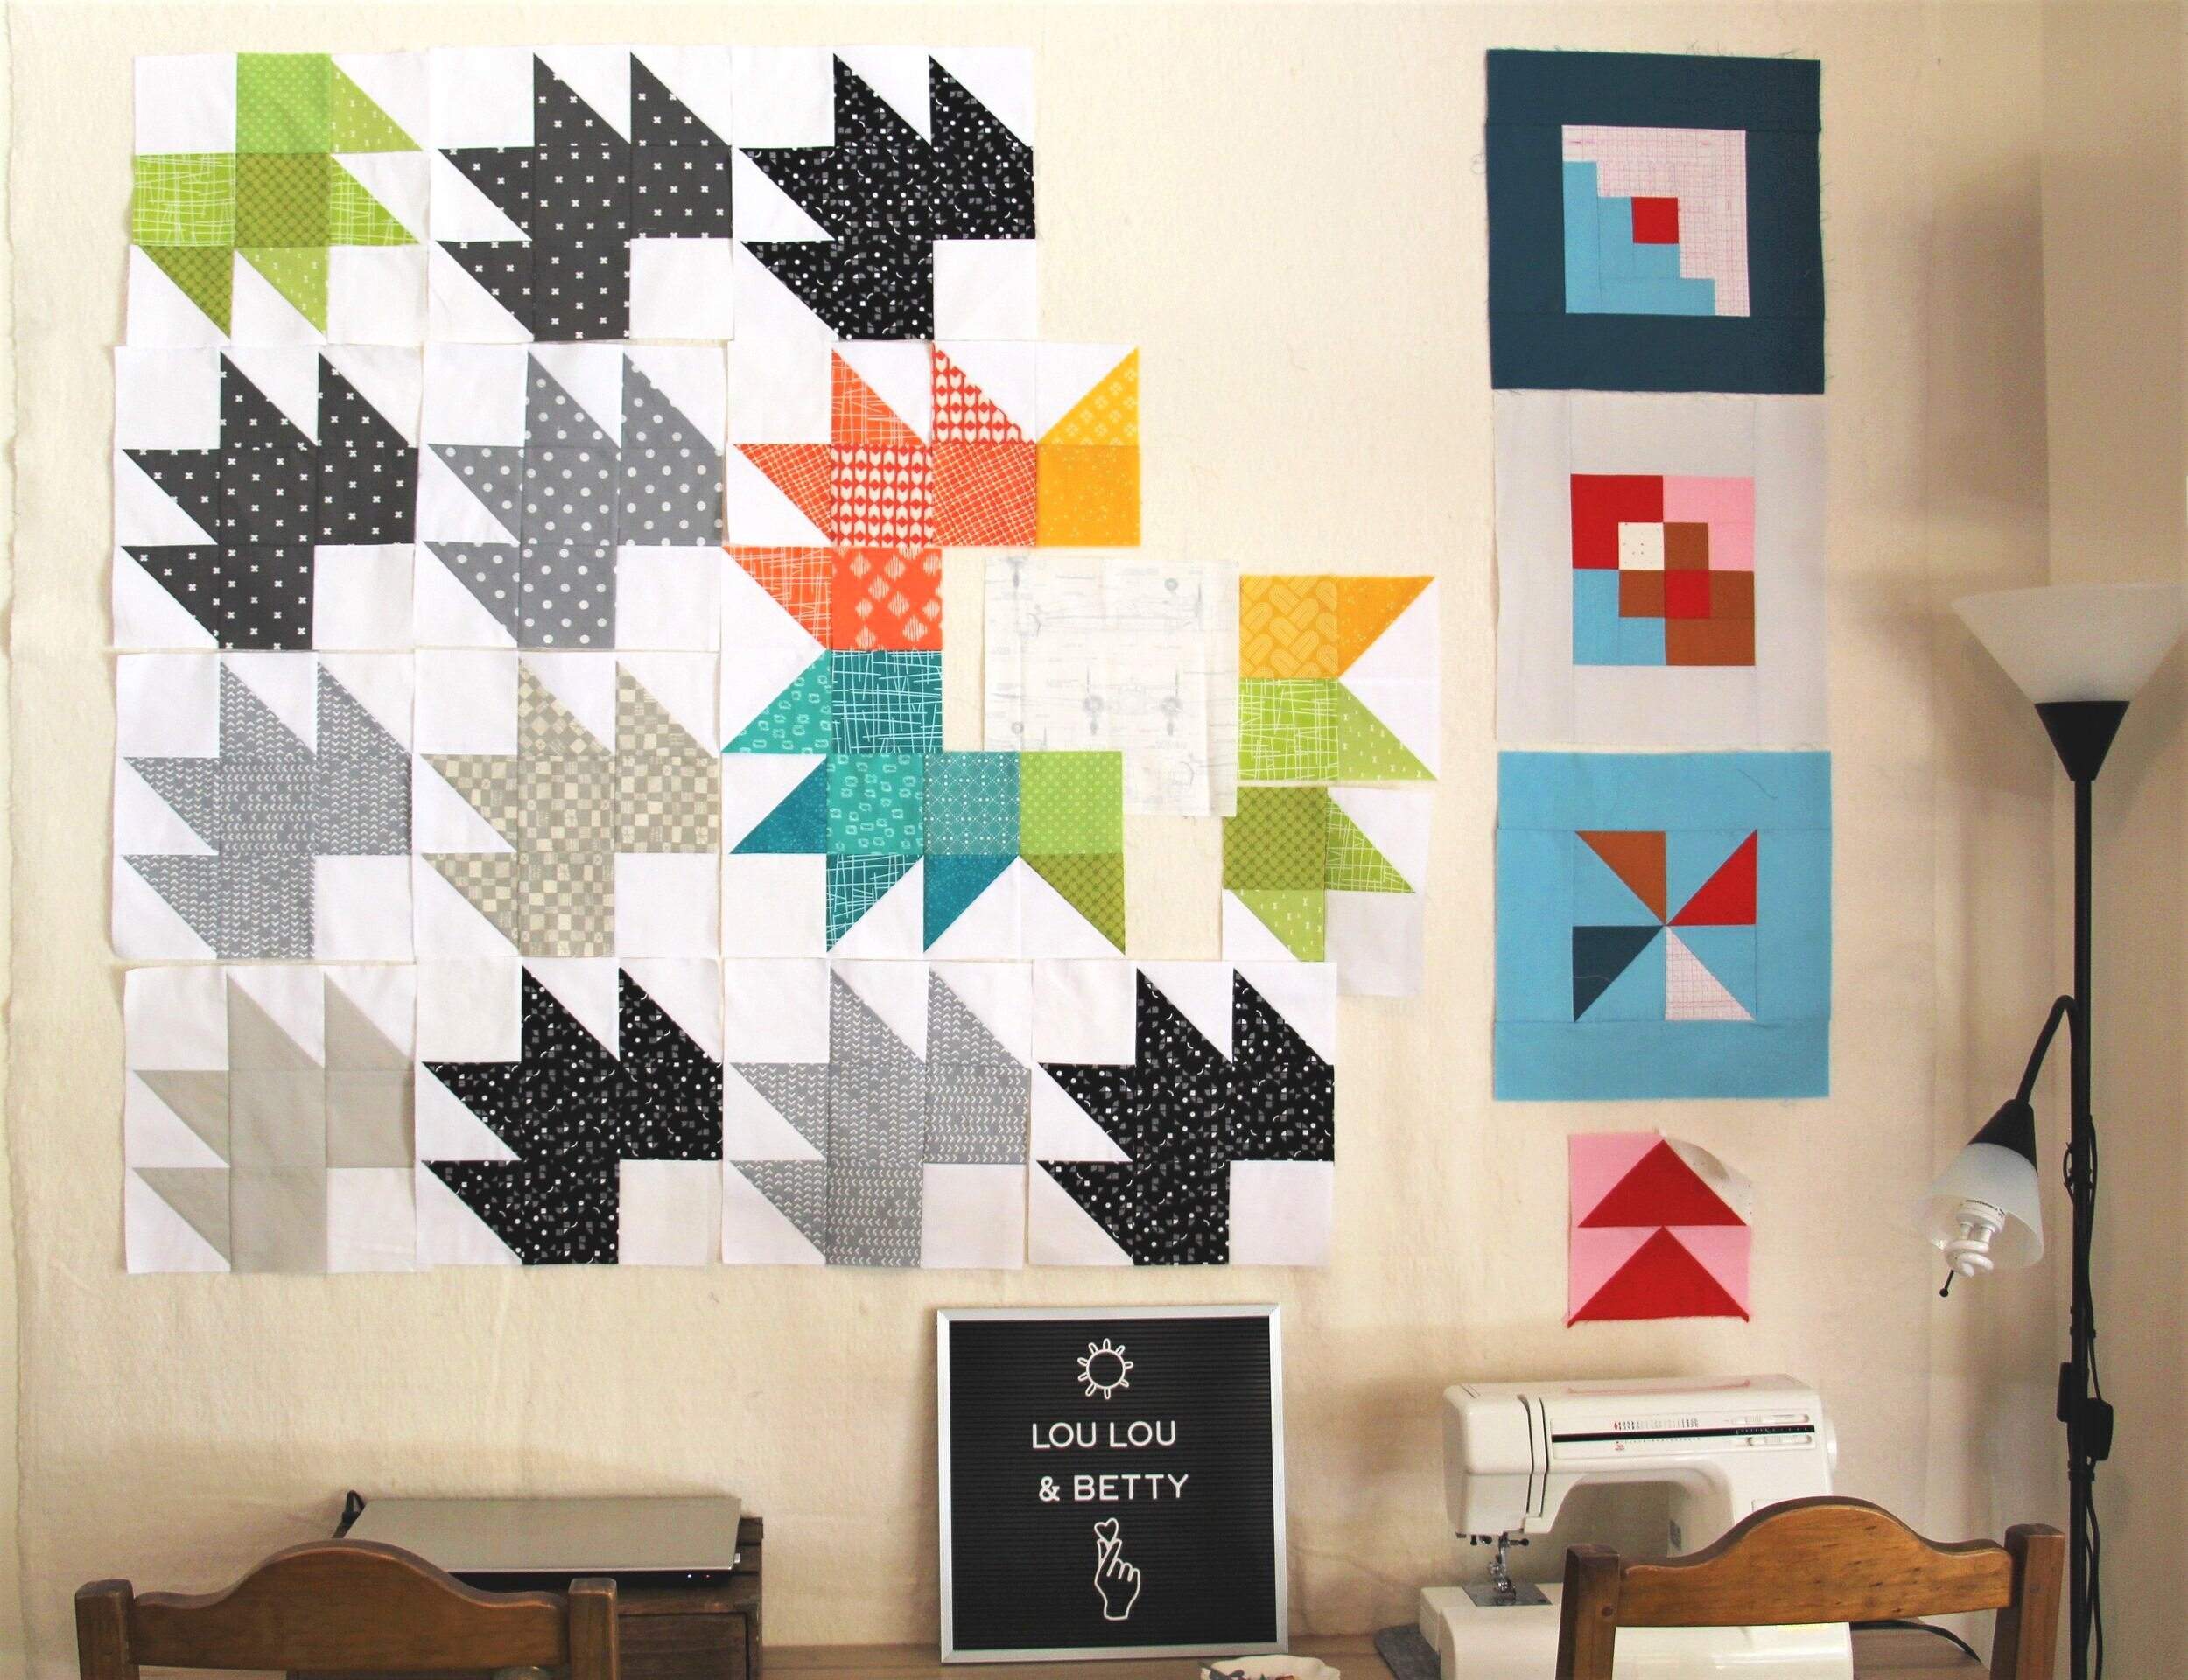
For instance, as you are putting together quilt blocks, place them on your quilt design wall and stand back to see how it looks. Sometimes you may see an error or something you don’t like, so this can easily be fixed or changed, before sewing your quilt top together. A quilt design wall makes it easy to audition fabrics, blocks or anything else you may want to preview during the quilt making process.
How does the fabric stick to the wall?
This is what makes a quilt design wall so cool! The texture of the quilt batting allows you to ‘stick’ pieces of fabric without the need to ever use pins. You simply press the fabric to the design wall and it will magically stay there! This is not a trick, it really does work!
Follow my instructions and make your own Quilt Design Wall.
Please note: This will only work only for plasterboard, drywall or gyprock walls.

Materials:
* This will give you 24 strips, as we are not pressing them together. You may need a second set of strips, depending on the size of your quilt. The Command Picture Hanging Strips are available on Amazon or you can usually find them at your local supermarket, hardware or variety store.
** I would suggest buying any pre cut size that fits your wall. I wanted the biggest design wall, so I went for the Queen size batting. I recommend using quilt batting over a flannel sheet, as a flannel sheet will be too flimsy and you will need the added structure that the batting provides for this project. Any quilt batting such as Matilda’s Own Cotton Batting will be suitable for this project.
Instructions:
1. Remove quilt batting from packaging and lightly press to remove creases.
2. If you need to cut the batting to a particular size, this would be the time to do this.
3. Find an area of wall you can hang your quilt batting and clean the wall with rubbing alcohol (this will ensure the picture hanging strips will adhere properly to the wall).
4. Separate the strips, but do not press them together (as suggested on the back of the packet).
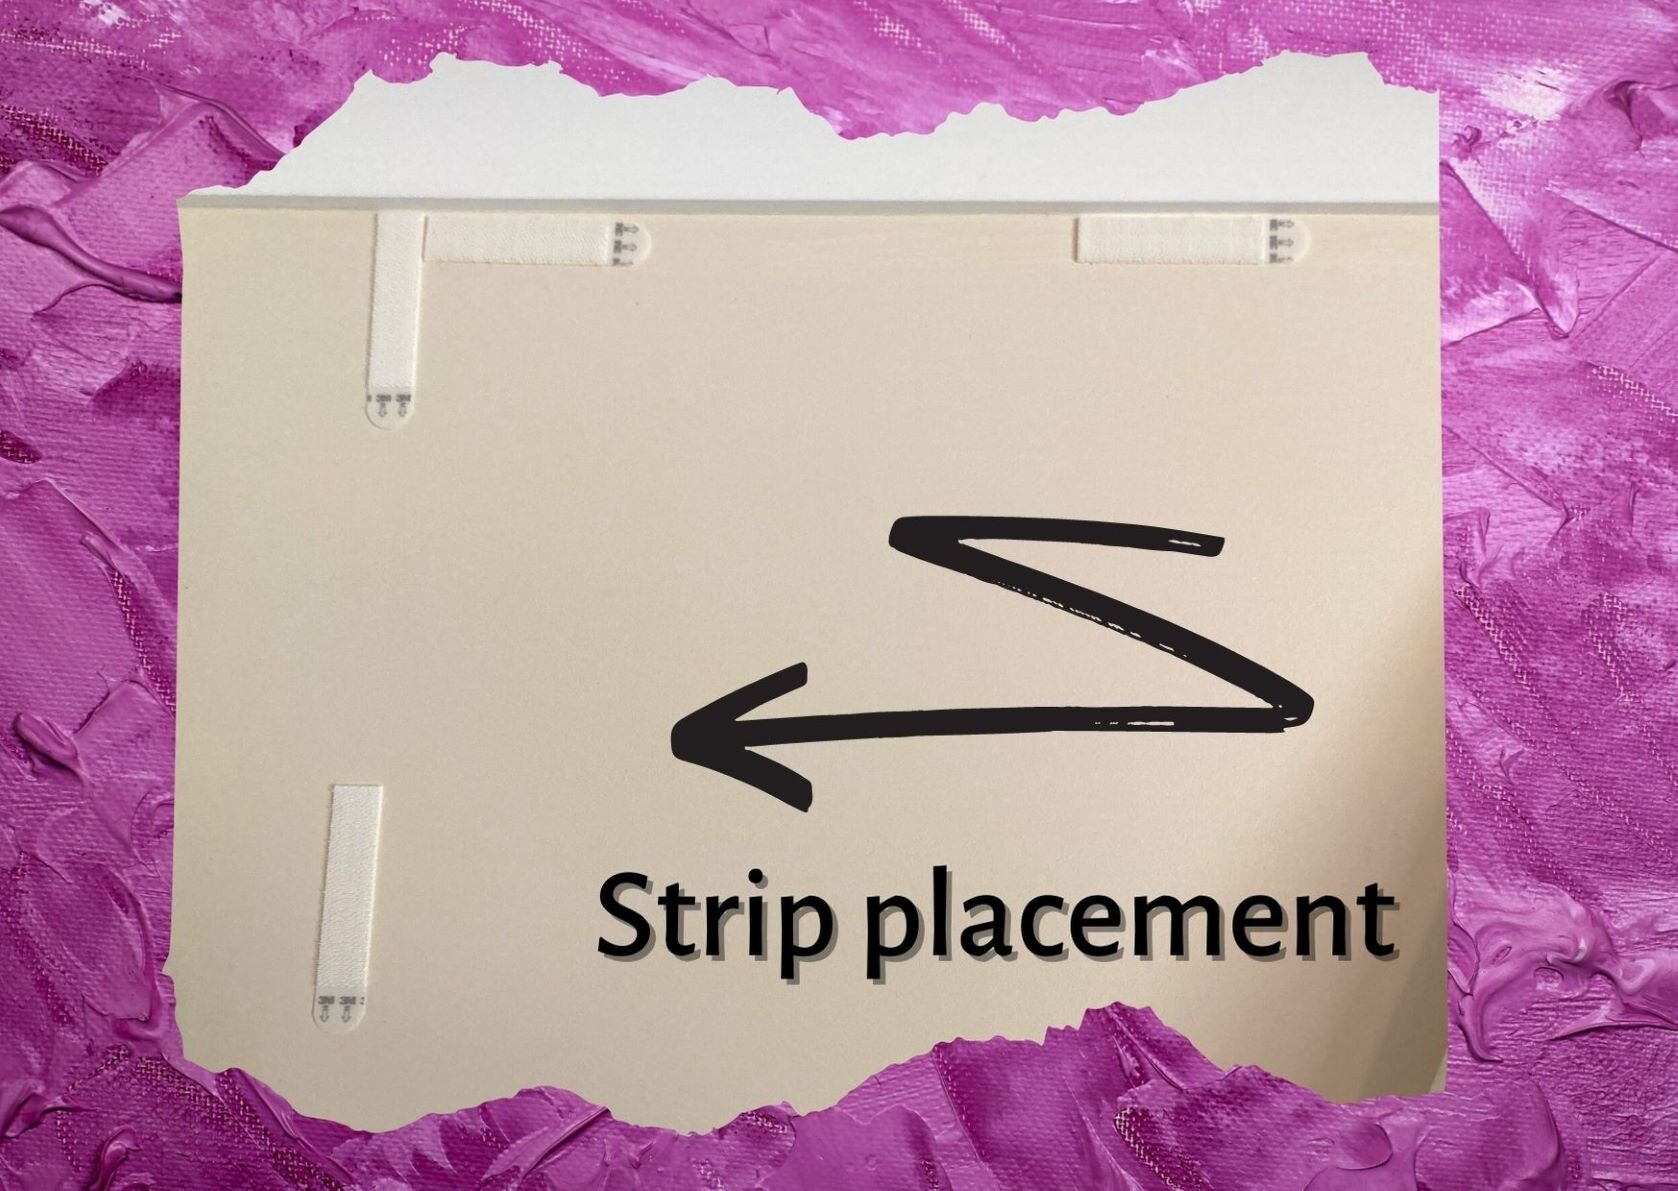
5. Grab another person to help you hang the quilt batting and use the below guide for strip placment. For the top row place each strip approximately 18-20cm (7-8”) apart.

6. Using a step ladder, start at the top right or left hand corner, placing two strips together to secure the corner of the quilt batting (as pictured below). Remove the strip liner and press the quilt batting firmly against the wall for 30 seconds.

7. Next press the top corner of your quilt batting hard against the picture hanging strip. While supporting your quilt batting, continue along adding more strips, pressing your quilt batting hard against each strip, until you have completed this for the entire top of the quilt batting. You definitely want to have plenty of strips for the top row. Tip: You may need to go back and repress the quilt to the strips and make slight adjustments, but trust me it will secure on the wall when all strips have been applied.
8. Continue working your way down the quilt batting, completing a row and then moving down the wall until you have secured the bottom of the quilt batting. You may find you need more strips, depending on the size of your quilt batting and for added security.
Now stand back and admire your completed quilt design wall!
The fun now begins as you start using your quilt design wall.
Add your cut fabric and arrange your blocks ready to sew.
Place each completed block on the design wall and watch as your quilt comes together!
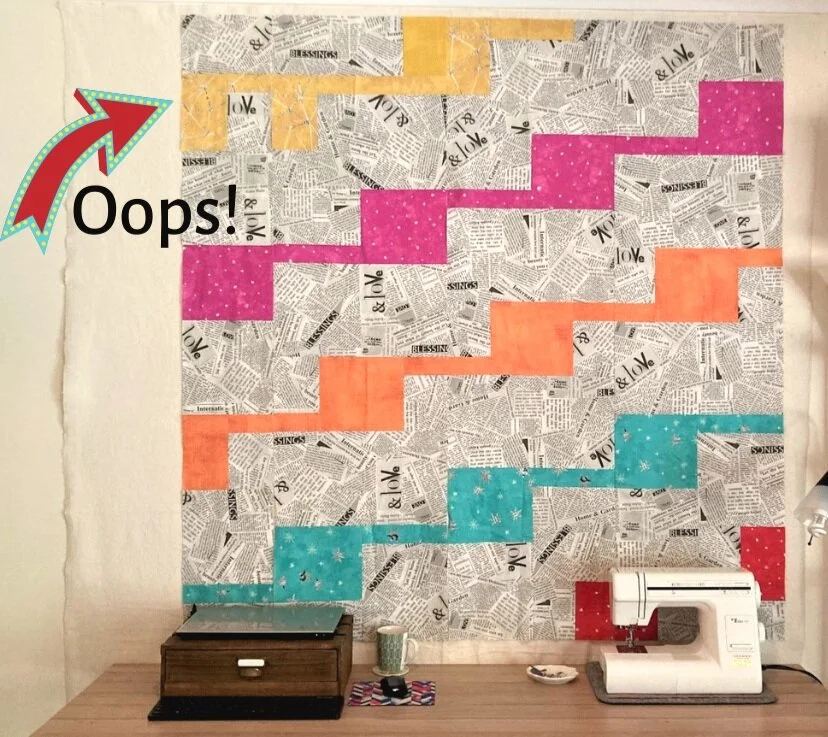
Oops! An error in block placement can been seen here and easily fixed before sewing the quilt top together.