
Cosmic Cactus Quilt Along PART 3: Make Half-Square Triangles

Half-square triangles (HSTs) are one of the basic blocks in quilting and this is a great block to start with if you are learning to quilt. Whether you are new to quilting or need a refresher, we will be providing plenty of tips for achieving accurate HSTs, along with photos for you to see how it’s done.
For the Cosmic Cactus Quilt you will be making HSTs four-at-a-time, using a method that allows you to have HSTs that when trimmed will have no bias edges! If you are making the scrappy quilt, you will also make HSTs using the two-at-a-time method. All HSTs require trimming, allowing you to achieve a perfect HST unit every time.
REMINDERS
QUICK LINKS (click to skip ahead)

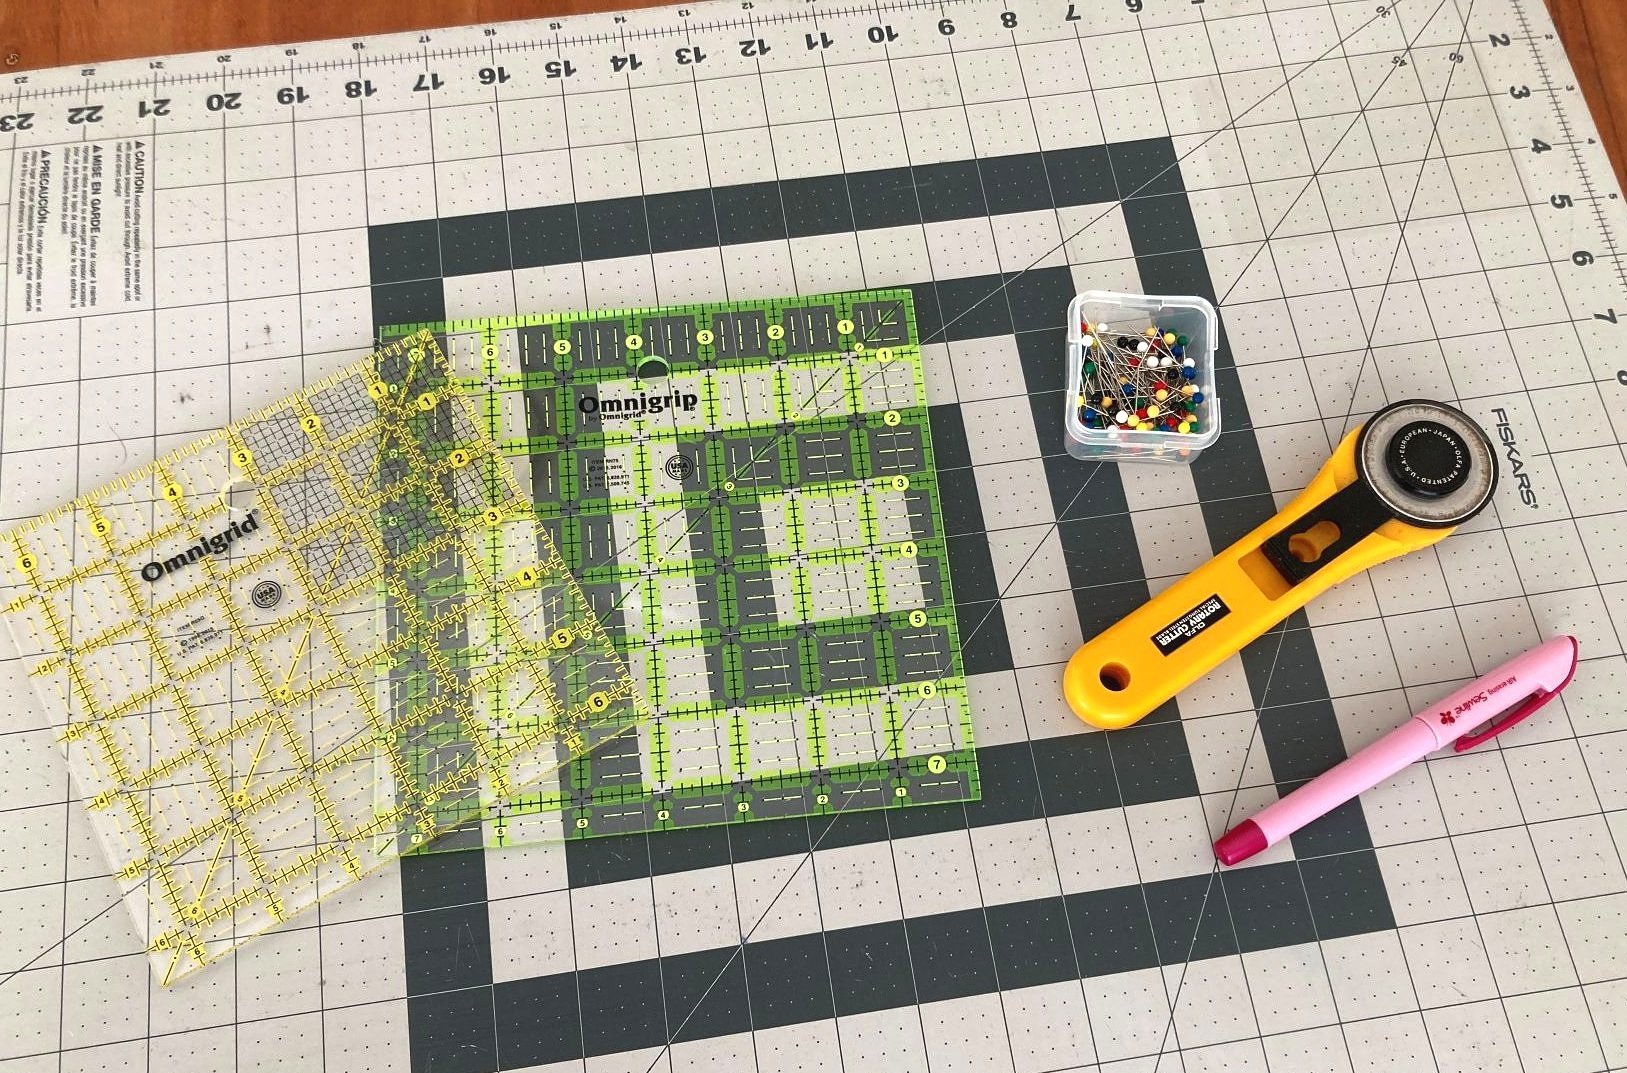
TOOLS REQUIRED
Omnigrip square quilt ruler - Consider a 7.5 inch square for the Baby size quilt; 9.5 inch square for the Throw size quilt. Look for value packs of two or more rulers!
Pins, fabric marker and ideally a 1/4 inch seam foot for your sewing machine.
BEFORE YOU START
1. Make a test block: If you are new to quilting, I would suggest making a test block first. This allows you to test the HST method outlined and ensure that your pieced and trimmed HSTs turn out right.
2. Sort your fabric squares into fabric pairs, following the HST Guides in the pattern. Scrappy quilters (option 3) may also refer to the Block Placement Guide for their fabric pairs.

3. Thread: Take a moment to consider if you have the correct thread for quilt piecing.
Choose thread to match the fabric i.e. cotton fabric with a cotton thread to ensure they shrink at the same rate.
Match the colour of the thread to the lighter fabric or choose a neutral colour.
4. Sewing an accurate 1/4 inch seam. For these HST units an accurate 1/4 inch seam isn’t crucial, as you will be trimming them to size. BUT as this is one essential skill you need to learn as a quilter, I suggest practicing this skill at all times. Then when it really matters (such as when you are assembling your blocks), you have already practiced and mastered the 1/4 inch seam!
Use 1/4 inch seam foot: It is worth the investment to purchase a 1/4 inch seam foot if your sewing machine didn’t come with one. Depending on your sewing machine, you may need to adjust the needle position. For instance, my new Janome Memory Craft 9450 QCP has a setting in the menu to adjust the needle position for a 1/4 inch seam. My older Janome My Excel 18W you leave the needle in the centre position.

1/4 inch seam foot with guide
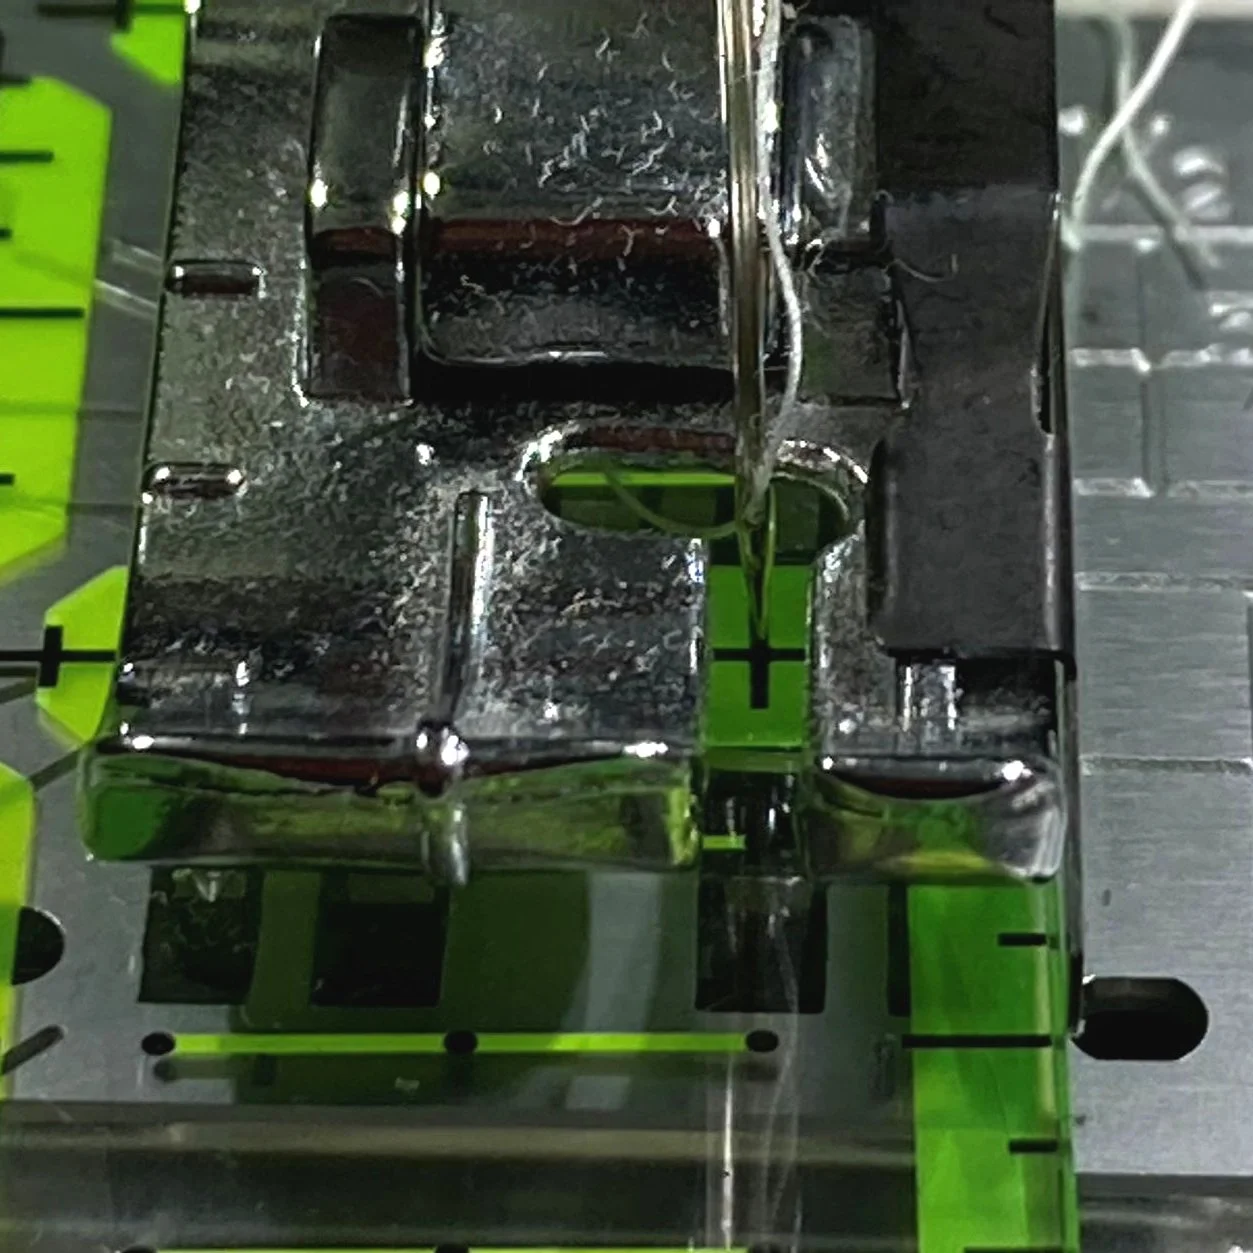
1/4 inch seam foot: Set your needle to the correct position to sew a 1/4 inch seam. The guide goes up against the edge of your fabric (or follow the marked line on your fabric).
Don’t have a 1/4 inch seam foot? Follow these steps to establish a 1/4 inch guide:
1. Start with your standard Zigzag foot or similar (as this is usually a foot included on all sewing machines).
2. With a ruler, measure a 1/4 inch ensuring the needle hits the 1/4 inch mark. You may find you have a 1/4 inch mark on the sewing machine too.
3. Place washi tape onto the sewing machine to create your 1/4 inch seam guide.

How to check your 1/4 inch seam is accurate:
Cut three rectangles 2.5 inch x 4.5 inch. Cutting accuracy is important!
Pin together two rectangles matching all edges exactly and sew together using a 1/4 inch seam. Press the seam to one side following the instructions in the pressing guide.

If you have sewn an accurate 1/4 inch, your remaining 2.5 inch x 4.5 inch rectangle should be the exact size of the two joined pieces. If not, make adjustments to the needle position and try again!
One of my quilt testers, Sara @gatesmountainquilter provided some feedback and offered an alternative to the typical HST four-at-a-time method, that allows you to make them without any bias edges. The method is simple and it was worth rewriting my pattern, as now you don’t have to starch the HST squares and worry about handling bias edges (making it much easier for beginner quilters).
What makes a bias edge tricky? Bias edges can stretch out of shape as you handle them, making it a little more difficult to match and piece them together accurately.

The bias is the diagonal grain of the fabric at 45-degrees to the straight grain.
Follow the HST four-at-a-time piecing instructions as outlined in the pattern. A visual guide is provided here, with some additional tips.
Tip: Sew all your HST blocks at the same time and practice chain piecing as outlined below.

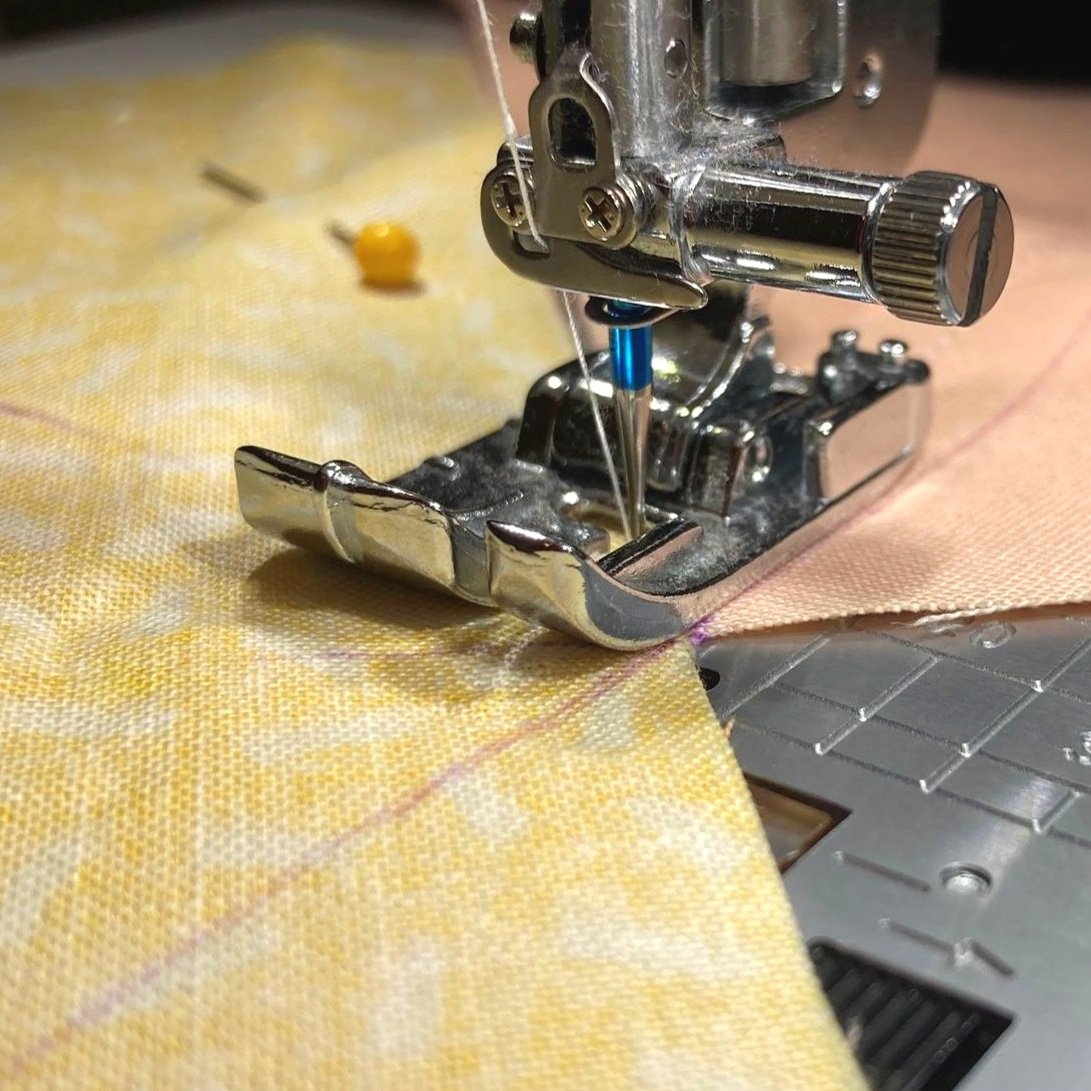
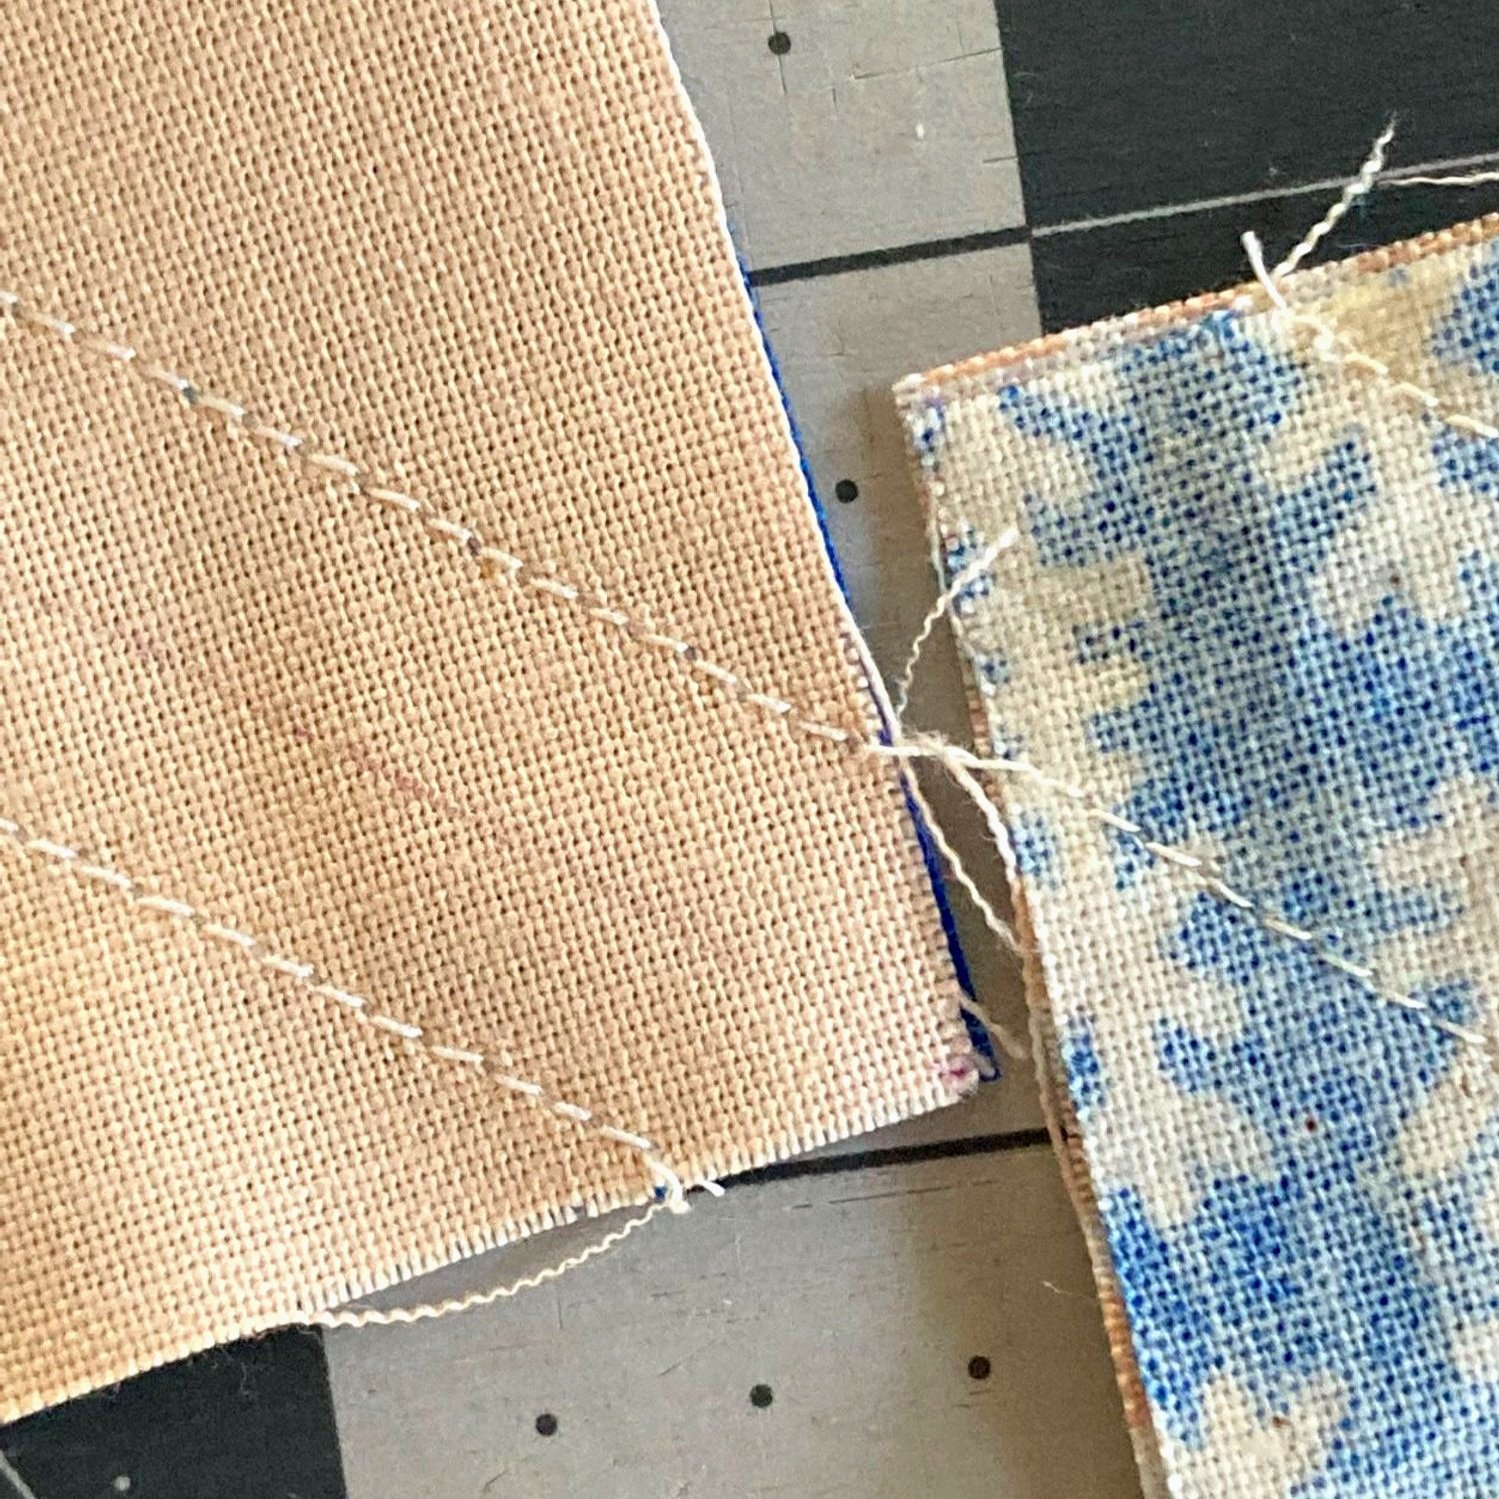
Step 1: With a fabric marker on the wrong side of one rectangle, mark a line at the centre point and two diagonal lines meeting in the centre.

Step 2: With right sides together, pin together two HST rectangles ready to sew.

Step 3: Sew on each side of the diagonal lines. Do not sew next to the centre line. This line is marked so you know where to cut you rectangle in half in Step 6.

Step 4: Your stitching lines will cross over in the centre.

Step 5: Piecing completed! The image has been edited so you can see the cutting lines (in black) and sewing lines (in red).

Step 6: Cut rectangle in half on the black marked centre line (as shown in black in Step 5).

Step 7: Cut the two squares in half on the black marked diagonal lines (as shown in black in Step 5) to yield four HSTs.
Chain piecing allows you to sew continuously from one block to the next without stop the sewing machine and cutting the thread, saving your time stopping and starting. This method relies on you preparing all your blocks before piecing. While there are not too many HST blocks to piece, it’s a good time to practice if you’ve never tried chain piecing before.

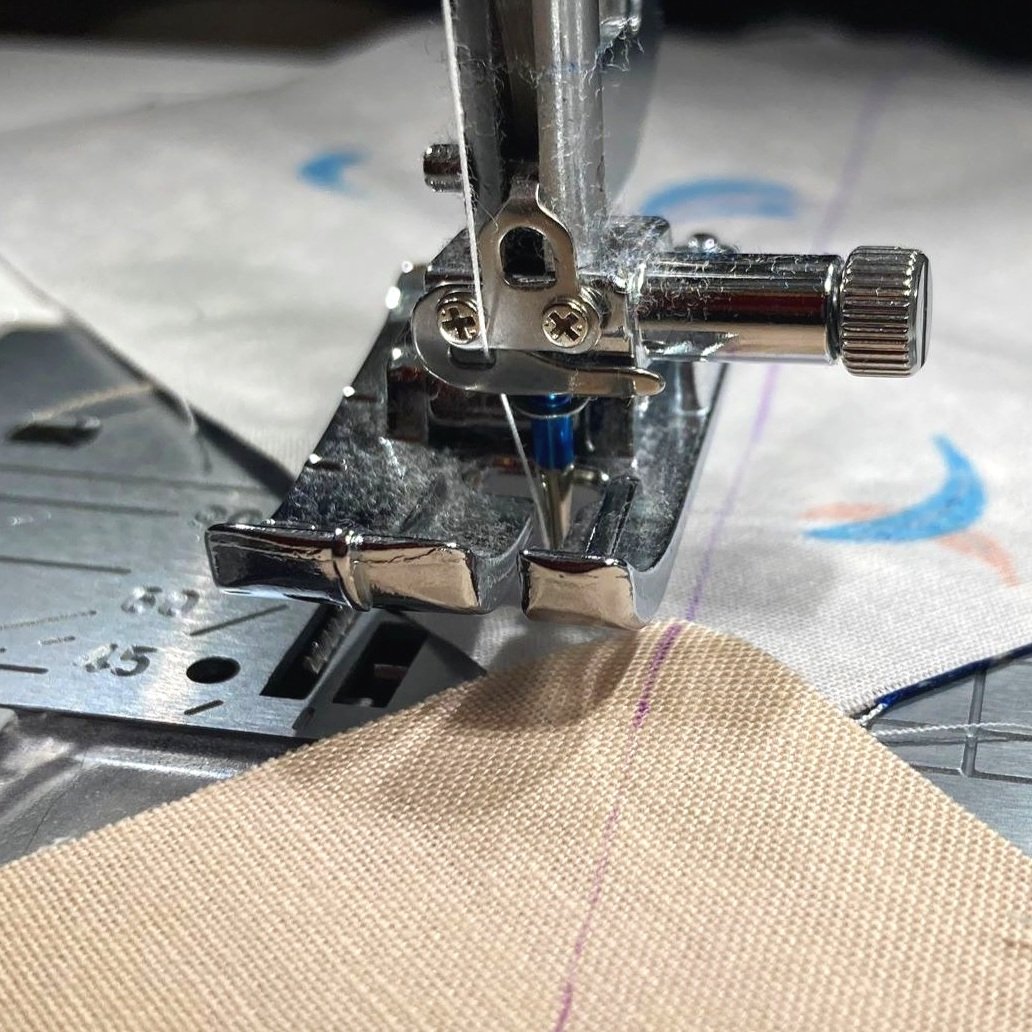
Step 1: After completing one block, line up the next block using the marked line as your guide.
Step 2: When you reach the end of the block slow down and continue sewing onto the next block.

Tip: Just ensure there is a gap so you can cut and separate the blocks after you finish chaining piecing.
Tip: How you line up the blocks, will depend on the angle of the line you are sewing. For instance, see below example.
When chain piecing HST for the two-at-a-time method, you will need to line up the corners of the squares. I like to lift the presser foot, line up the corners and marked line.

Put down the presser foot. Ensure there will be a gap between the two blocks as you continue to sew your 1/4 inch seam. Continue sewing onto the next block.

Finished chain pieced blocks joined together.
Once you have completed chain piecing, cut the thread to separate the blocks
Follow the piecing instructions as outlined in the pattern. A visual guide has been provided here to show you how it’s done.
Save time and practice chain piecing your blocks.

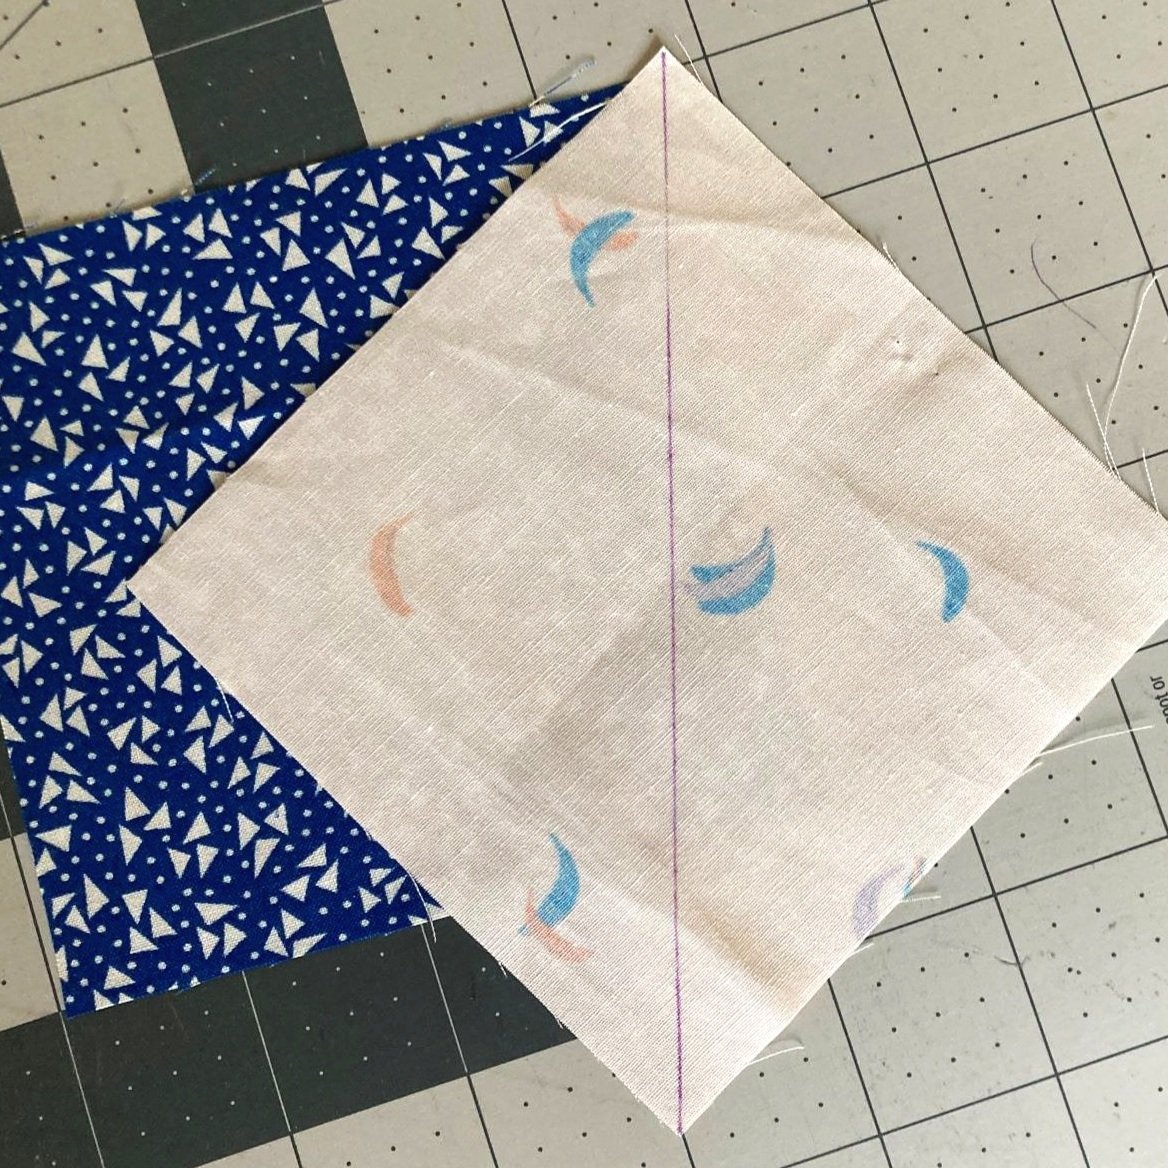
Step 1: Take your two fabric squares and using a fabric marker, draw a diagonal line on the wrong side of one square. Next place two squares with right sides together and match all edges exactly.

Step 2: Sew a 1/4 inch seam on both sides of the marked line.

Step 3: Cut along the diagonal line to yield two HSTs.
Pressing is different from ironing. When you press, you are lowering and lifting the iron from the fabric. Ironing is the back-and-forth motion of the iron on the fabric that can cause the fabric and seams to distort.
For our HSTs we will be pressing the seams towards the darker fabric.

Step 1: Set the seam in the closed position by pressing with your iron. My preference is to use a hot iron with a little steam.

Step 2: Open up HST and finger press the seam open. With your iron, press along the seam line to flatten out the seam.

Step 3: Press the remaining half-square triangle units. Next you will be trimming your HSTs!
Step 1: Align the 45-degree ruler line with the HST seam. Check the left and bottom edges extended past the finished size (which in this example is 3.5 inches). Trim the right and top edges once you have correctly aligned the ruler.


Step 2: Rotate the block 180 degrees.
Step 3: Align the 45-degree ruler line with the HST seam. Referring to the unfinished size of your block (in this case 3.5 inch), line up the left and bottom edges of the HST unit to the unfinished size. Trim the right and top edges once you have correctly aligned the ruler.


HST trimming finished!

Half-square triangle trimmings.
If you have any further questions, require any help throughout the QAL or want to join a community of quilters, please join our Facebook group.
PART 2 WINNER: The winner of the Cosmic Cactus Quilt Pattern is @diannaskillen!!!
Now that you have made your HSTs, you are ready to start Part 4: Make Flying Geese.