
Cosmic Cactus Quilt Along PART 4: Make Flying Geese
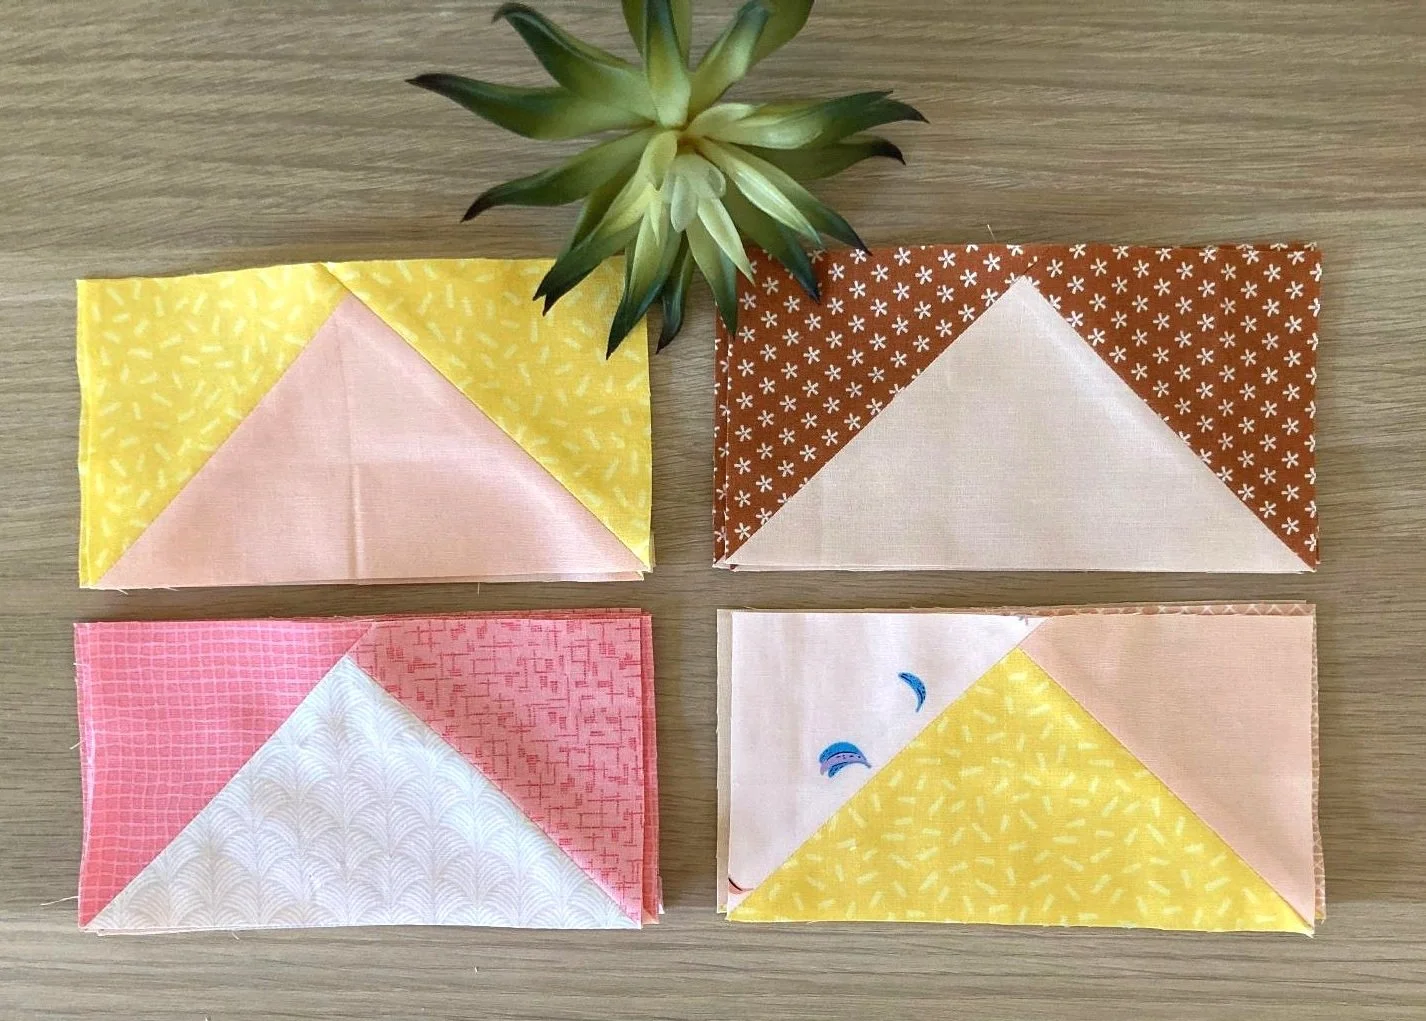
What are Flying Geese? Flying Geese (or FG for short) consist of a middle triangle which represents the ‘flying goose’ with two smaller triangles which represent the ‘sky’ around it. These blocks are common in modern quilts and are one of the essential quilting blocks you should master as a quilter. Once you discover how easy they are, you’ll be hooked!
In this tutorial, discover the secrets for making perfect FG using the four-at-a-time method. While the method for making the FG is straight forward, the key to successfully making these blocks is accuracy from start to finish.
This tutorial includes Flying Geese Essentials, Tips for Perfect Flying Geese and a comprehensive guide (including plenty of photos) to piecing and trimming your geese.
Read on to find out my tips for ensuring your geese turn out perfect every time!
QUICK LINKS (click to skip ahead)

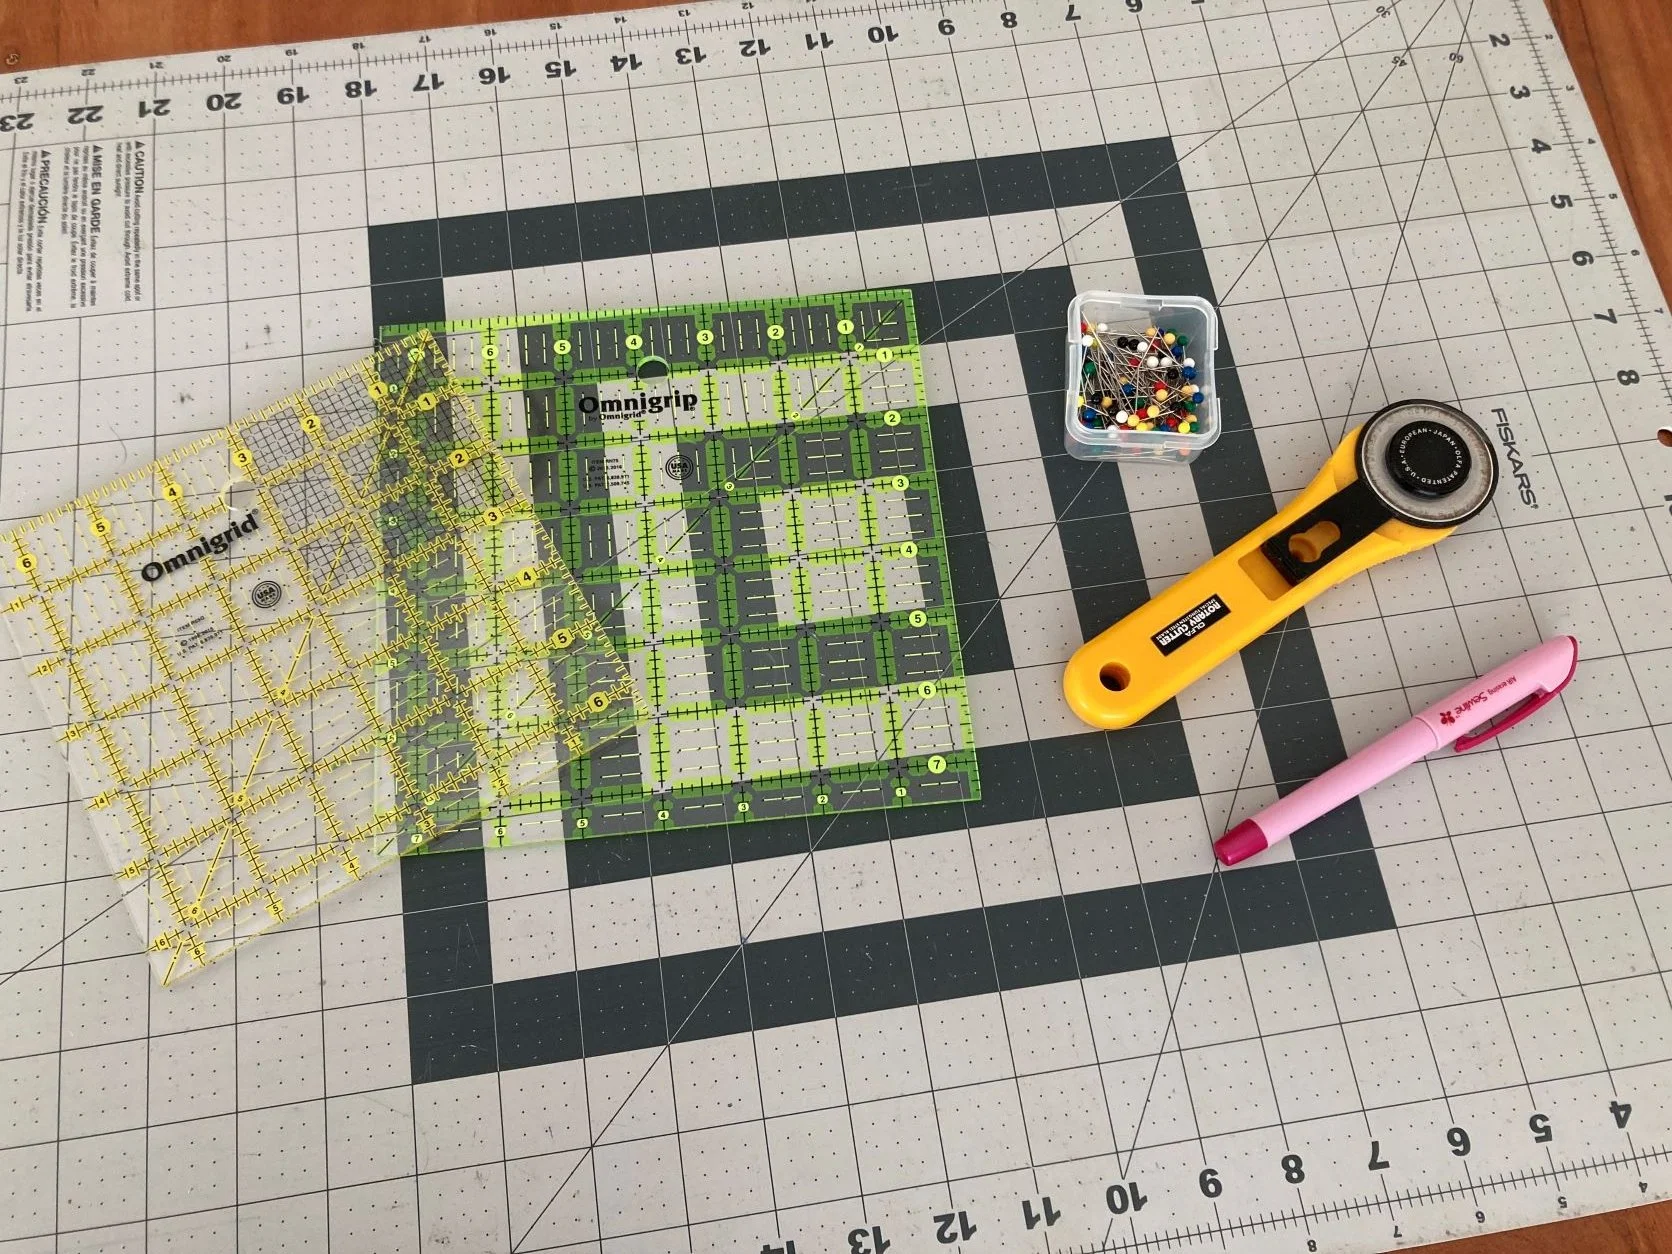
TOOLS REQUIRED
Omnigrip square quilt ruler - Consider a 7.5 inch square for the Baby size quilt; 9.5 inch square for the Throw size quilt. Look for value packs of two or more rulers!
Pins, fabric marker, washi tape and ideally a 1/4 inch seam foot for your sewing machine.
FLYING GEESE ESSENTIALS (Four-at-a-time Method)
Achieve perfect flying geese every time! Allowance is included to trim your geese to the exact unfinished size.
There is very little wastage with only a little trimmed off to get your geese to the exact size.
It saves you time! You can sew four flying geese at a time.
No special quilt tools required! Use what you already have, including a regular quilting ruler.
This method uses a modified equation and has been thoroughly tested so you don’t get the dog ears (or flaps) of fabric appearing on the right side of your finished flying geese. If the maths isn’t right, you find these dog ears showing at the top of the geese for everyone to see.
TIPS FOR PERFECT FLYING GEESE
Take time to accurately cut your fabric.
When drawing diagonal lines on the small squares, take care to draw with a marker accurately from one corner to the other.
Take care to line up your smaller squares exactly with the large square corner and two sides. Too much overlap of the squares in the centre and you will likely have dog ears (or flaps) showing on the right side.
Ensure the marked lines matches up in the centre, to create one continuous line.
Pin your squares to hold them in place, including the overlap in the centre.
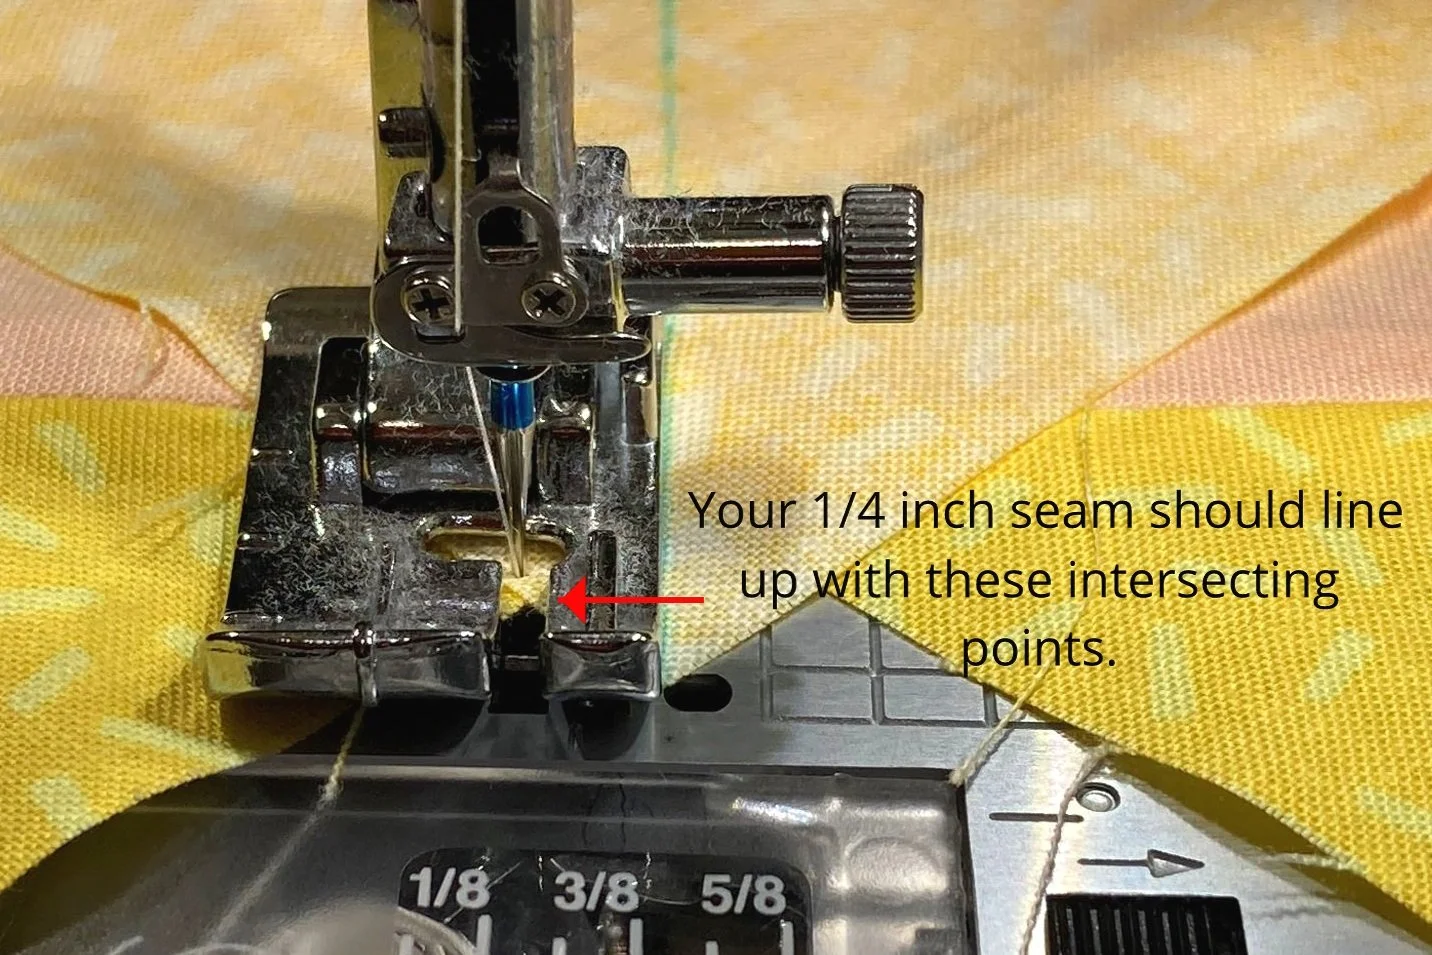
Your 1/4 inch seam should line up with the intersecting points when piecing the last 2 small squares. Refer to Step 7 Make your Flying Geese to put this into context.
Sew an accurate 1/4 inch seam following the marked centre line on your small squares. We covered How to Achieve a 1/4 inch seam in Part 3: Make half-square triangles if you need a refresher.

Finger pressing your diagonal seams open before you press with your iron. This helps keep you from stretching the bias and distorting your block. Then press your seams open with your iron.
Don’t forget, when pressing you are lowering and lifting the iron from the fabric. Ironing is the back-and-forth motion of the iron on the fabric that can cause the fabric and seams to distort.

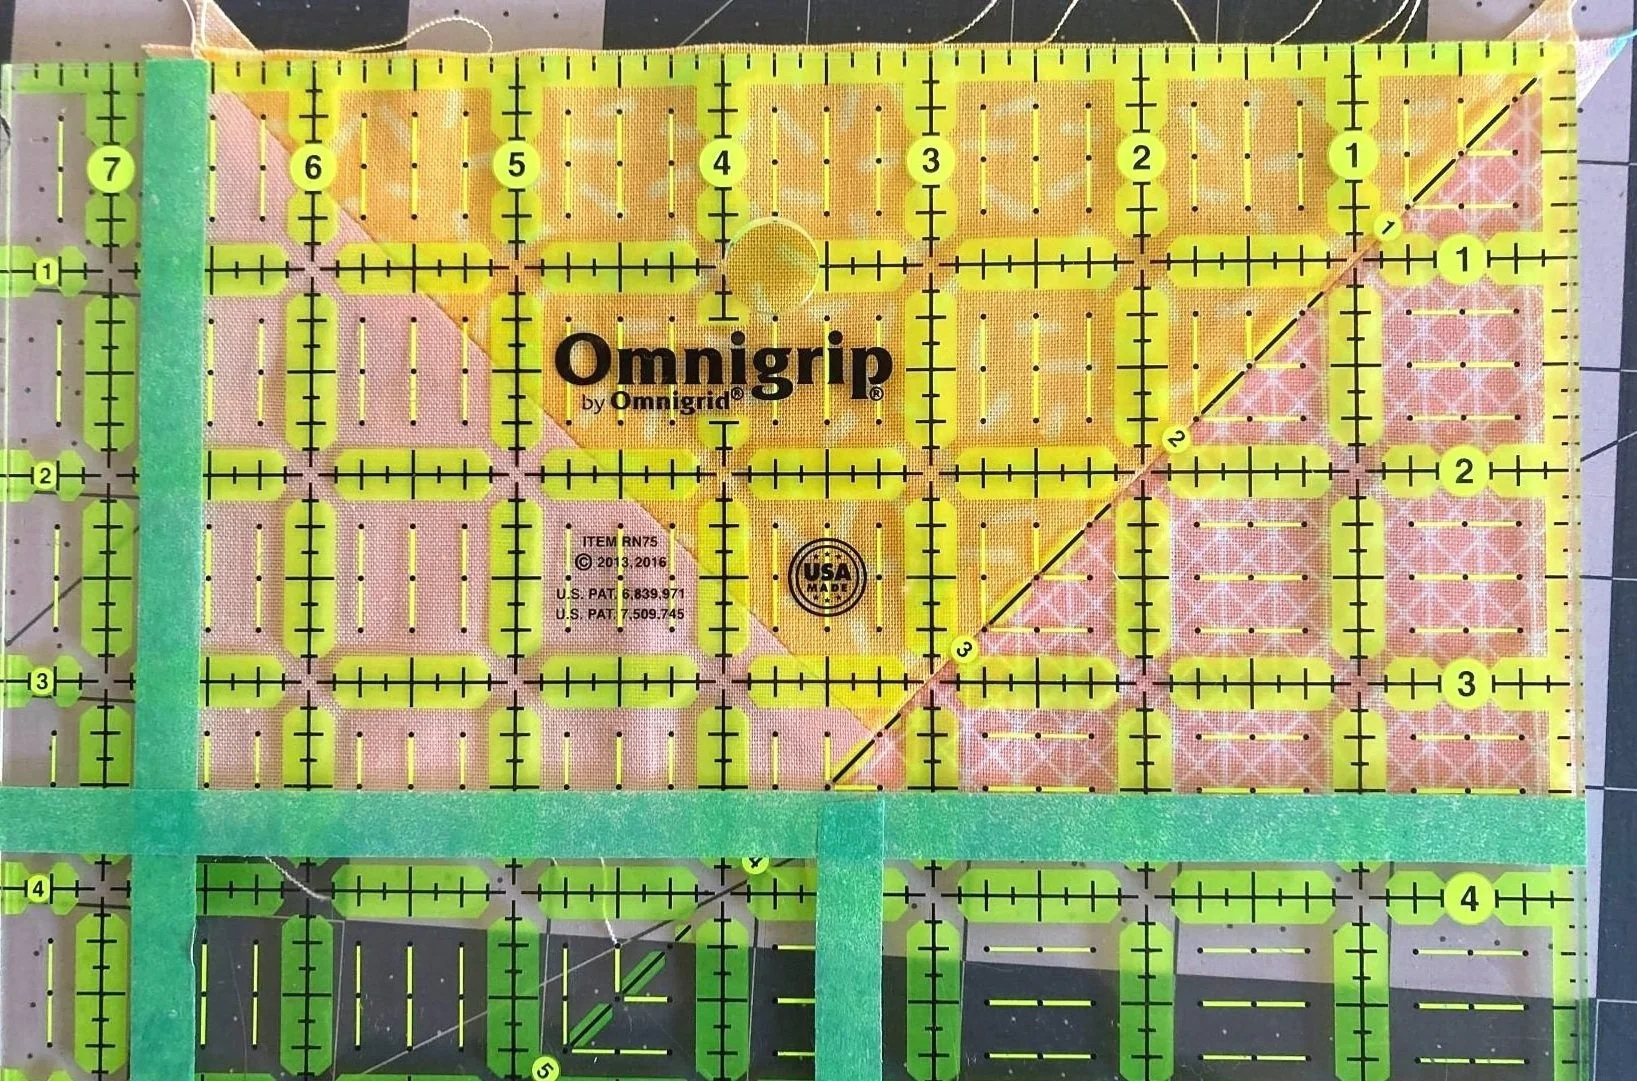
Use washi tape to mark the unfinished size on your square quilt ruler to ensure you are always cutting the correct size.
Lastly, get your handy Flying Geese Guide. I’ve done the maths for you! Create custom sizes using the included formula. Includes Step by Step Instructions, making a handy reference guide. This guide is FREE to all website subscribers!

BEFORE YOU START
1. Make a test block: If you are new to sewing flying geese, try making a couple of test blocks with scrap fabric and ensure you are happy with your finished FG. If you’ve gone wrong somewhere, review my tips or ask our community of quilters by joining our Facebook group.
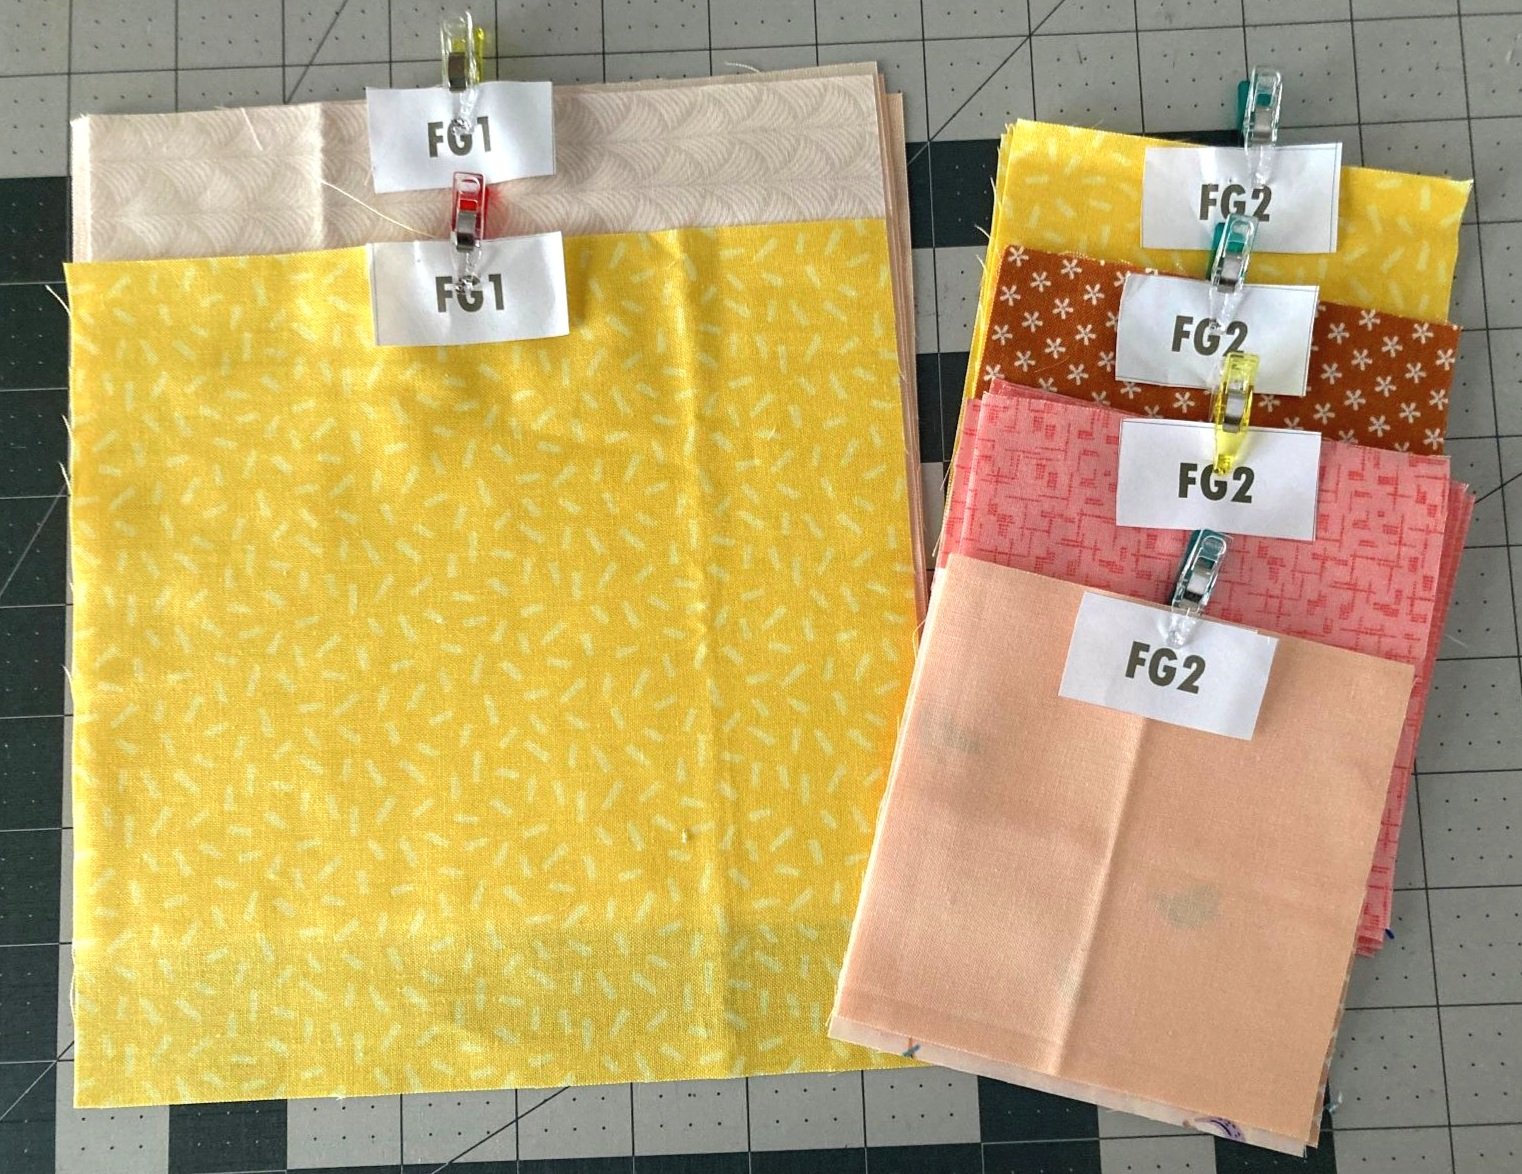
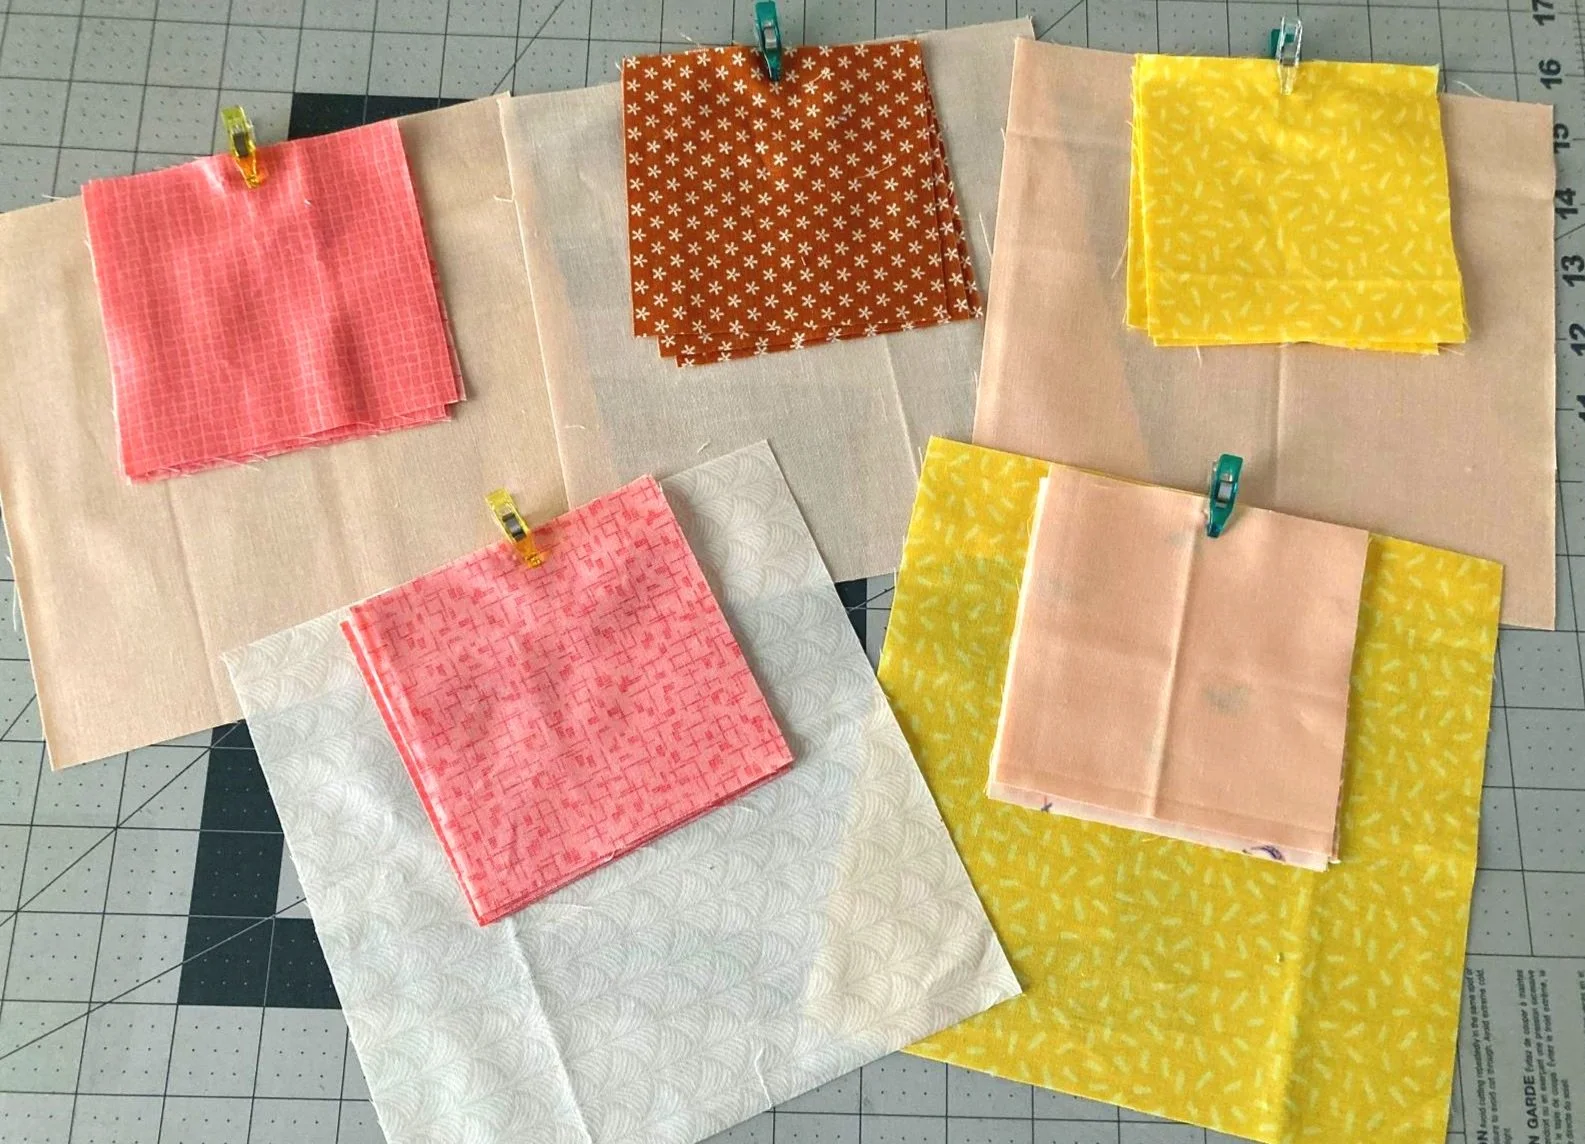
2. Sort your fabric squares, pairing 1 large goose square with 4 small sky squares, following the Flying Geese Guides in the pattern.
Scrappy quilters (option 3) may also refer to the Block Placement Guide for their fabric pairs.
MAKE YOUR FLYING GEESE
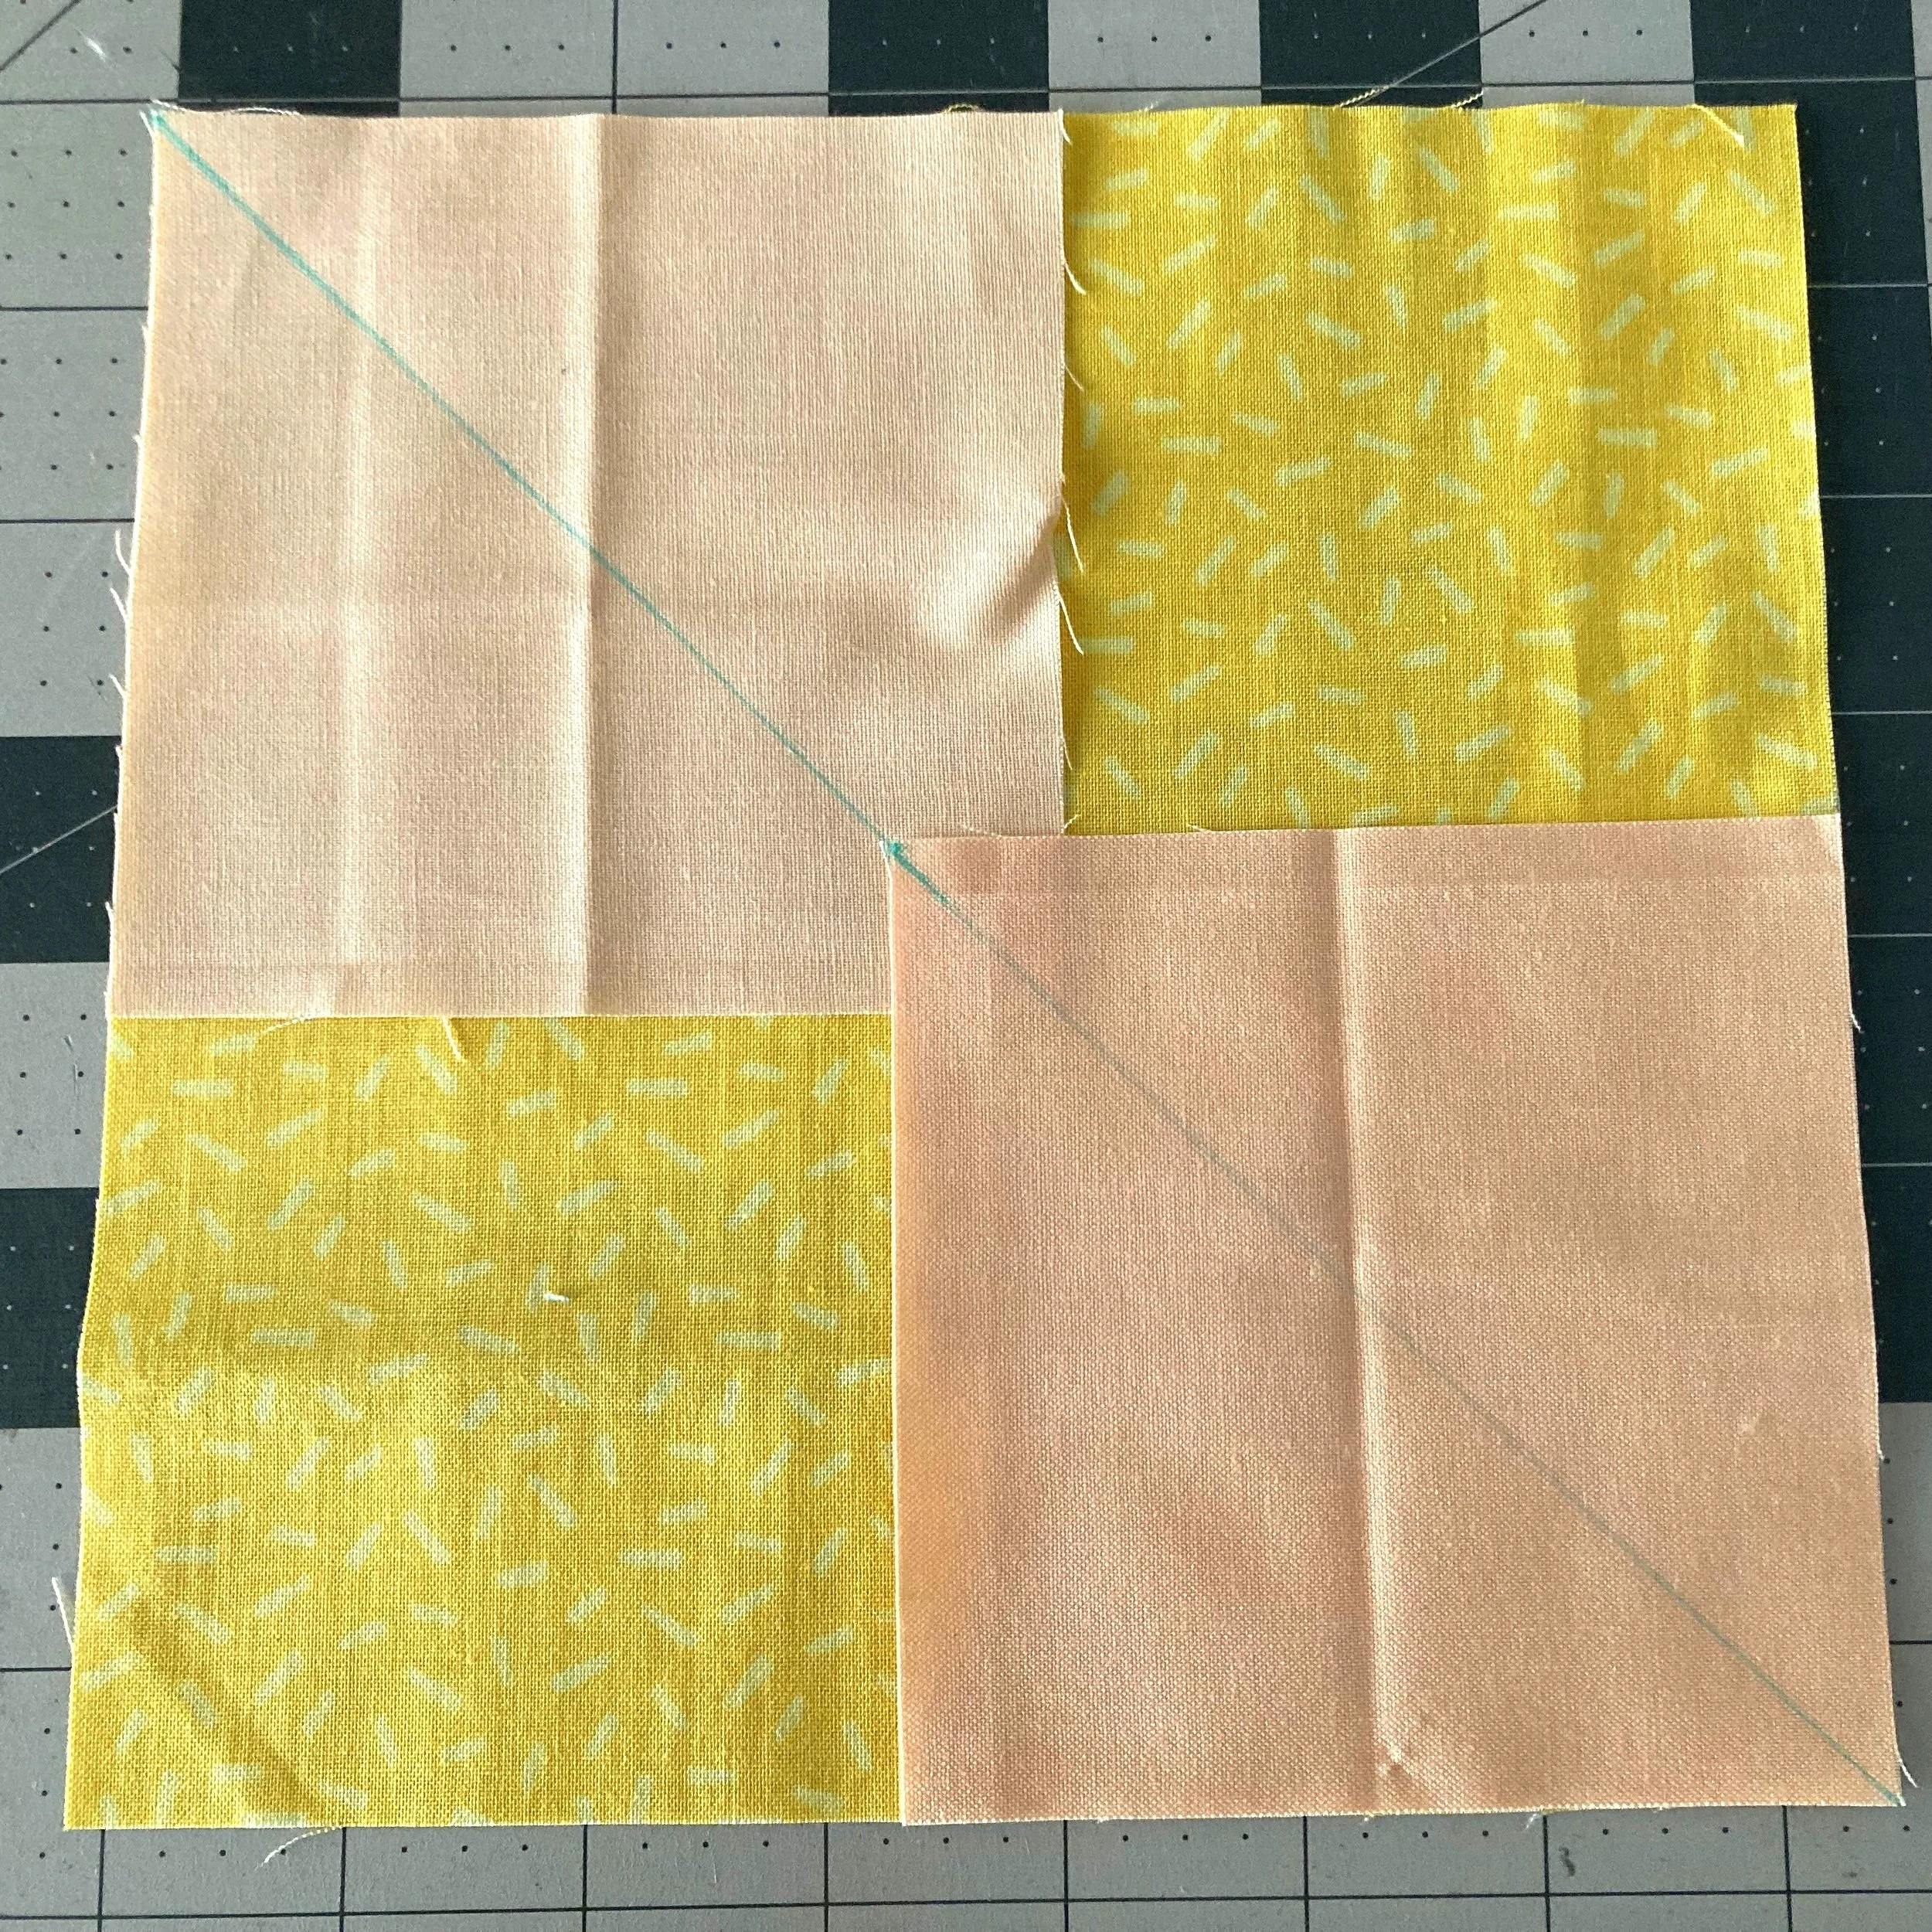
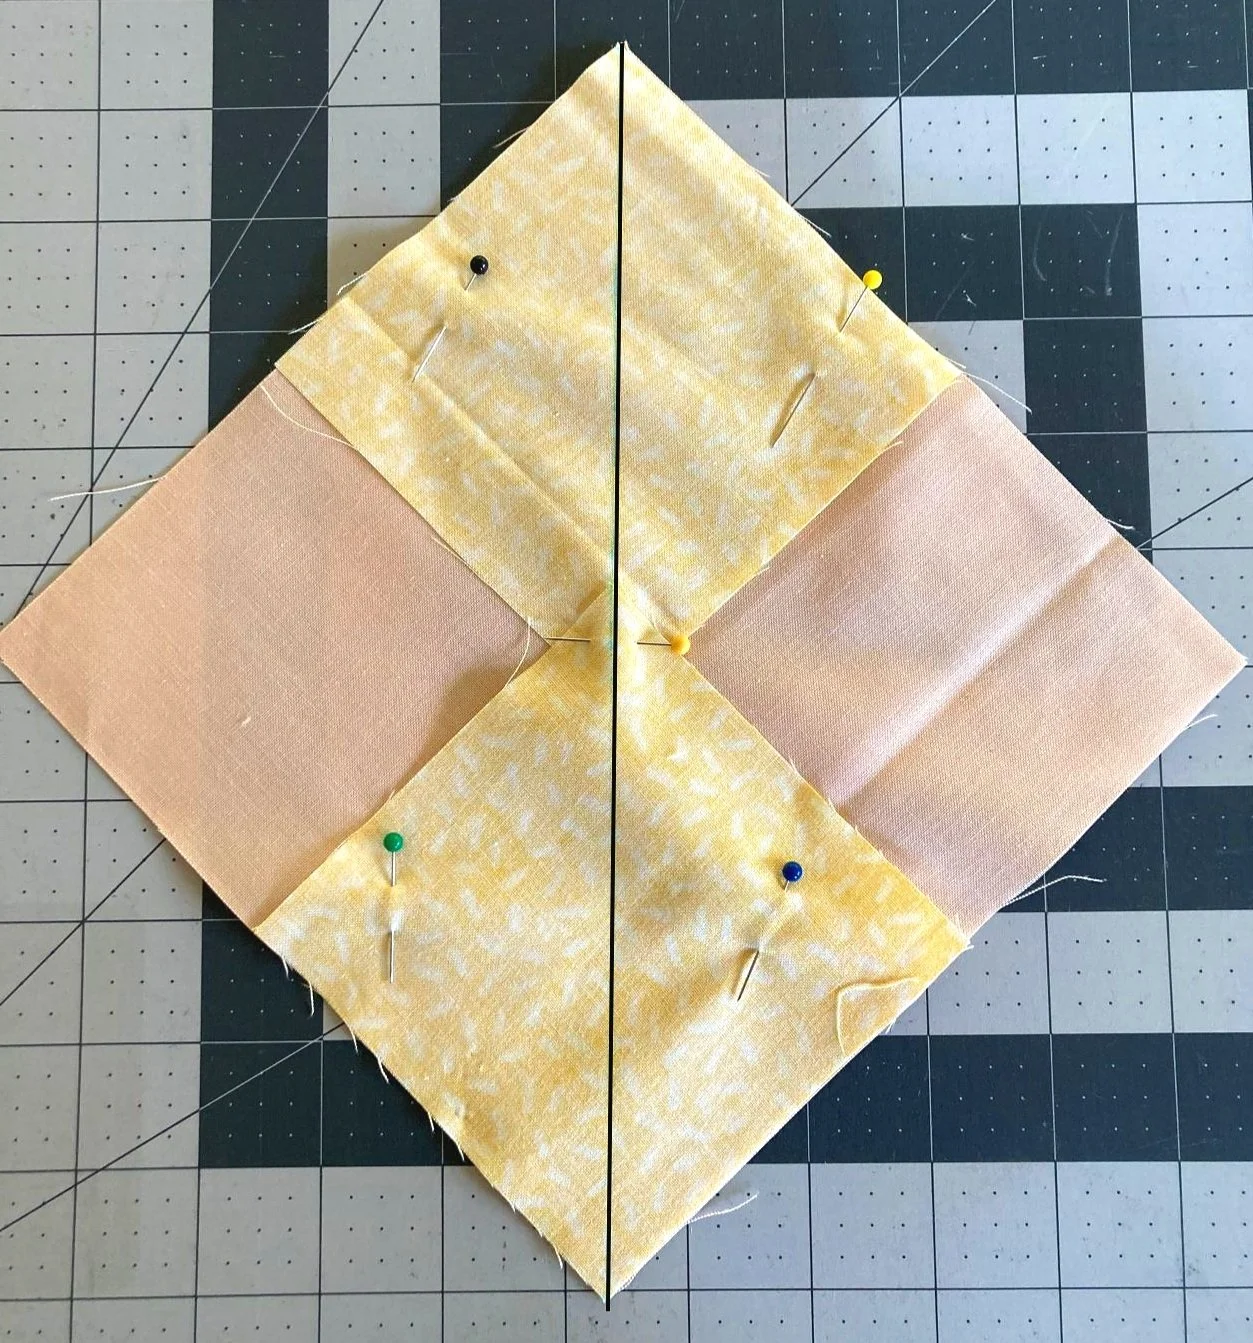
Step 1: Draw a diagonal line through each of the 4 small squares on the wrong side of the fabric.
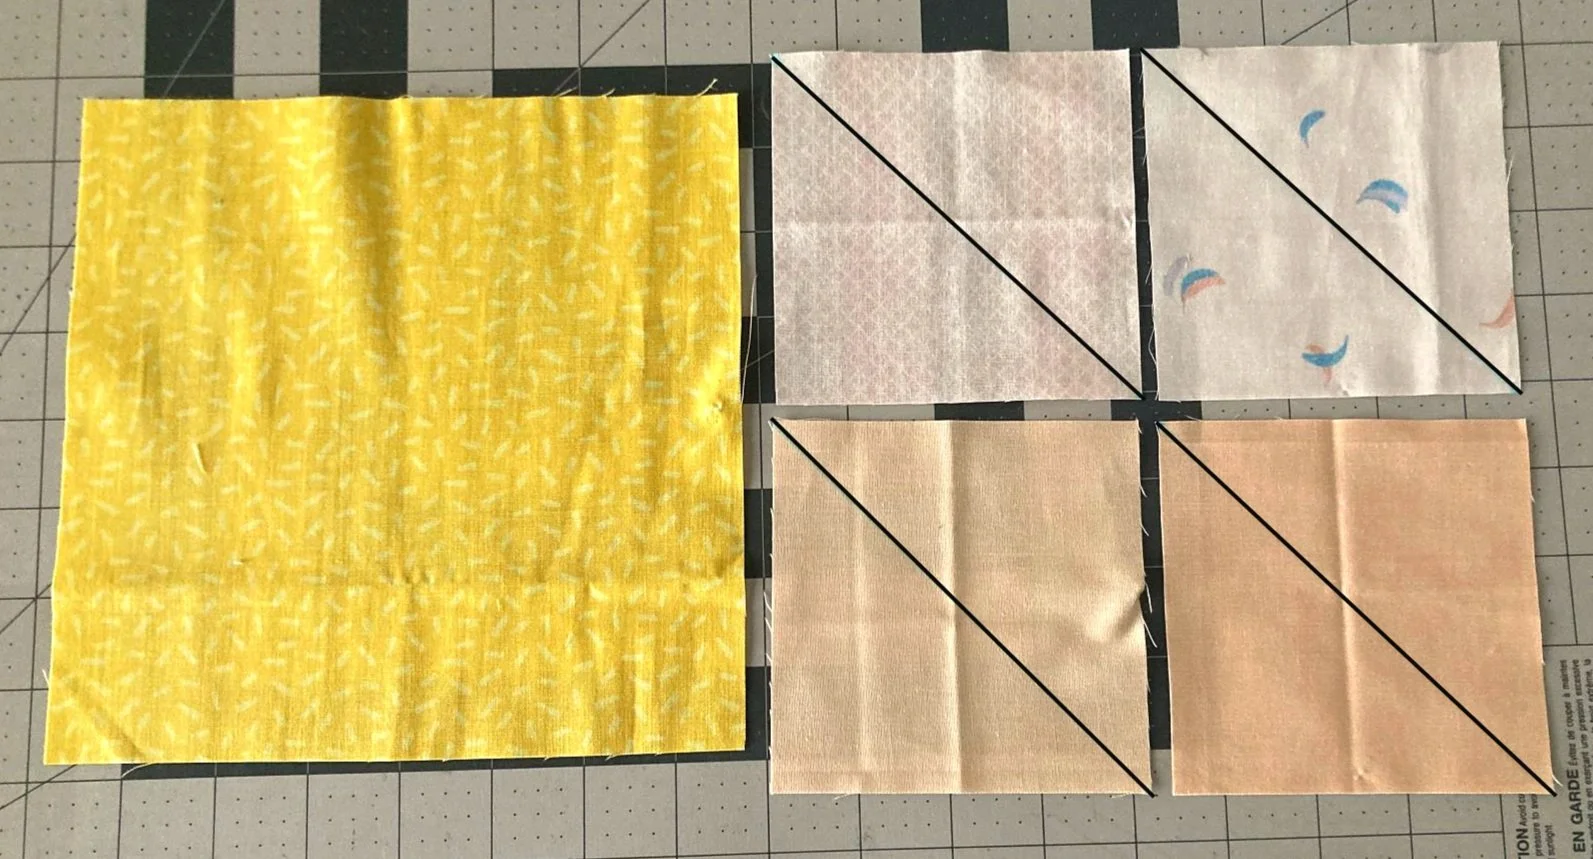
Step 2: With RST (right sides together), place 2 small squares in opposite corners of the large square, matching the overlapping diagonal line. Pin to hold in place.
TIP: Placement of the small squares to the very edge of the large square means you want overlap too much in the centre. If you small squares overlap too much, you may get dog ears (or flaps) showing on the right side of your flying geese.
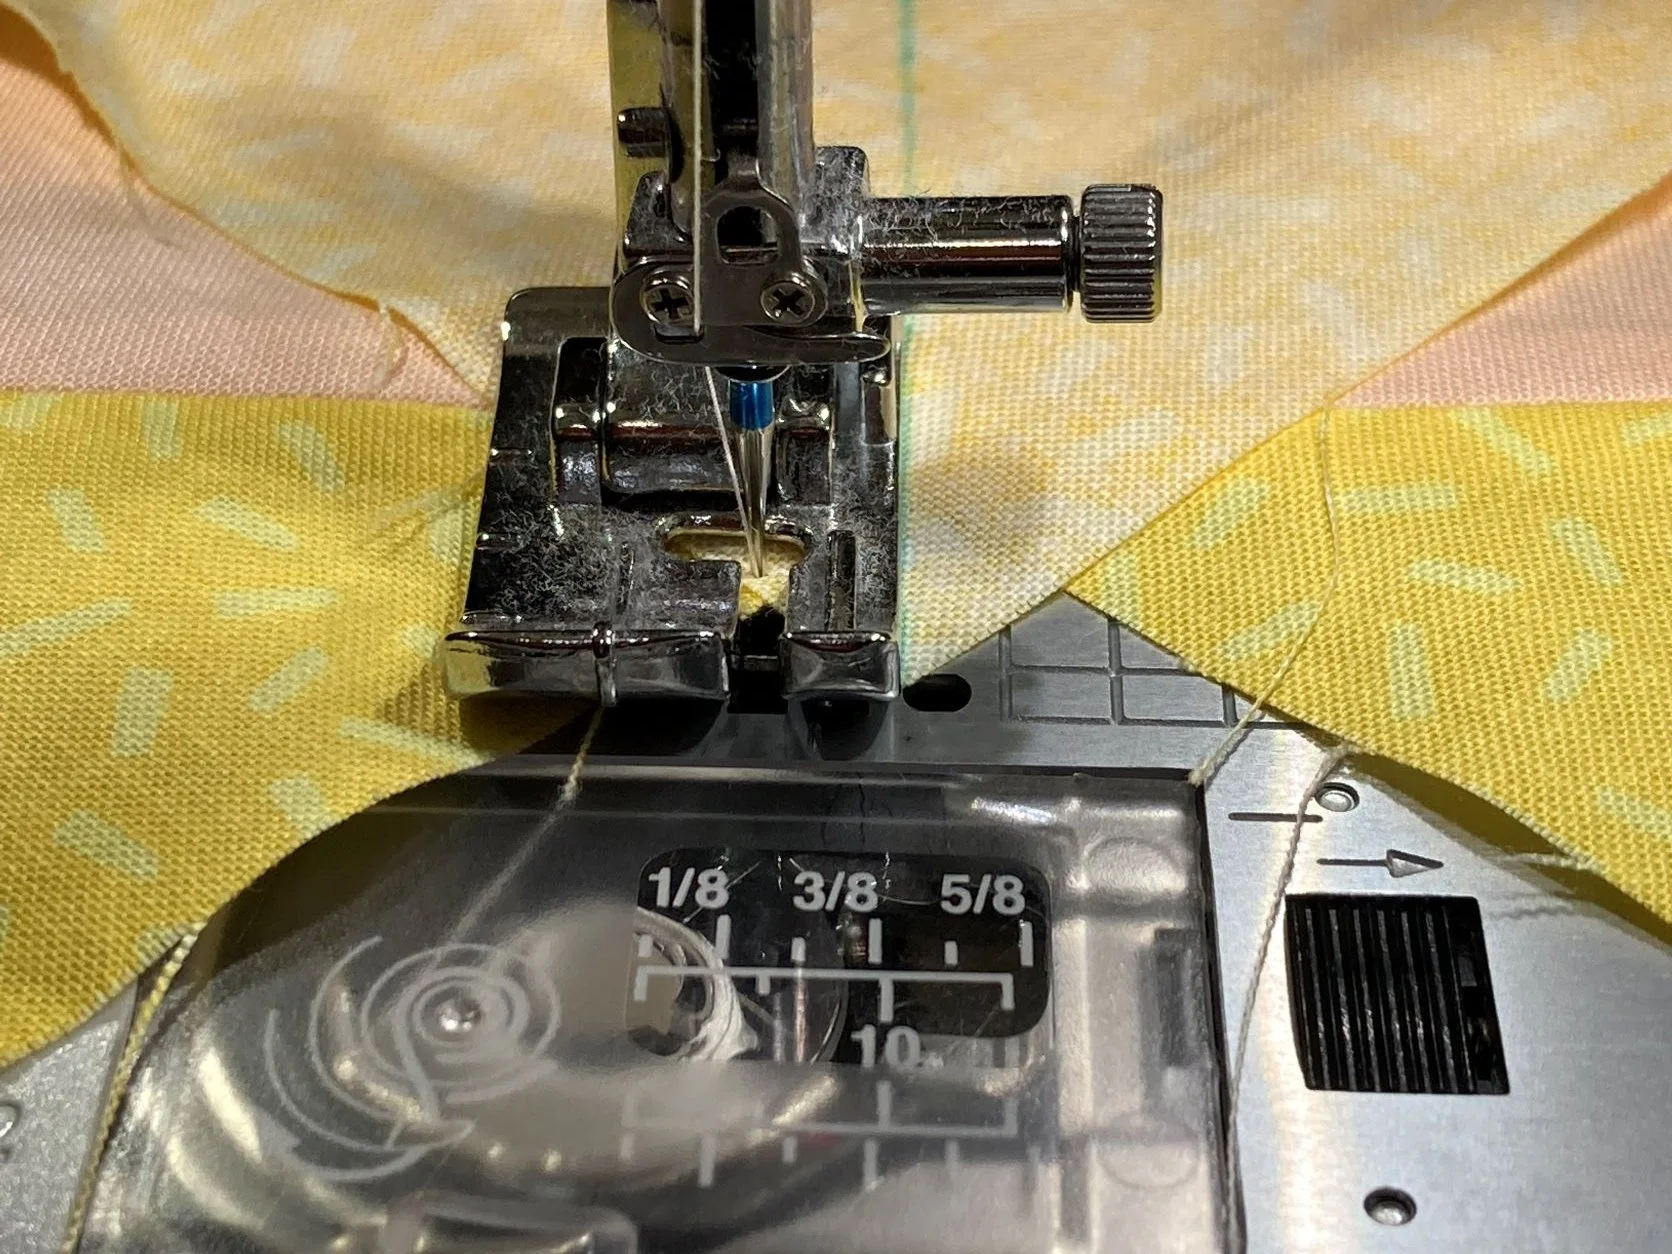
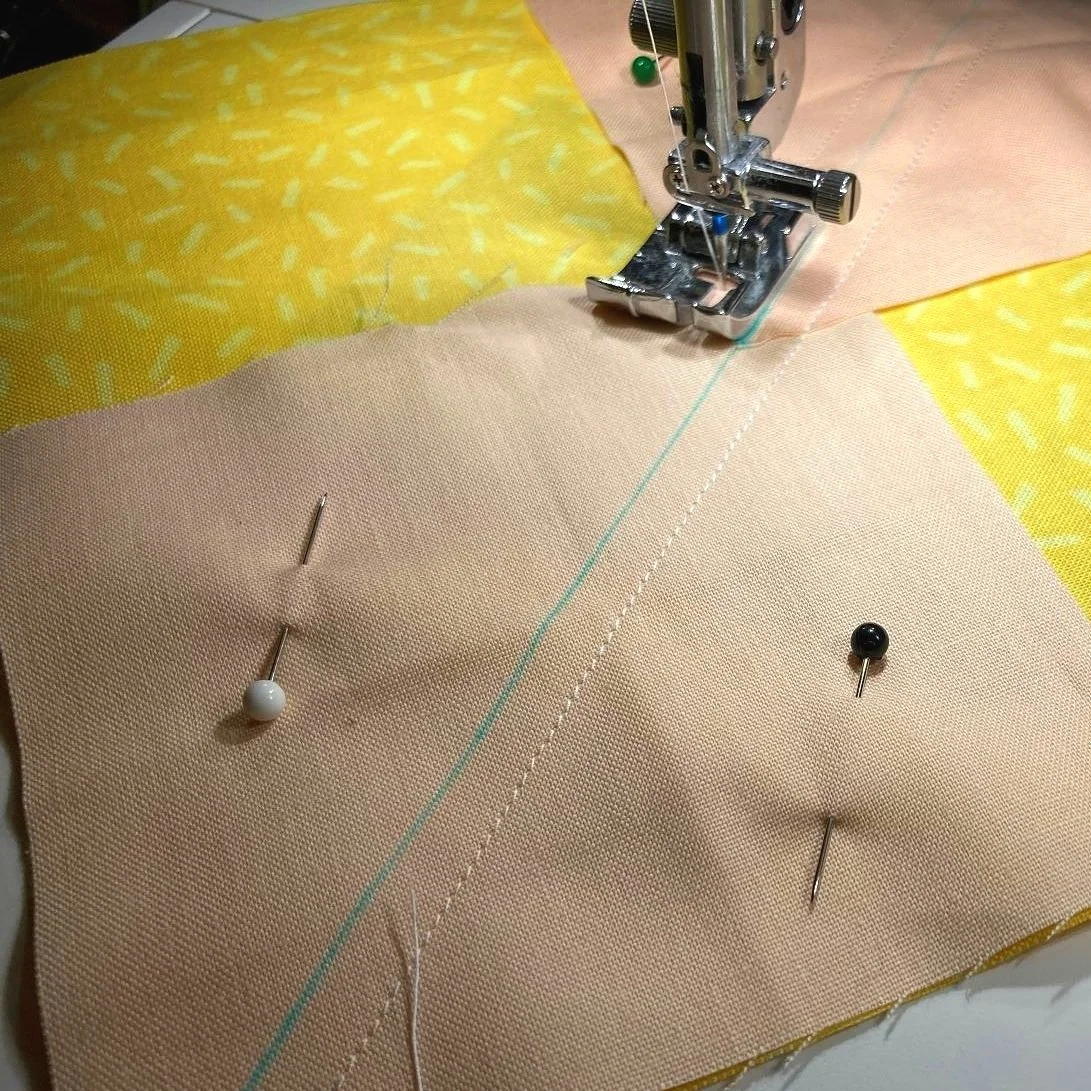
Step 3: Using a 1/4 inch seam foot as your guide, sew a 1/4 inch on either side of the drawn diagonal line.
If you are confident in making your FG, then you can chain piece at this point. If you are a beginner, I would suggest only piecing one at a time until you become more confident.
Need a refresher, the Guide to Chain Piecing can be found in Part 3: Make HSTs.
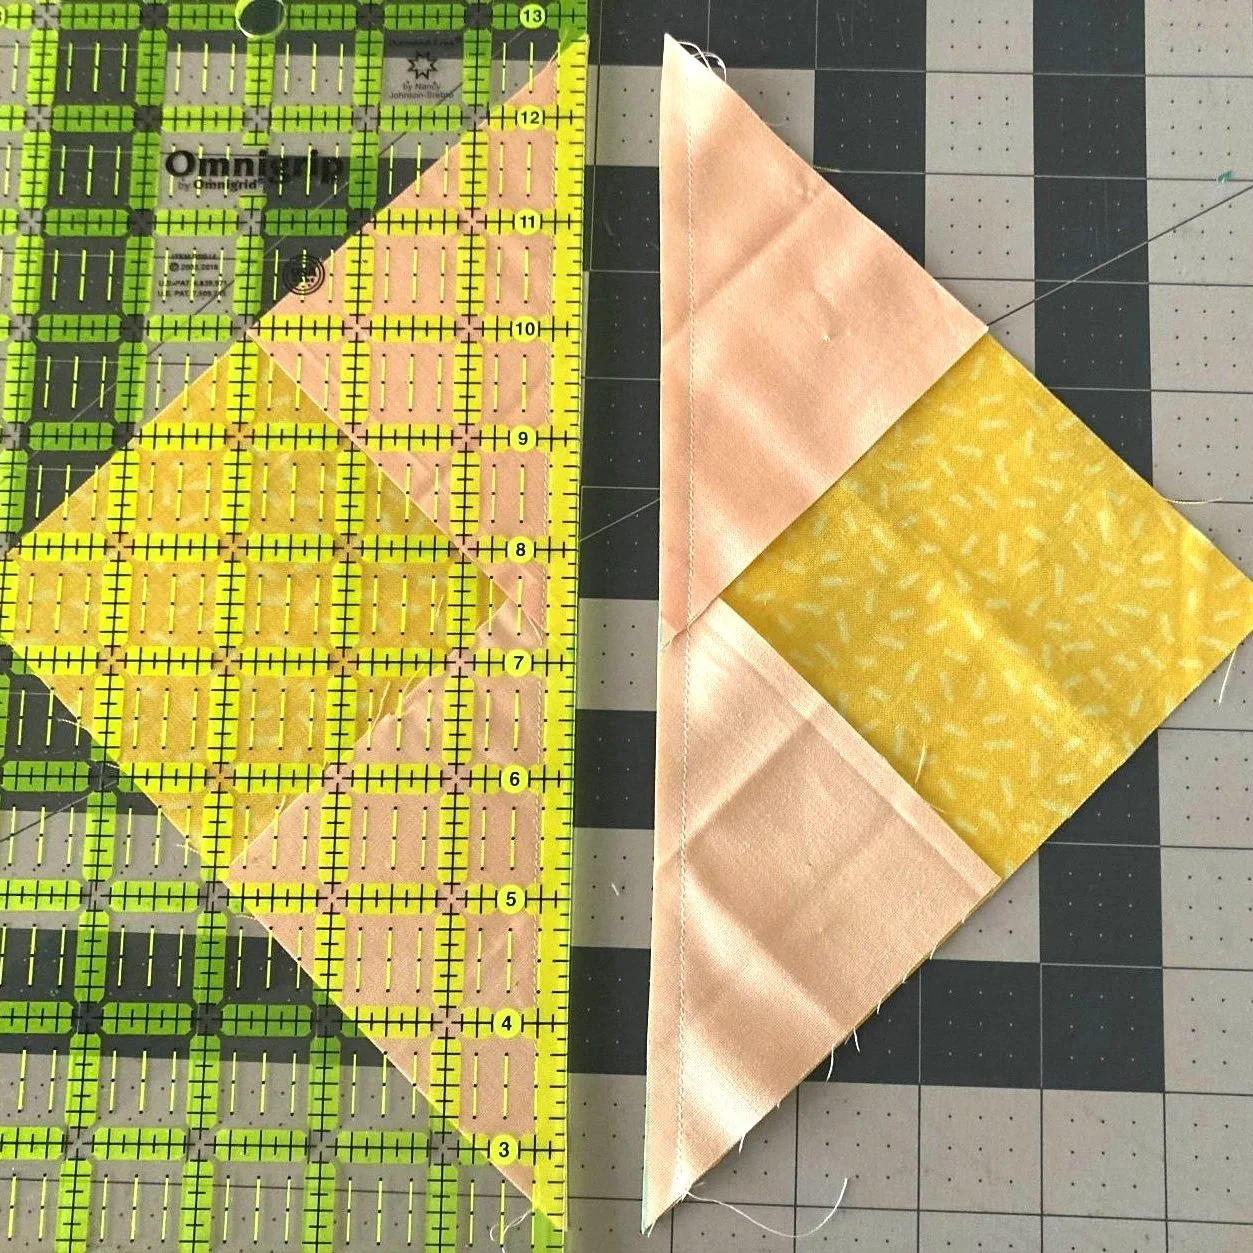
Step 4: With a rotary cutter and ruler, cut along the diagonal line between the two rows of stitching.
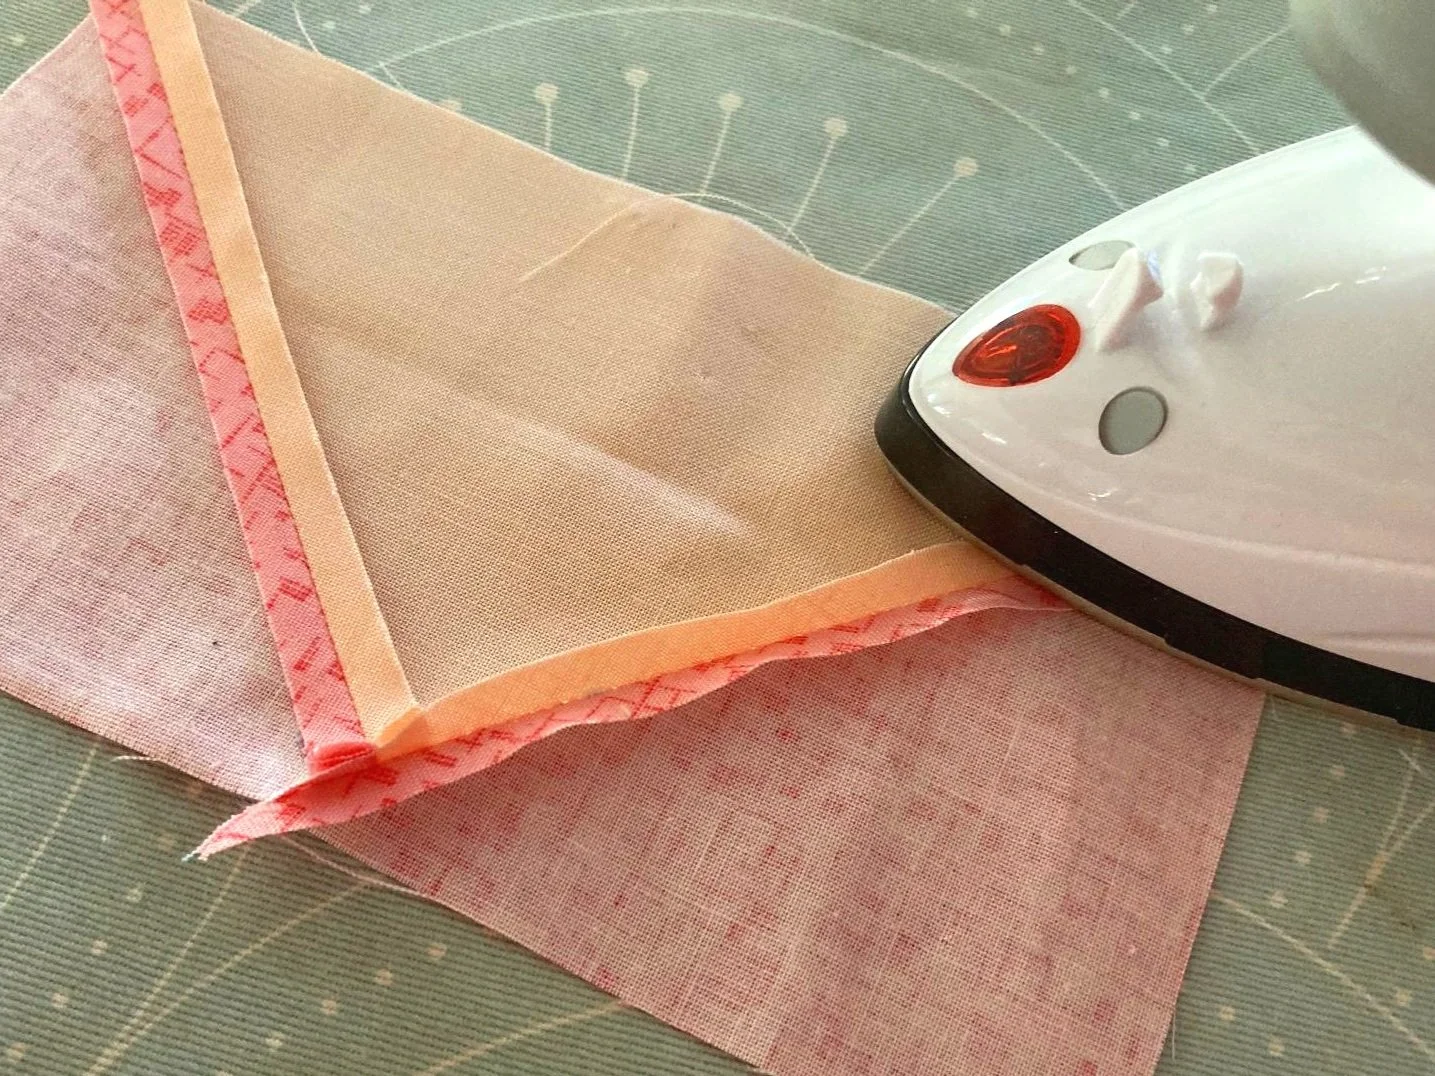
Step 5: Press your seams open following these three steps.
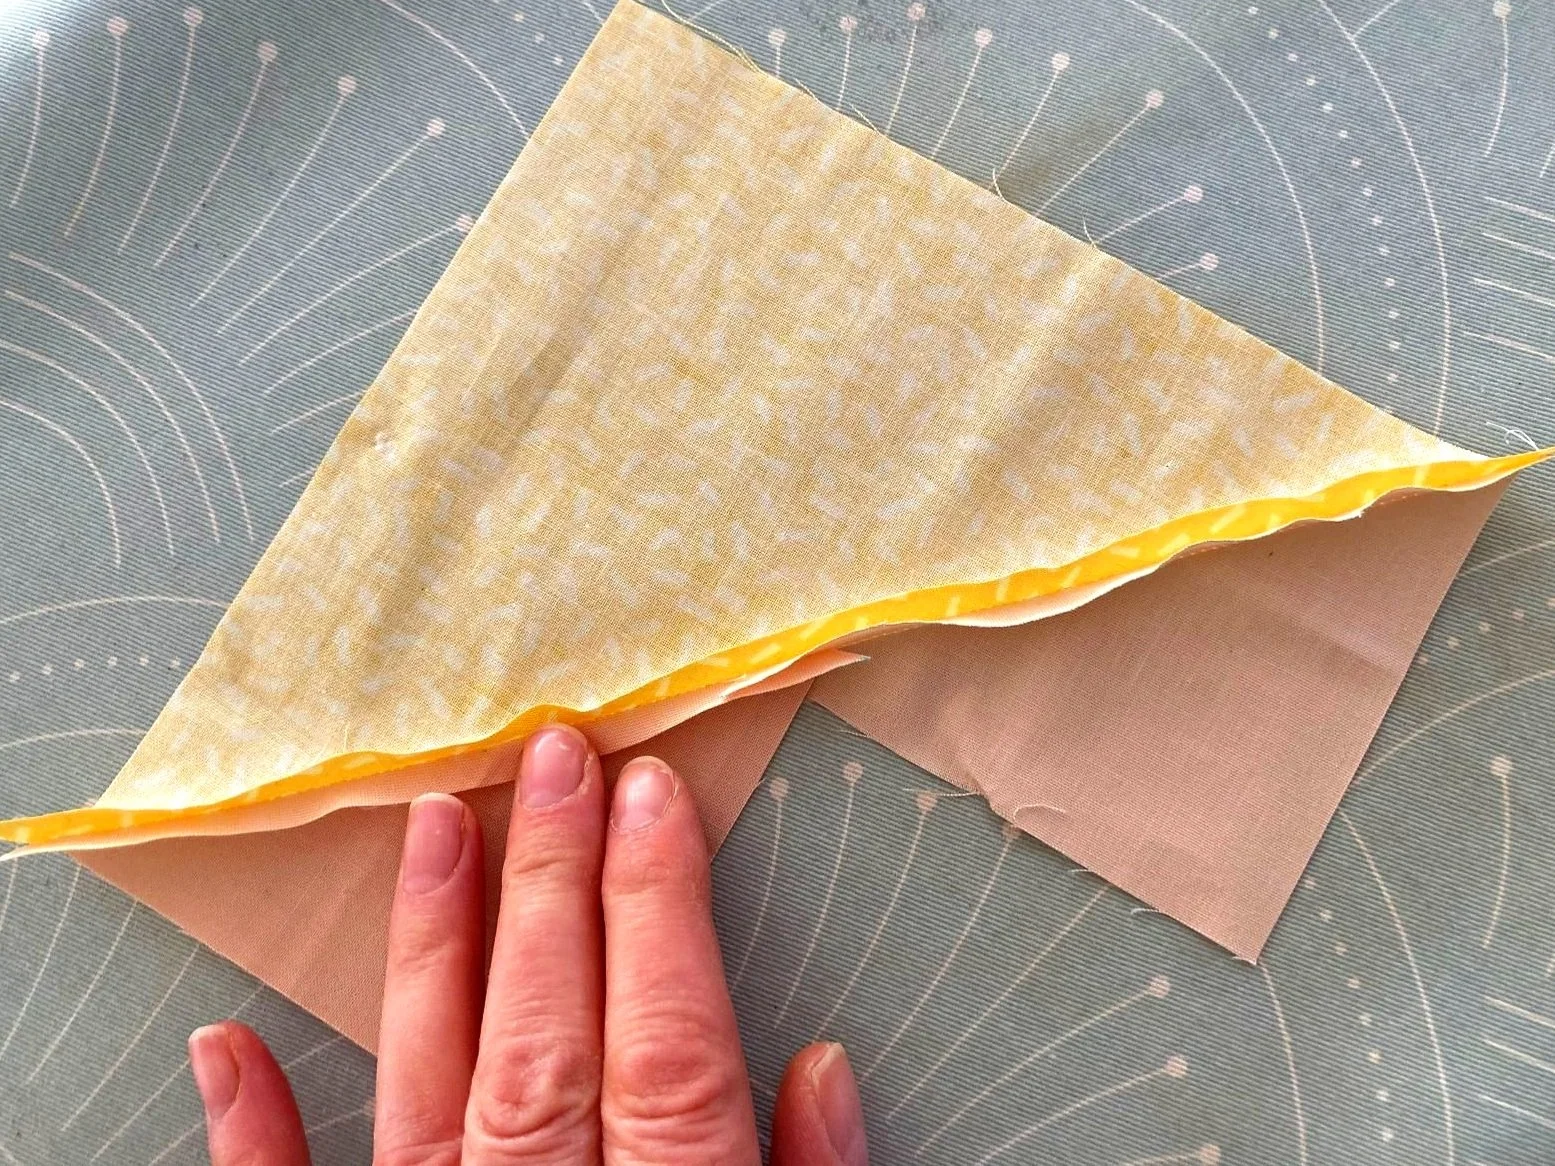
1. Finger pressing your seam open.
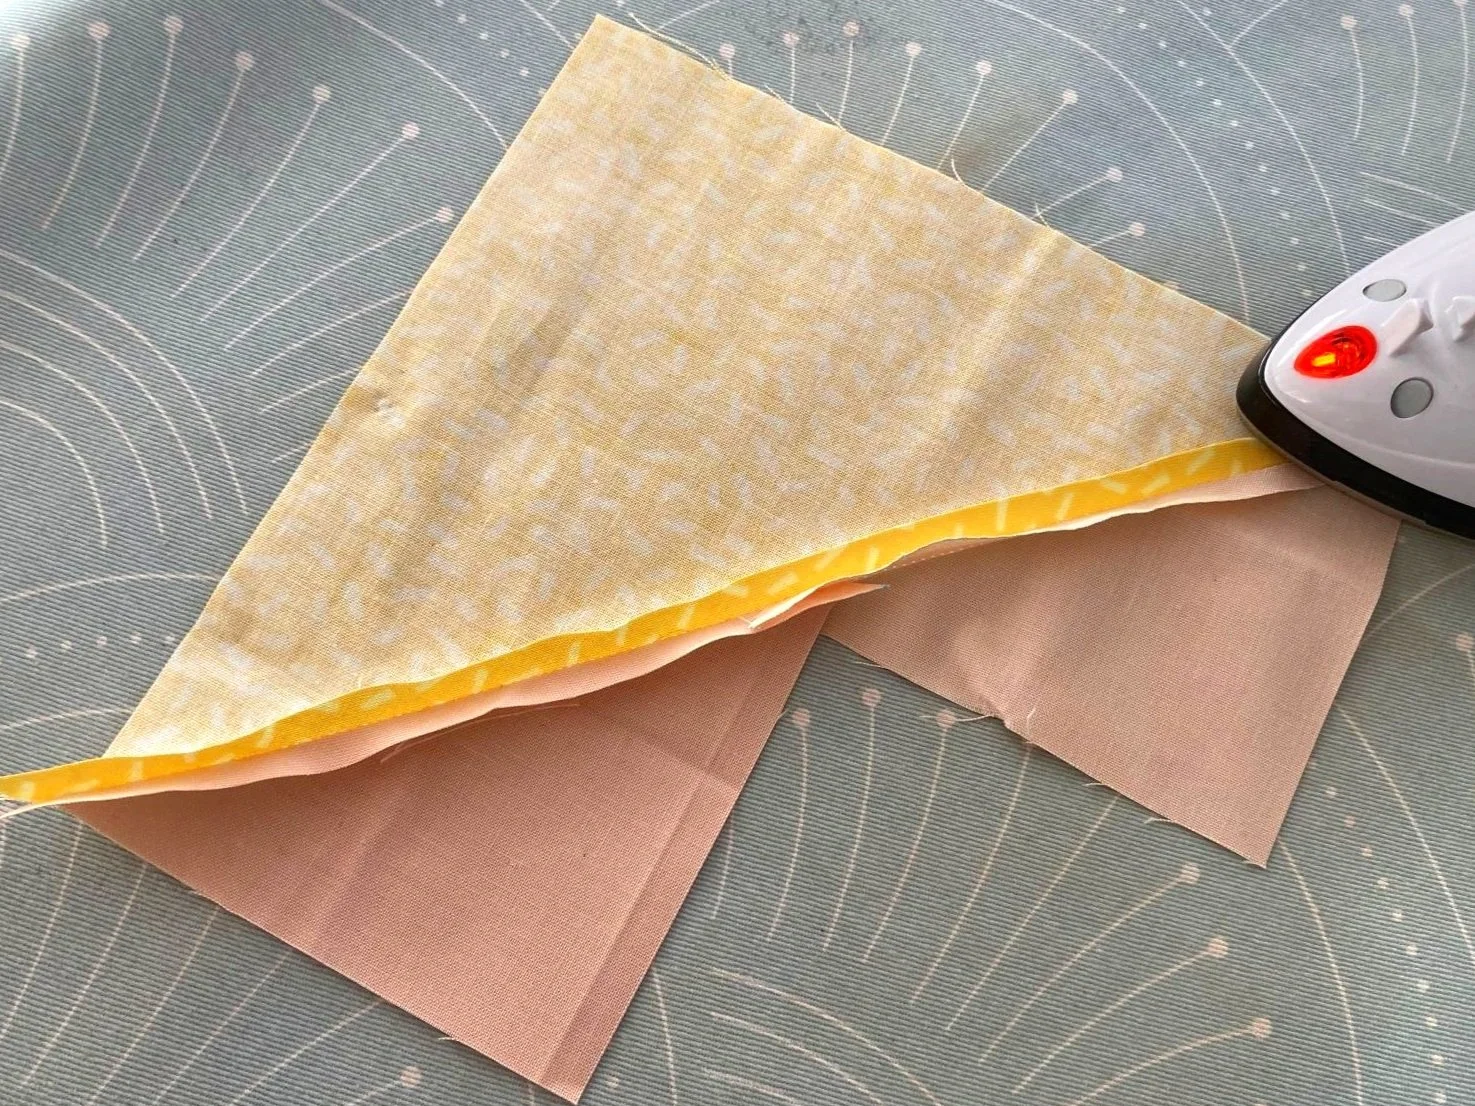
2. Then with the iron, gently press the seam open.
3. Turn around to the right side and gently press the seam again.
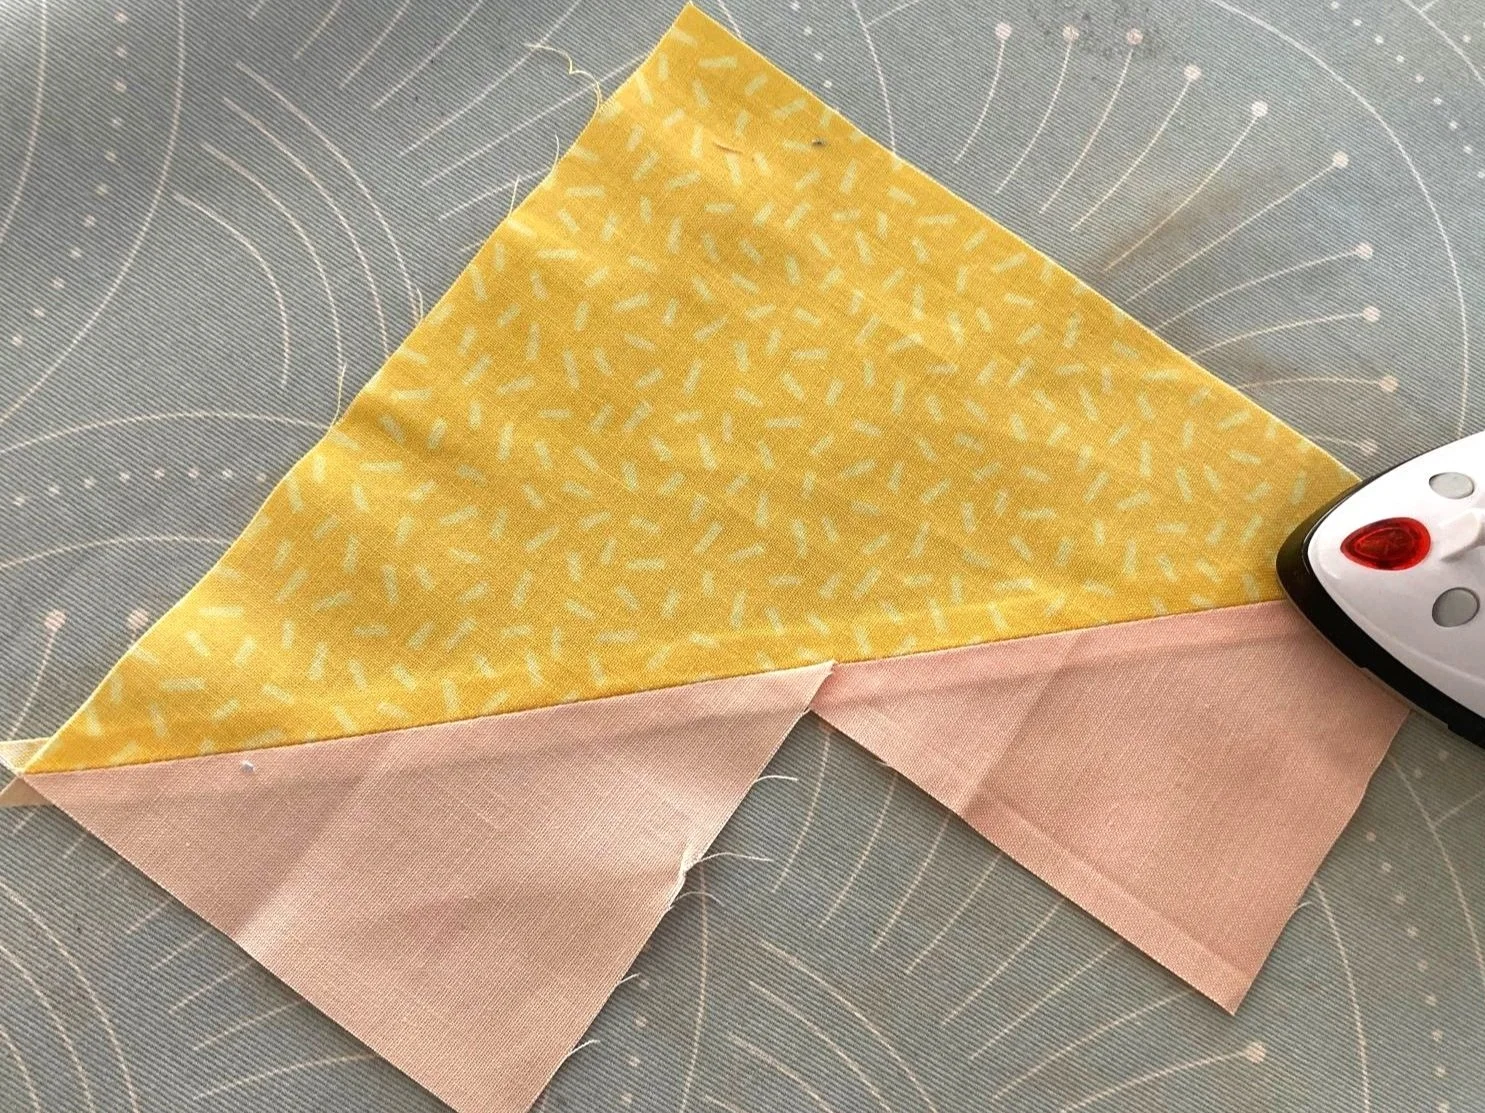
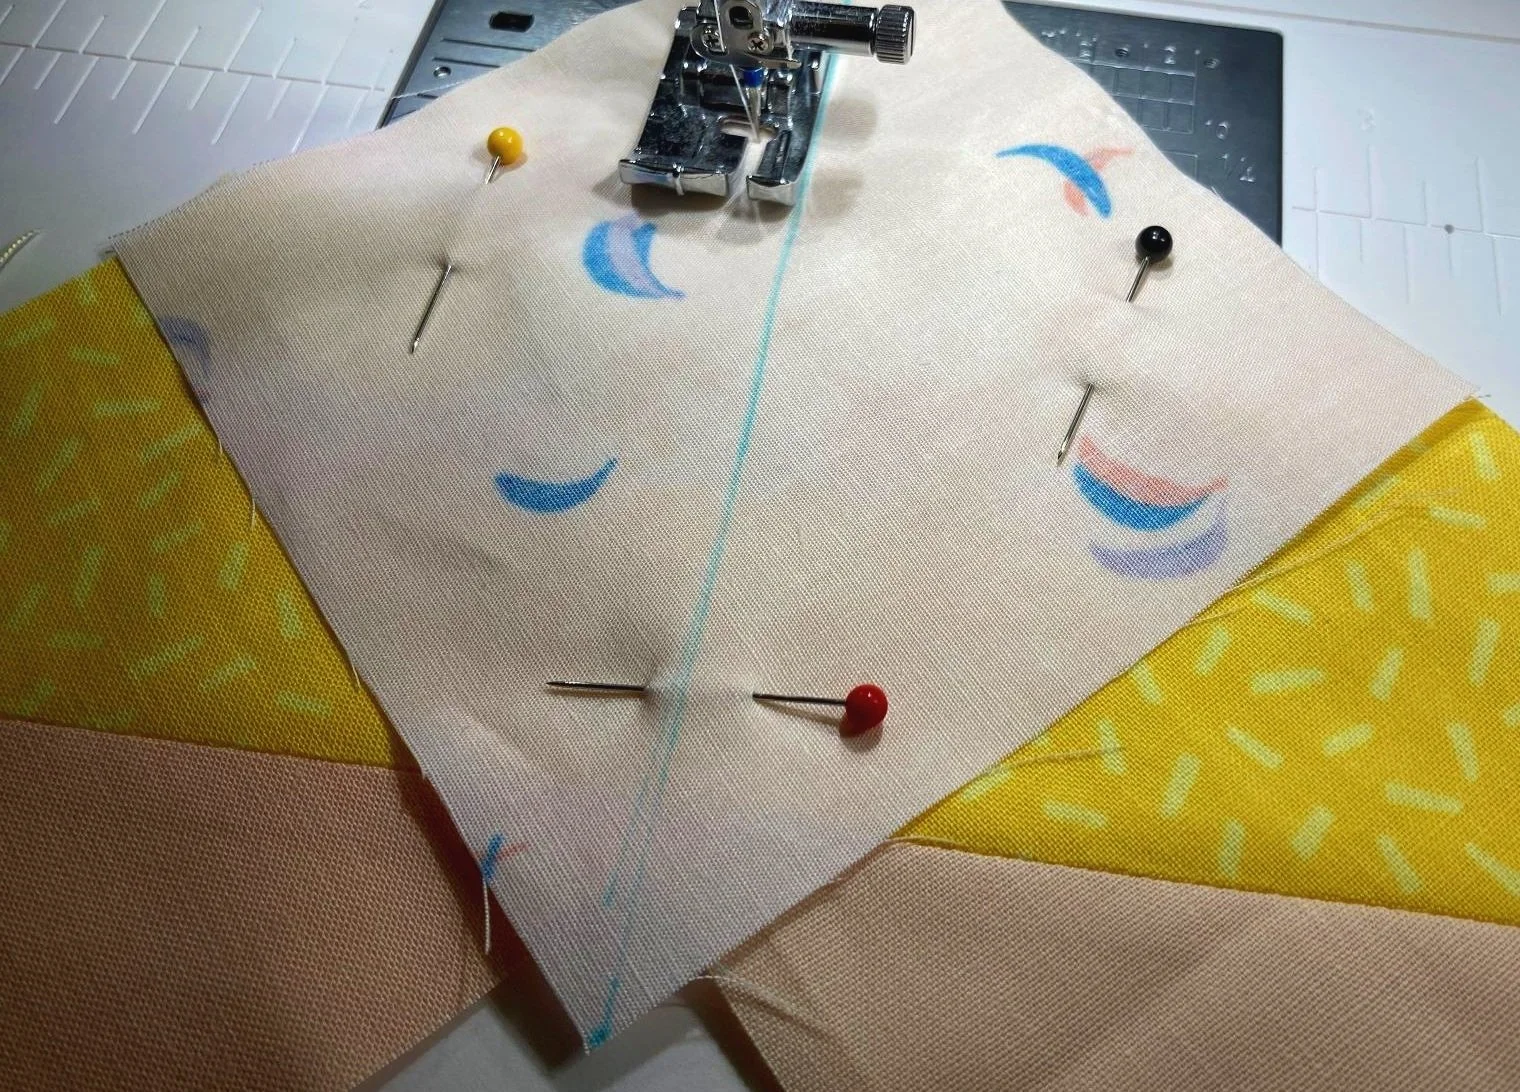
Step 6: With RST place the remaining 2 squares with the diagonal line going directly through the centre of the two smaller triangles.
The drawn guideline should run perpendicular to the seam we already stitched.
Pin to hold in place.

Step 7: With the remaining two sections, sew 1/4 inch on either side of the marked line. If you are confident in making your FG, then you can chain piece at this point.
Step 8: With a rotary cutter and ruler, cut along the diagonal line between the two rows of stitching.
Step 9: Press seams open as previously outlined in Step 5.
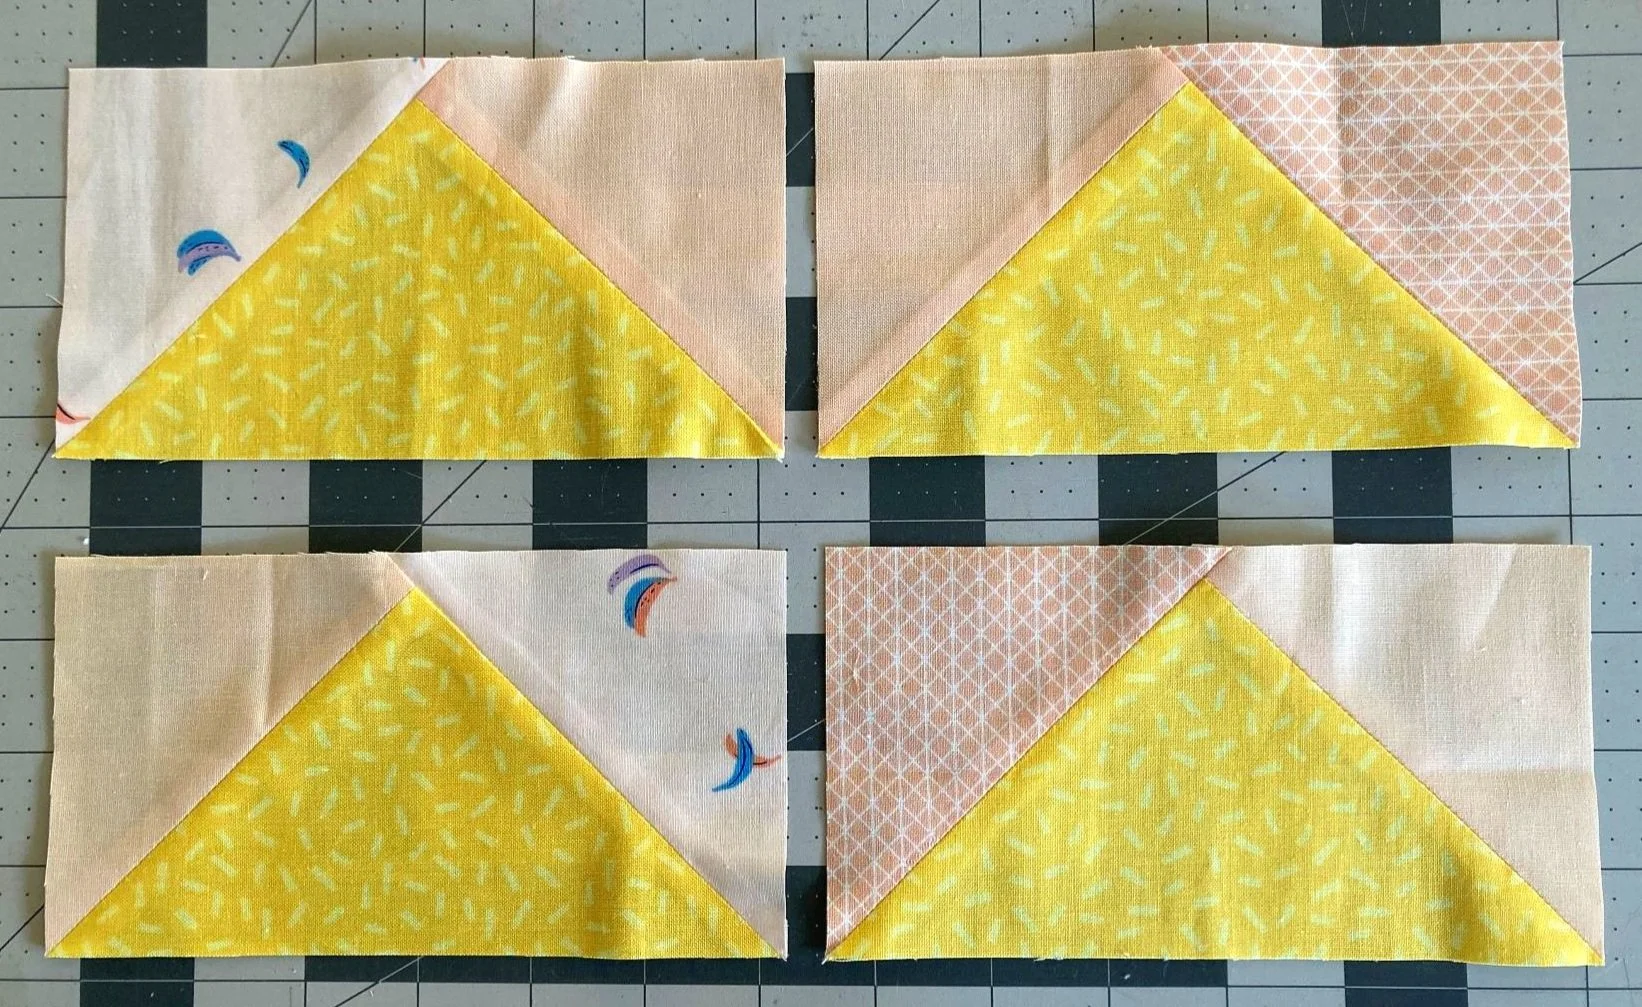
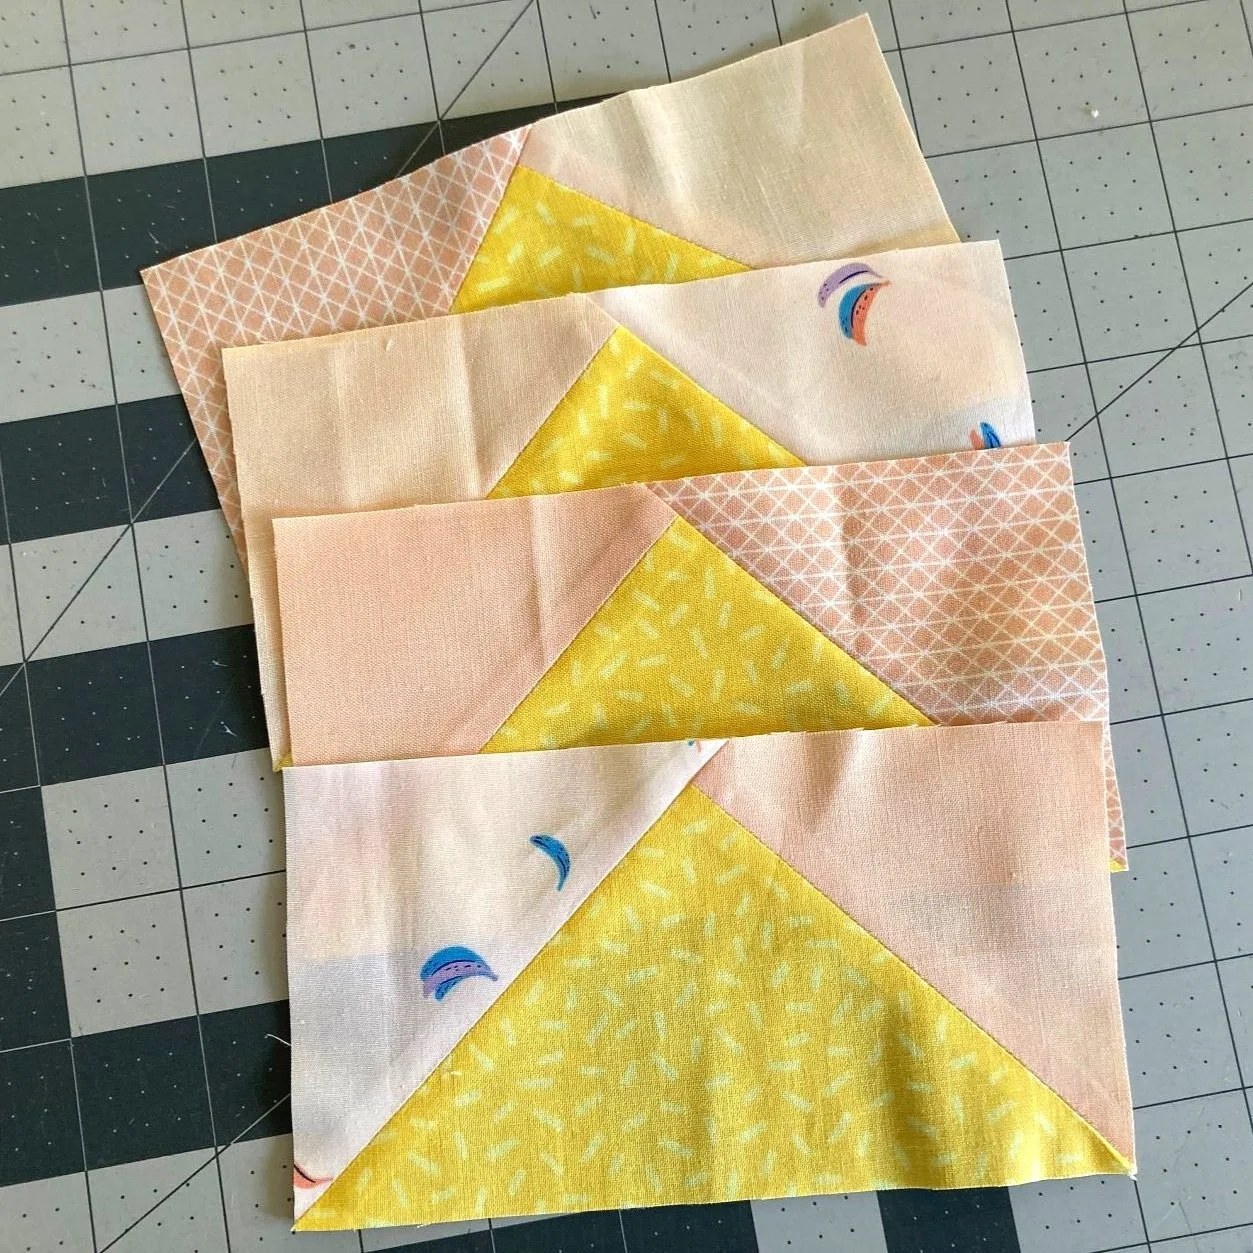
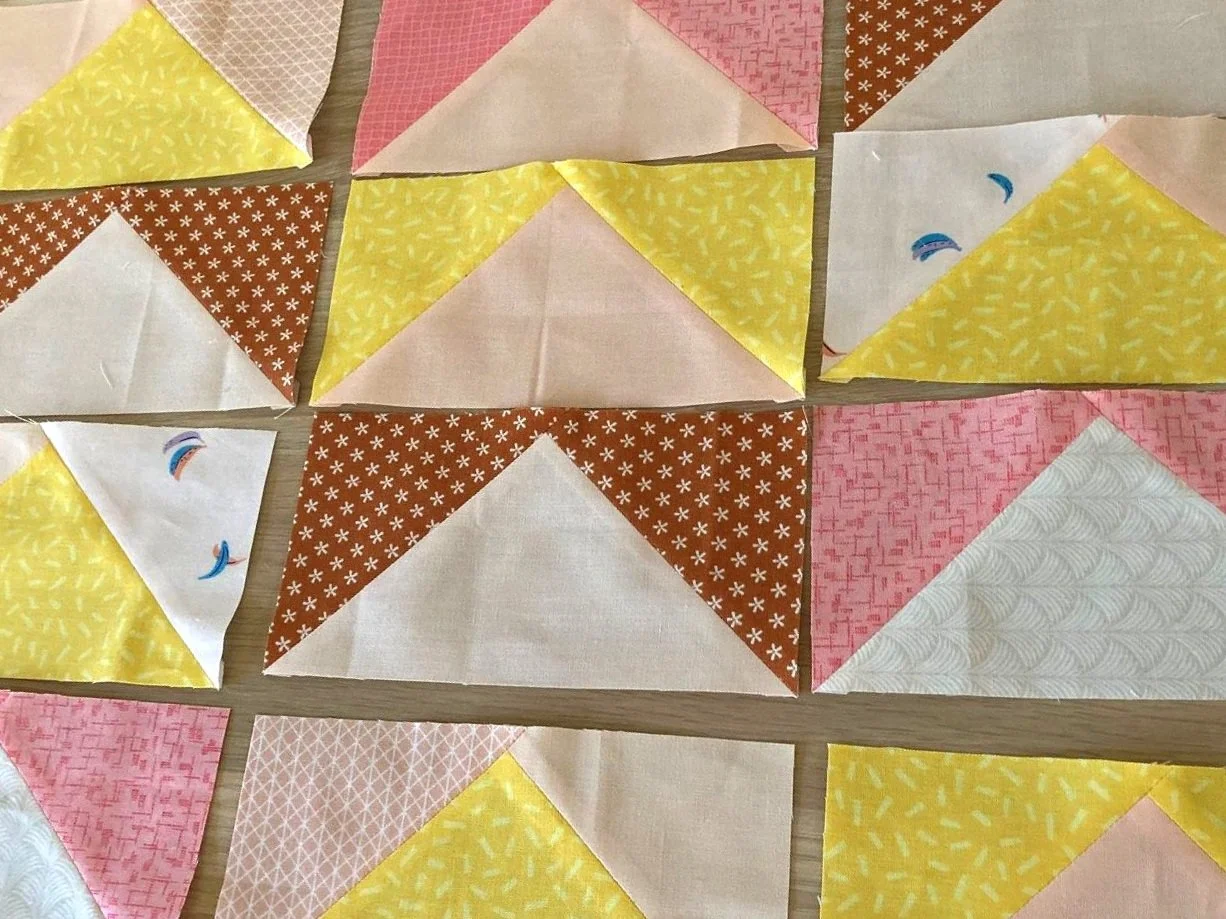
Next refer to the pattern or the guide below for trimming your flying geese.
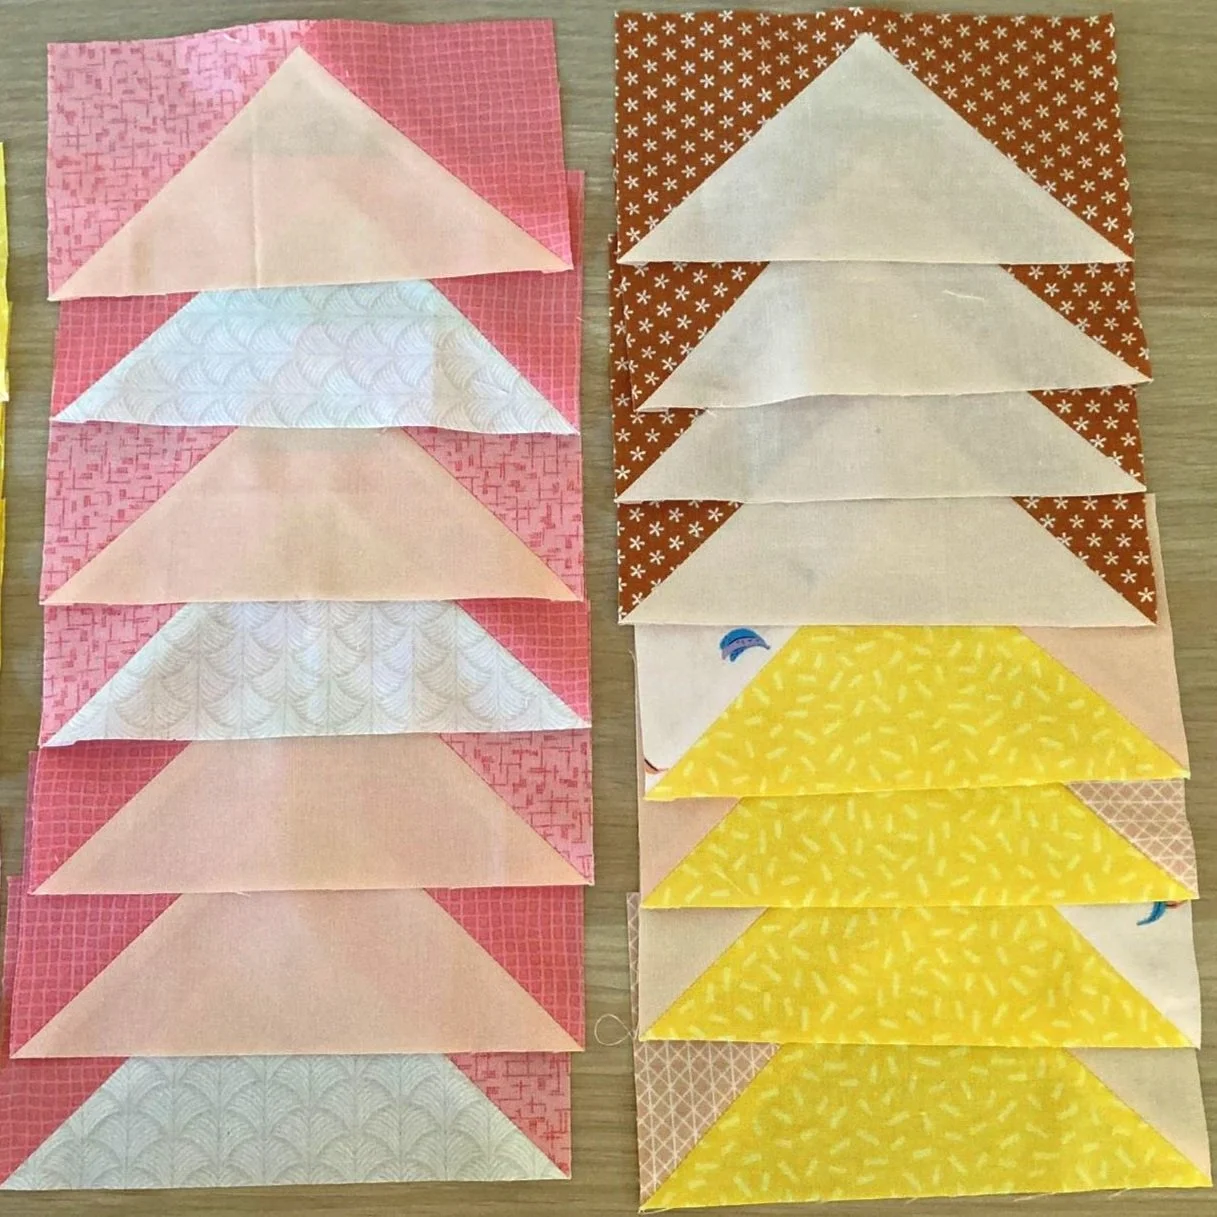
TRIMMING YOUR FLYING GEESE
The best part about this method is you trim the flying geese to exact size!
Refer to the detailed trimming directions in the pattern. A photo guide with instructions has been provided here to show you how it’s done using rotary cutter and standard square quilters ruler.
Use washi tape to mark out the unfinished size of your flying geese + the centre point. That way there’s less chance for cutting mistakes!

Mark out the unfinished size + centre point of your flying geese with washi tape.
HOW TO TRIM YOUR FLYING GEESE:
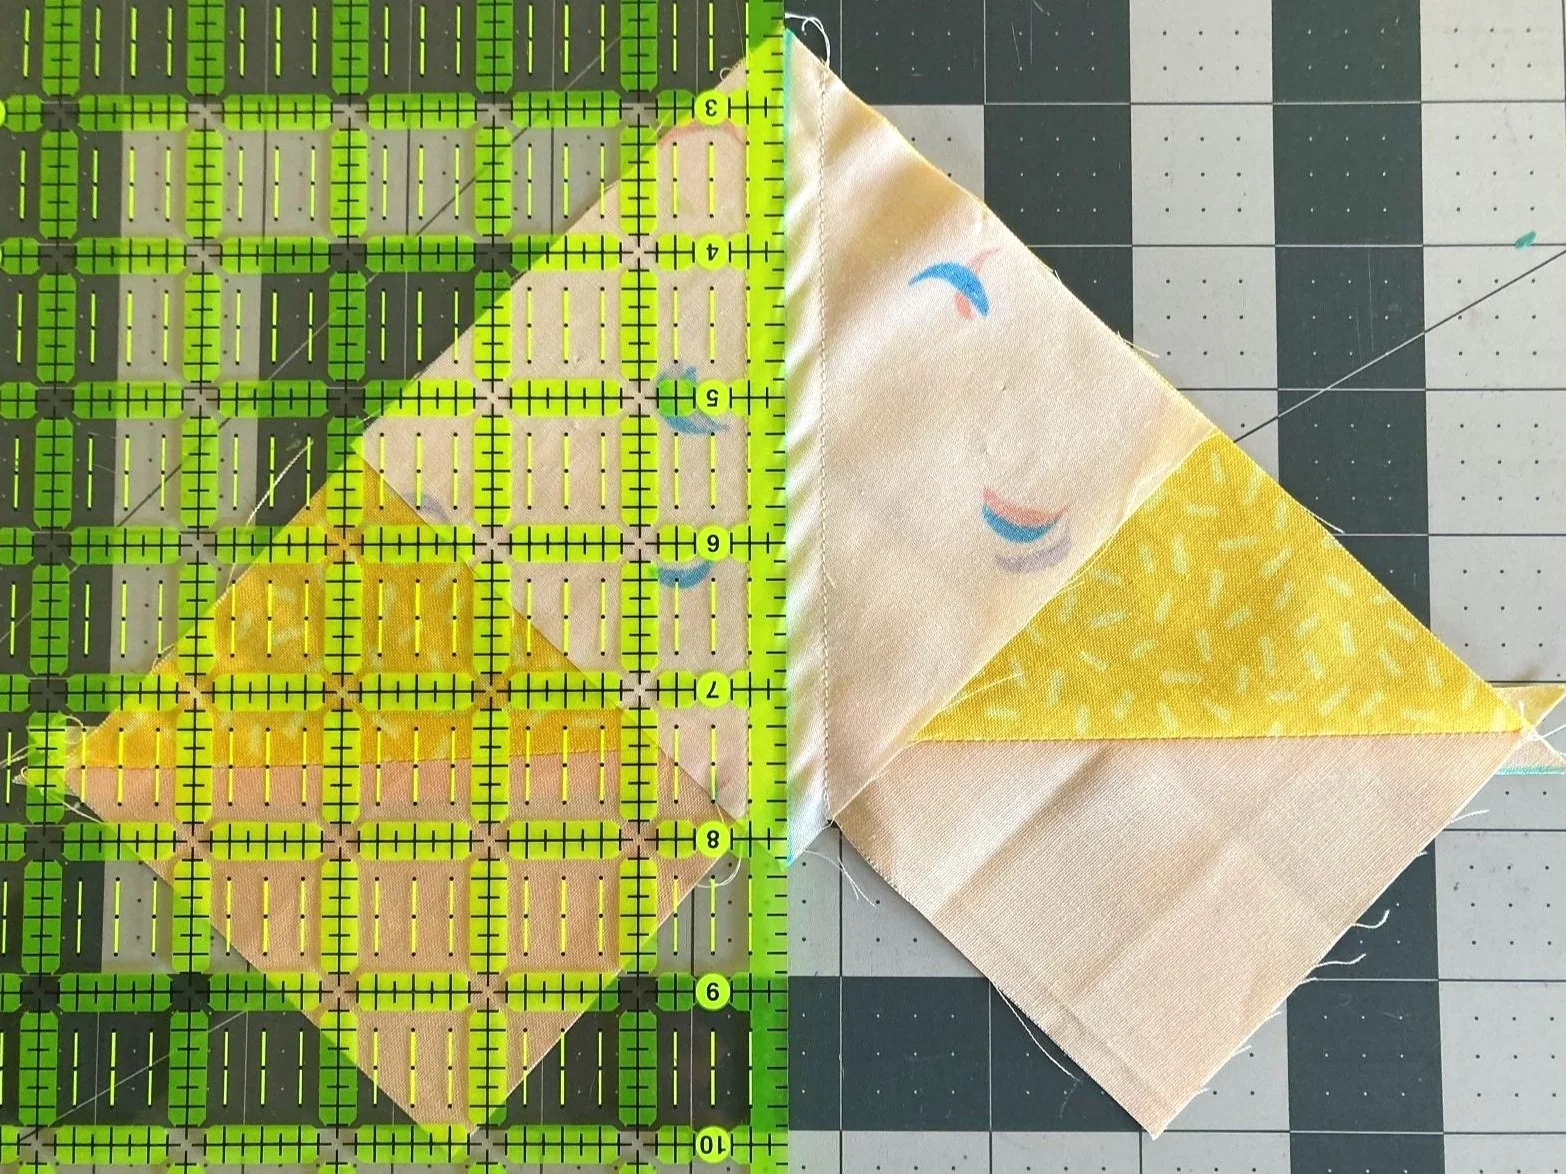
Step 1: Place your flying geese on your cutting mat with the point facing towards you.
Take a ruler with a 45° line and place it on top of your flying geese. Align your diagonal seam with the 45° line. The other geese corner should line up with your unfinished width. In this example 4½ inch.

Step 2. Find the centre of your geese. Divide the long side by two to find the centre of your geese. For example: Unfinished FG is 2½ inch x 4½ inch in size. Divide 4½ inch by 2 = 2¼ inch (centre of your geese).
Using the centre geese number (2¼ inch), line up your ruler markings with the tip of the geese.
Ensure there is a 1/4 inch above your flying geese triangle tip to the edge of the fabric.

TIP: You can make adjustments here if you’re a little short on one side.
Step 3: Double check before you cut! Check all the points in red are correctly aligned. Ensure the flying geese extend past your unfinished measurement (or perfectly aligns with it).
In this example it will be 2½ inch x 4½ inch.
Once everything is aligned correctly, trim around the right and top sides of your ruler.

Double check before you cut!
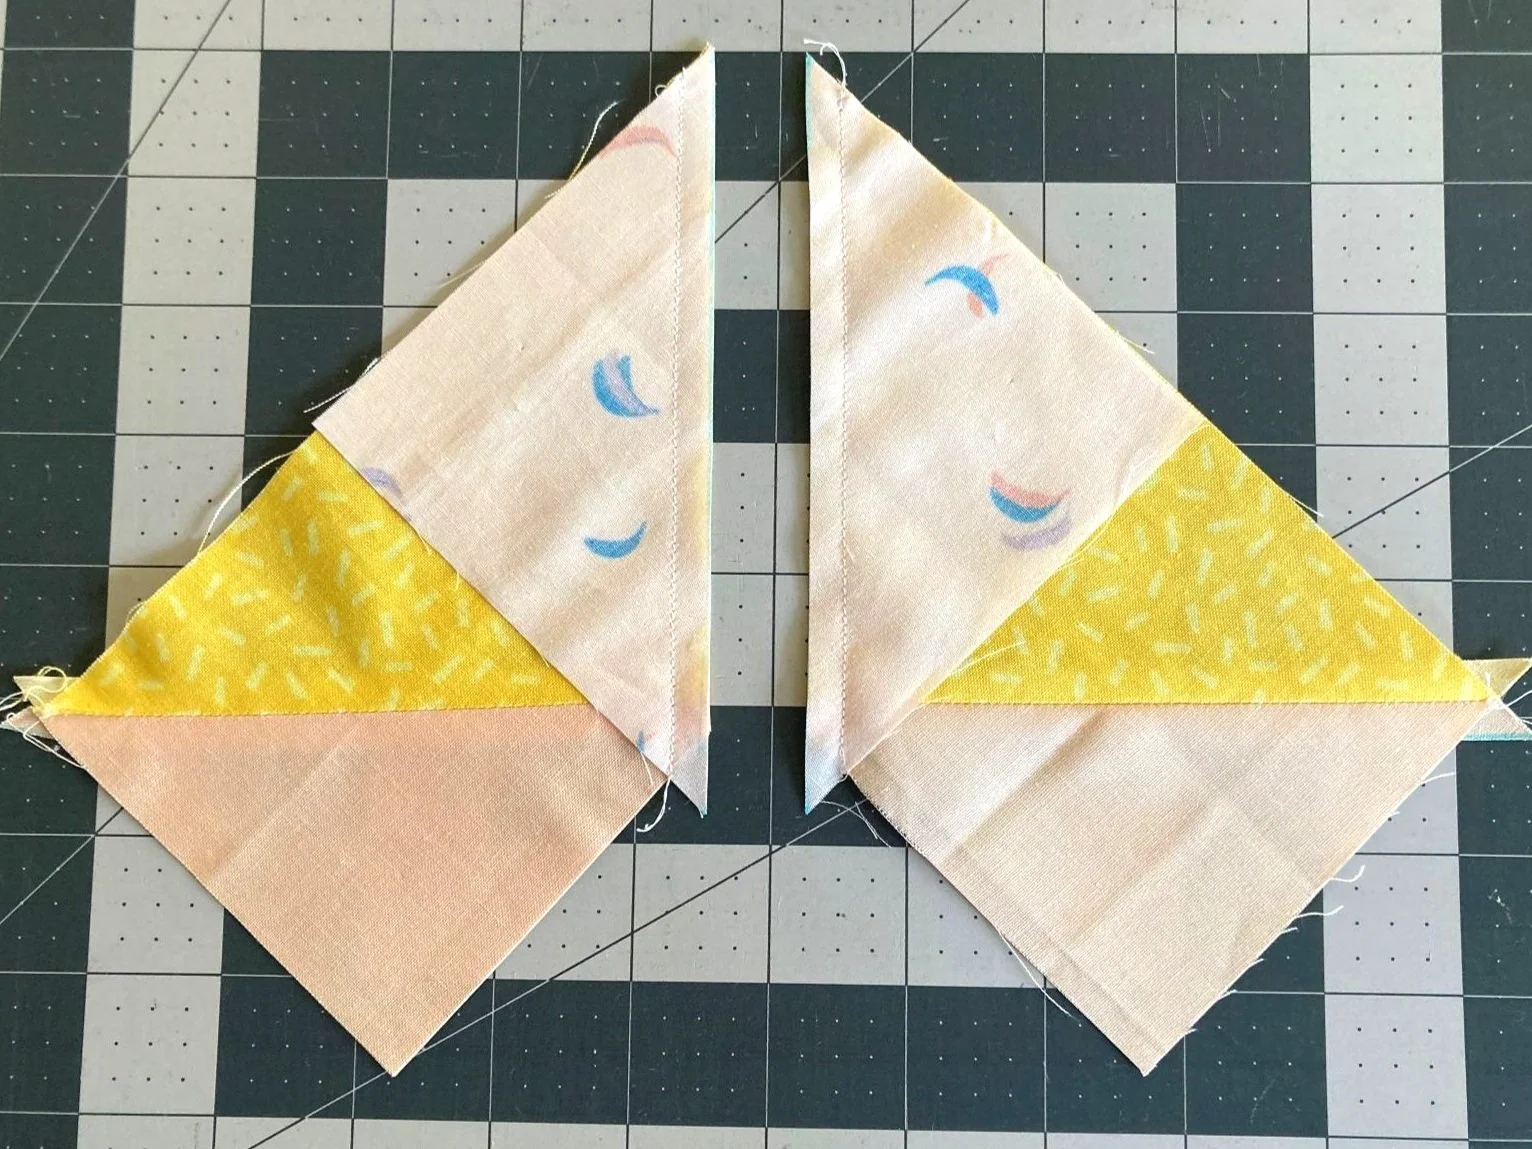
Step 4: Turn your geese around 180°. Using the unfinished size of your flying geese (in this example 2½ inch x 4½ inch), line up your ruler using your trimmed sides as your guide.
Ensure your centre point is matched and you have 1/4 inch above your geese tip to the edge of the block.
Once everything is aligned correctly, trim around the right and tops sides of your ruler.

Turn your geese around 180°, line up your ruler and trim the other sides.
Continue trimming until you have completed a set of four flying geese!
How did you go making your Flying Geese? If you have any further questions or need a little help completing your FG, please ask our community of quilters by joining our Facebook group.
PART 3 WINNER: The winner of the Cosmic Cactus Quilt Pattern is @susanmarkhamvirtualassistant!!!
Now that you have made your Flying Geese, check out Part 5: Make Square-in-a-square block (paper pieced).