
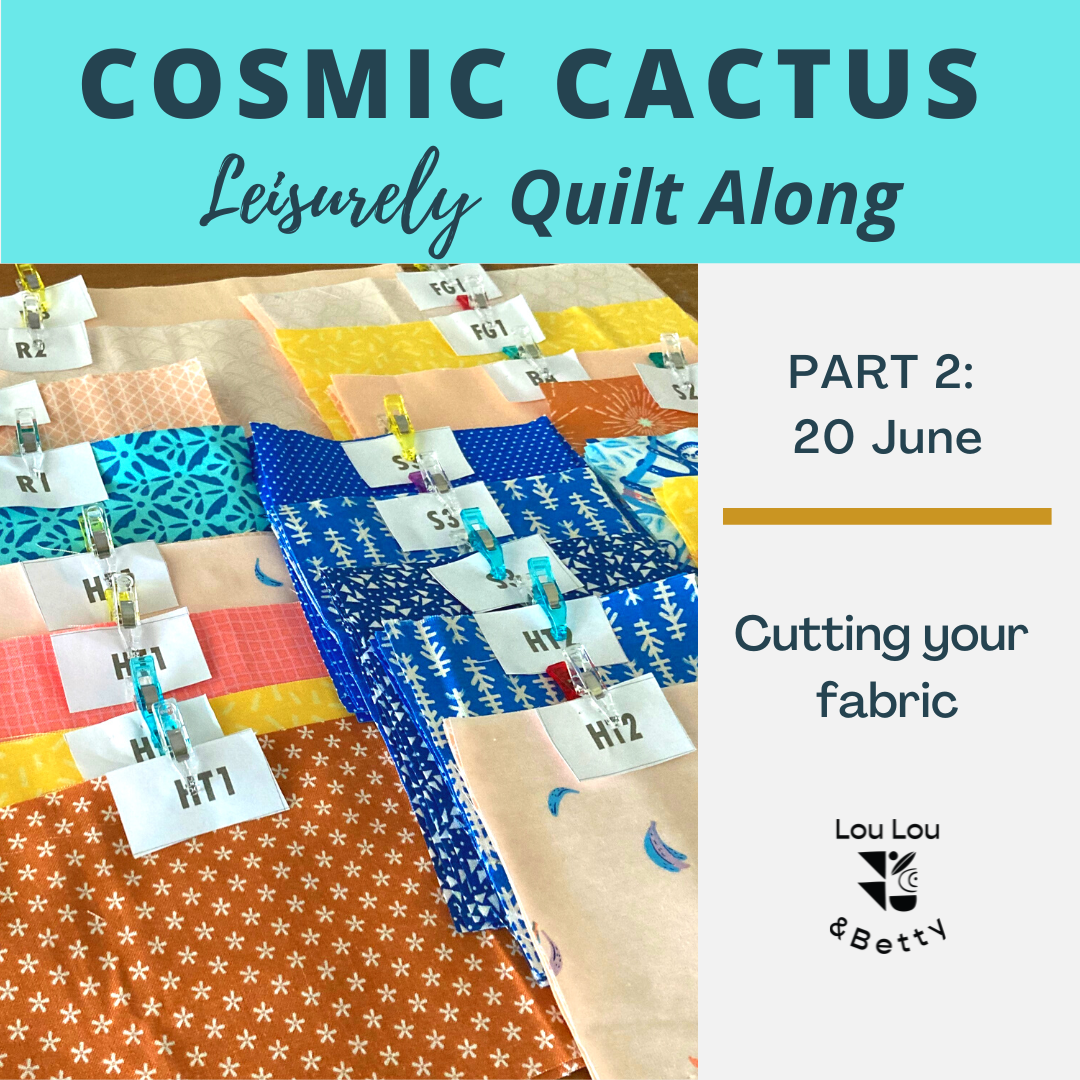
Cosmic Cactus Quilt Along PART 2: Cut your fabric
You have selected your fabric and now you’re ready to cut your fabric.
But before you start, take a moment to read Preparing your Fabric and Tips for Accurate Cutting. Then refer to your quilt fabric option for specific cutting guidance.
My advice is to take your time cutting!

REMINDERS
Schedule - to view the complete QAL schedule.
Essential information - including where to sign up, joining the QAL Facebook group and prize giveaways.
If you want to revise PART 1: Select Fabrics + Colour Inspiration
PART 2 prize: Don’t forget to share your progress on Instagram using the hashtag #CosmicCactusQAL for your chance to win a copy of the Cosmic Cactus pillow pattern! Please note cut off time for entries is 12pm, 4 July 2022, AEST - Sydney, Australia time.

QUICK LINKS (click to skip ahead)
Tips for accurate cutting - including tips for cutting your yardage and fat quarters / fat eighths.
Cutting your Fabric. To help you get started, I’ve included specific guidelines for each fabric option:
1. All Quilts; 2. Two-colour; 3. Four-colour;
4. Scrappy. You have three options for cutting your scrappy quilt:
TOOLS REQUIRED
Olfa 45 mm rotary cutter + spare blade
Fiskars Self-Healing Rotary Cutting Mat, 18 inch x 24 inch - Great for cutting WOF lengths.
Omnigrid quilting ruler, 8.5 inch x 24 inch - Or bigger if you can afford it or have the room!
Omnigrip quilting ruler, 6 inch x 14 inch - A smaller ruler makes it easier for sub-cutting fat quarters.
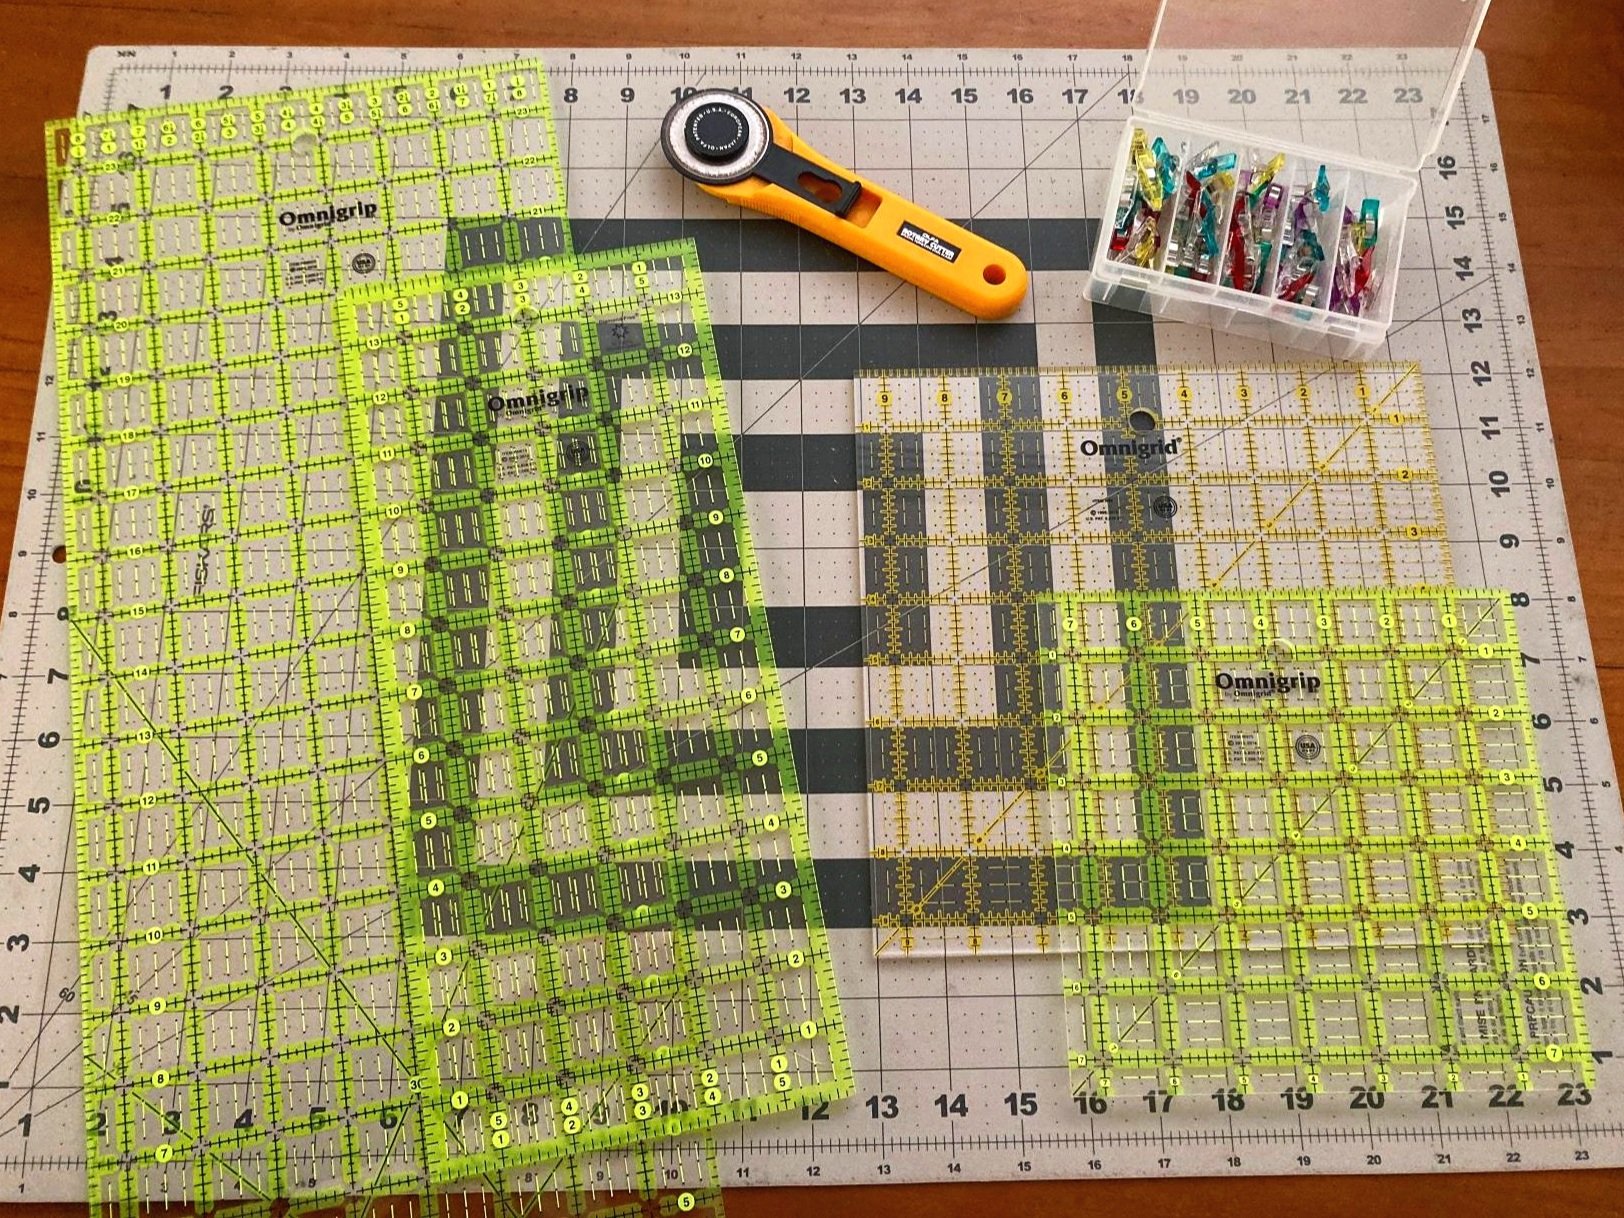
Omnigrip square quilt ruler - A square ruler can make it easier for sub-cutting the square blocks. It’s also handy for creating a viewing window for your fussy-cut motif. Consider a 7.5 inch square for the Baby size quilt; 9.5 inch square for the Throw size quilt. Look for value packs of two or more rulers!
Clover Wonder clips - For securing block labels. Also good for holding binding in place in preparation for sewing on to your quilt top.
Colouring pencils - For colouring in your Block Placement guide as you are cutting your scrappy quilt.
Washi Tape - Allows you to make a fussy-cut viewing window as outlined in the pattern.
PREPARING YOUR FABRIC
There are a few things to consider before you start cutting into your fabric.
To prewash or not to prewash cotton quilt fabrics?
The Cosmic Cactus quilt pattern is written assuming your fabric is unwashed. My preference is not to prewash my fabrics. Why? I find the fabric easier to cut and sew when it comes straight off the bolt. And I’ll be honest here, I don’t enjoy the extra time it takes to wash and then iron the fabric! I also don’t like how the edges fray either. If you’re not sure, do a little further research before deciding.
What about shrinkage? There will be some shrinkage with a cotton fabric if you don’t prewash, but not a significant amount. This is fine for a quilt, but not so much for garment sewing! If you like the look of a vintage quilt, then a little shrinkage creates a cozy, crinkly looking quilt.
What about excess fabric dye? This is where you have to be careful, particularly if you have used fabrics with highly saturated colours. Many manufacturers now work hard to ensure the fabric dyes are completely set, but you can’t always be sure.
When washing your quilt for the first time, I recommend putting in a colour catching sheet (or more depending on the size of your quilt) such as Sard Wonder Colour Catcher, usually found at the local supermarket in the laundry detergent isle.
If still concerned, do a simple colour fastness test before you cut into your fabric. Try hand washing a small amount of fabric and see if there’s any fabric dye bleed.

What about starching? There are no bias seams to be concerned about in this project, so I found that starching was not required.
Iron your fabrics (if required) to ensure they wrinkle free. Sometimes even if the fabric has come straight off the bolt or it’s been stored for a while, it might need a quick press. If you have prewashed your fabric, you will definitely need to iron your fabric and cut off any loose threads. Having the fabric wrinkle free sets you up for better cutting accuracy.
TIPS FOR ACCURATE CUTTING
If you are new to quilting you may be a little nervous about cutting into your fabric. Please read these tips to help you get started, referring to the photos and diagrams. If you need further help, please ask for help in our Facebook Group. Experienced quilters may like to skip ahead to the next section.
Take note to ensure you are referring to the correct cutting instructions for your selected quilt size (baby and throw) and each fabric option (two-colour, four-colour or scrappy).
Tip: Separate the relevant pages from the main pattern and there’s less chance of going wrong.

Check your rotary cutting blade. When is it time change the blade? It’s time to change the blade when you find there are a few places where the blade didn’t cut through a thread or two.
Take your time cutting! Get it right the first time and you’ll save yourself some heartache.
For cutting accuracy, DO NOT rely on the grid lines on the cutting mat, but use the lines on the quilting ruler to make your cut.
Check off the blocks as you are cutting them. You can do this in a number of ways:
Checking off each line in the written cutting instructions.
Marking off the blocks on the cutting diagram.
Checking off the blocks on the Block Cutting Quick Guide.
Colouring in the Block Placement Guide as you cut the blocks (scrappy quilt only).
Referring to cutting diagrams can help you interpret the written cutting instructions, especially for those people that are visually orientated (like me). It also gives you an idea on how much fabric you should have left over (allowing a little extra for cutting mistakes).
What are sub-cuts? This means you are cutting smaller squares and rectangles from a larger piece of fabric.
For example, if you are asked to cut:
1 - 10.5” x WOF, sub-cut into 8 - 10.5” x 5.25” rectangles.
Start by cutting 1 x 10.5” WOF strips. Note your WOF is folded in half at this point.

From the 10.5” x WOF strip you will cut:
• 8 x 5.25” wide rectangles.
Tip: Referring to the cutting diagram will let you know how many rectangles you can cut from each strip.


Use the Block Labels on Page 30.
There are a few blocks that are similar in size and this will make it so much easier to keep track of the blocks when you need to find them to piece.
Ensure you have a straight edge, by making a clean cut.
Start by laying out your fabric with wrong sides facing together on your self-healing cutting mat, with your fabric folded in half and aligning it selvedge to selvedge.
Line up your quilting ruler on the fold line. With your rotary cutter, press firmly down on the quilting ruler to hold it in place and make a cut slowly from fold to selvedge

Cutting your WOF strips:
Line up your quilting ruler perpendicular to the fabric, double checking the measurement of the WOF strip before cutting.
With your rotary cutter, make a cut from fold to selvedge.

I don’t recommend trimming the FQ to achieve a ‘clean cut’ as outlined for cutting yardage. You will lose any wriggle room you have for cutting out all your blocks. Instead square up you blocks as you are cutting them.
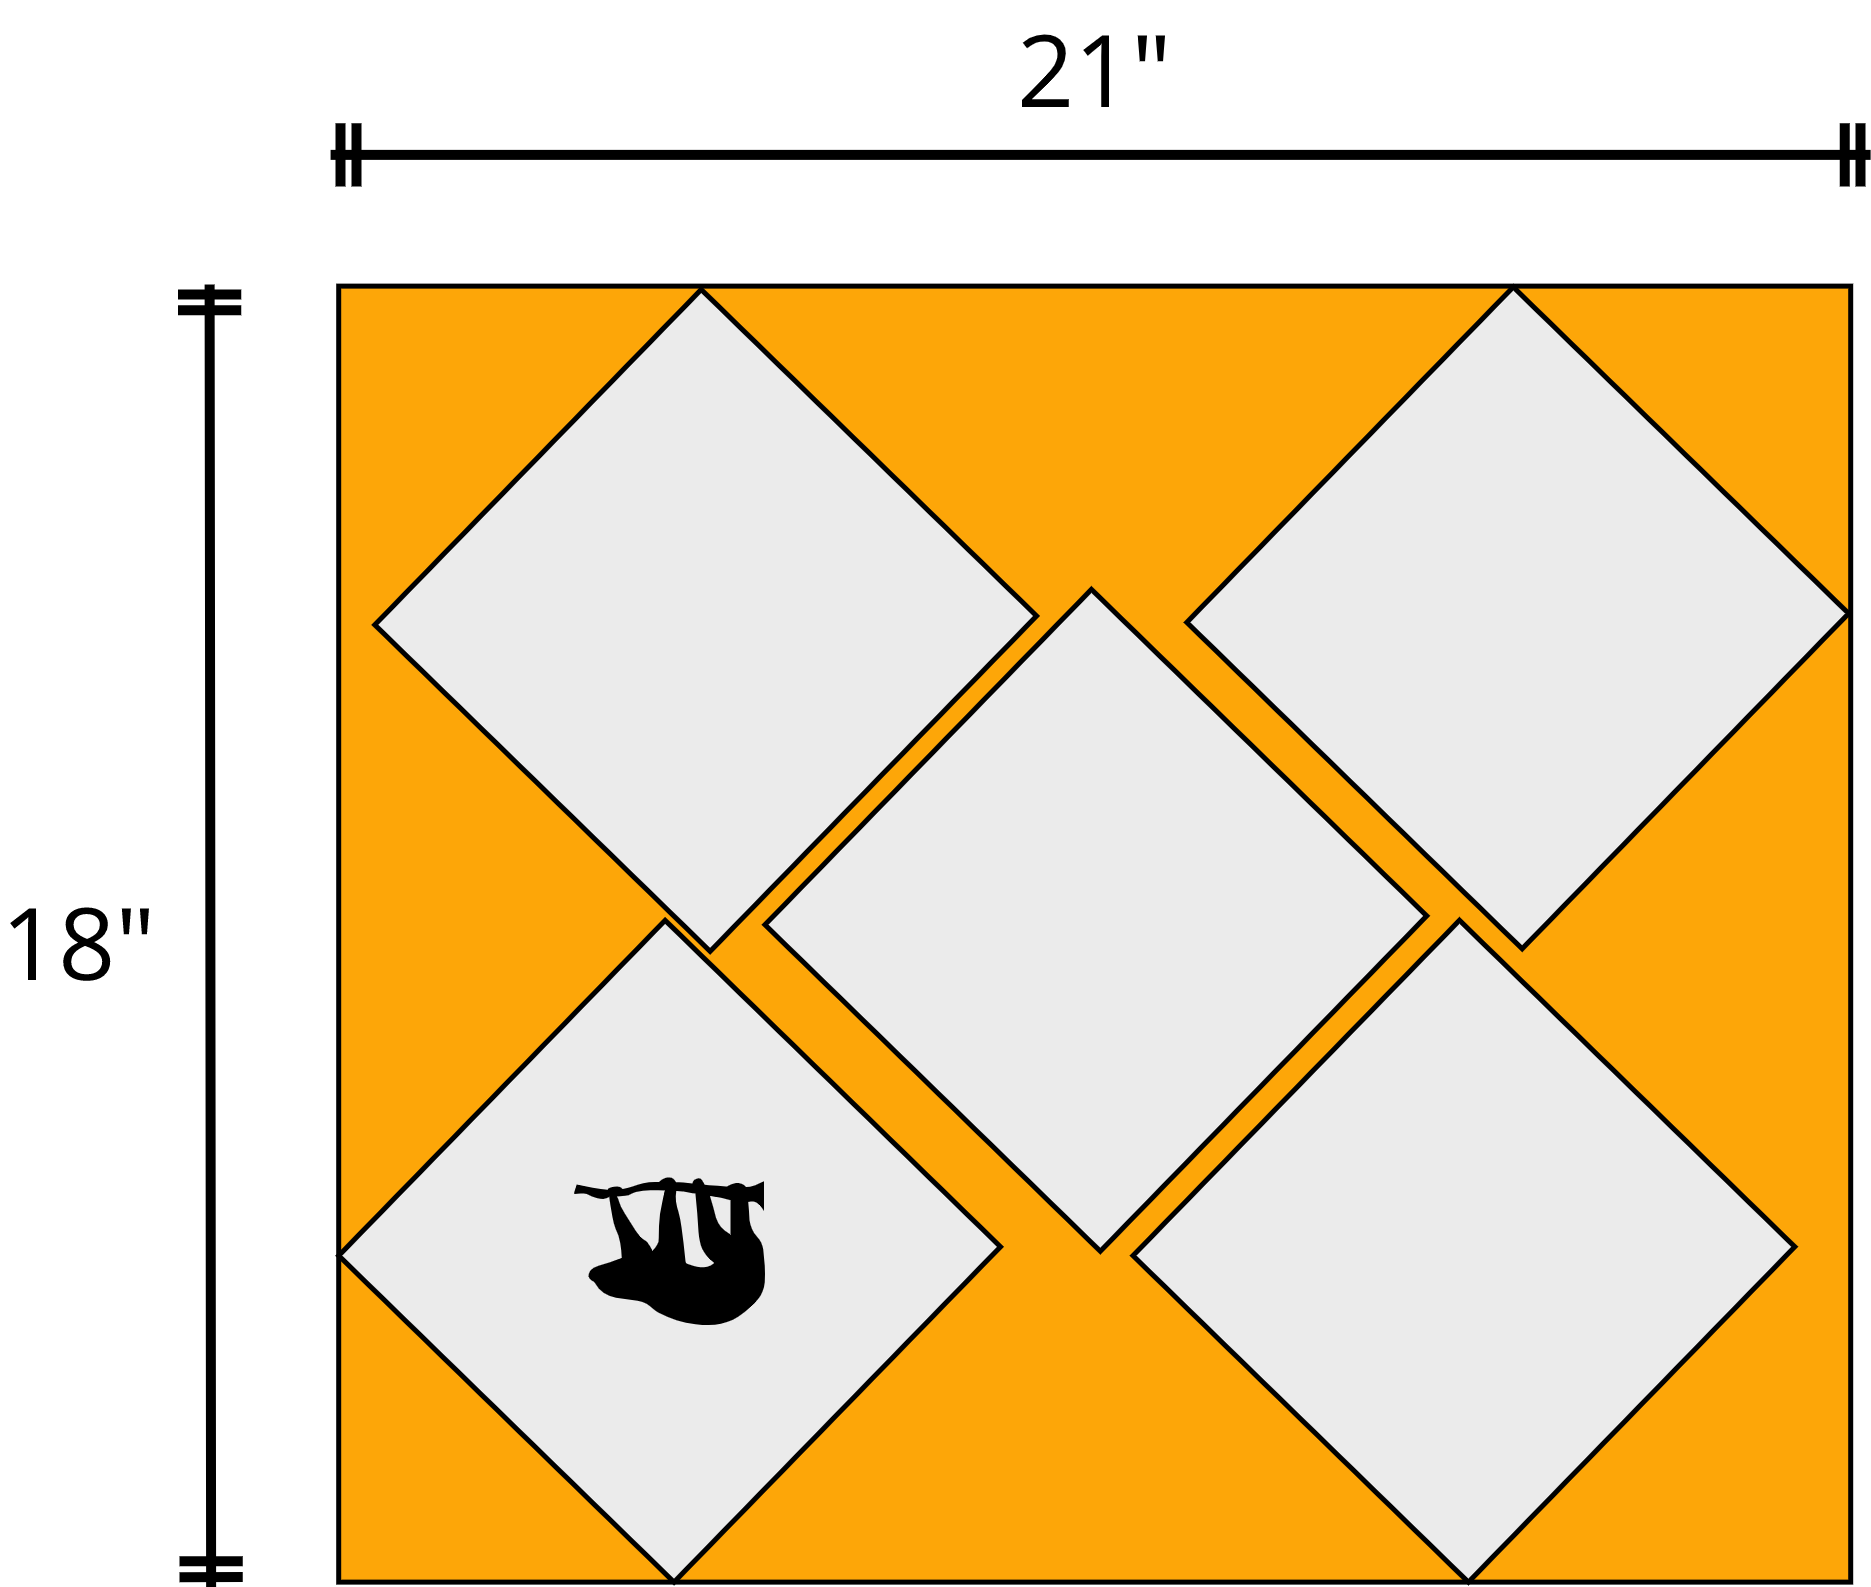
Ensure you have the fat quarter or fat eighth orientated the correct way before cutting, referring to the cutting diagram for the 21 inch WOF x 18 inch orientation.
Note there is no margin for error in cutting! Refer to the cutting diagrams and maybe consider having an extra fat quarter in reserve if things go wrong. Take your time cutting fabric. Check off blocks as you are cutting them.
When it comes to cutting, take a look at the blocks and sizes you are cutting. Look for ways you might be able to cut a row or two, or a couple of blocks of similar size. For this example, I’ll be referring to FQ for the Baby size background fabric on Page 12 (as pictured below).
I’m going to start with cutting the R1 blocks. Refer to Page 14 in the Block Cutting Quick Guide to find the size of the block.

While you are there, check the size of the S1 blocks and you’ll notice you can cut two rows as the blocks the same width:
• Row 1: R1 + S1 + S1 + S1
• Row 2: R1 + S1 + S1

Sub-cut the rows into the R1 & S1 blocks as pictured.
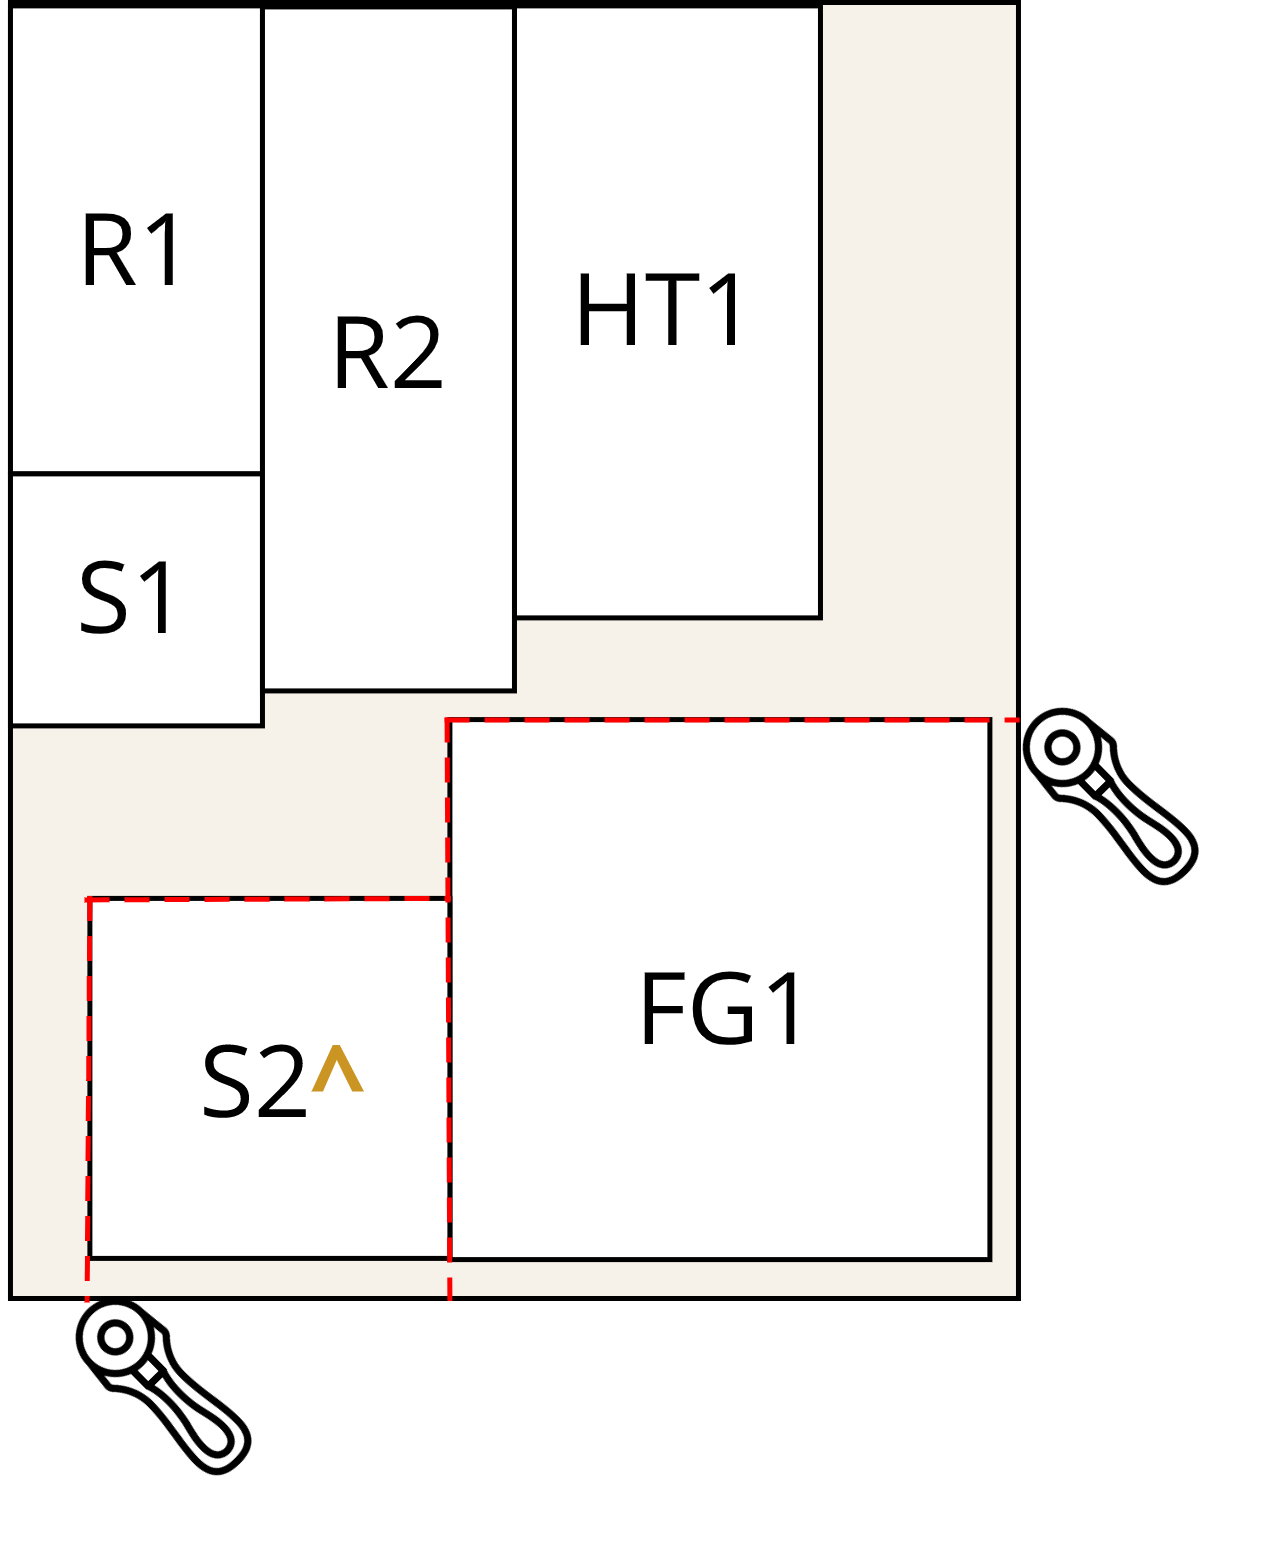
I would then cut out the FG1 in the corner, then the S2 block next to it.

Continue to cut this way until you have cut out all the blocks for this fat quarter.
CUTTING YOUR FABRIC
This pattern requires you to cut squares and rectangles only.
Use the block labels to keep track of the blocks as you cut them.
Refer to 1. All Quilts (if fussy-cutting) and/or your fabric option i.e. 2. Two-colour; 3. four-colour or 4. Scrappy for more specific cutting instructions.
Fussy-cutting:
If you have decided to fussy-cut the S2 squares for the centre of the Square-in-a-square block, you will have a separate fabric print to cut. If this is the case, disregard cutting the S2 squares (and cross them out on the diagram) and follow the fussy-cut instructions on Page 7.

Make your fussy-cut viewing window following the directions in the pattern on Page 7.

How many fussy-cut S2 squares can you get out of a fat quarter? How many squares you get will entirely depend on your motif and the size of the squares you are cutting. For the baby size quilt you could get a maximum of 10 squares.

If you have a motif that's a little tricker to work with, mark out the fussy-cut blocks with a fabric marker to see how many blocks you can get from your fabric.

The viewing window allows you to centre the motif or pattern as desired. I was lucky to centre the one sloth in this square, but for the majority of squares this was not possible. So had to look at how many sloths to include and what parts of them you would see.
For the throw size quilt you will get a maximum of 5 squares from a fat quarter. You will either need 2 x fat quarters or yardage to get your 9 x S2 squares.


Cutting your fabric for the two-colour quilt is straight forward. Don’t forget to refer to the separate instructions for fussy-cut S2 squares.
Cutting background fabric:
Refer to the cutting instructions in the pattern for All Quilts on Page 5 (baby) and Page 6 (throw). You have both written cutting instructions, as well as a cutting diagram.
Don’t forget the additional background cutting instructions on Page 7.
Cutting accent fabric:
Refer to the cutting instructions in the pattern for Two-Colour Quilt on Page 7 (baby) and Page 8 (throw). You have both written cutting instructions, as well as a cutting diagram.


Cutting your fabric for the four-colour quilt is straight forward. Don’t forget to refer to the separate instructions for fussy-cut S2 squares.
Cutting background fabric:
Refer to the cutting instructions in the pattern for All Quilts on Page 5 (baby) and Page 6 (throw). You have both written cutting instructions, as well as a cutting diagram.
Don’t forget the additional background cutting instructions on Page 8 for your quilt size.
Fabric A-C:
Refer to the cutting instructions in the pattern for Four-Colour Quilt on Page 8 (baby) and Page 9 (throw). You have both written cutting instructions, as well as cutting diagrams.
You have three options for scrappy cutting. The option you choose will depend on if you are using fabric yardage, fat quarters / fat eighths or stash buster. We’ll be covering all three options in more detail. Don’t forget to refer to the separate instructions for fussy-cut S2 squares.


Background fabric:
Refer to the cutting instructions in the pattern for All Quilts on Page 5 (baby) and Page 6 (throw). You have both written cutting instructions, as well as a cutting diagram.
Don’t forget the additional background cutting instructions on Page 10 (baby) and Page 11 (throw).
Group 1 - 7 fabrics: Refer to the cutting instructions in the pattern for Scrappy Quilt on Page 10 (baby) and Page 11 (throw). You have both written cutting instructions, as well as cutting diagrams.
This option only includes Cutting Diagrams (Baby - Page 12; Throw - Page 13) and is used in conjunction with the Block Cutting Quick Guide (Page 14), which outlines all the blocks + sizes you need to cut. Refer to Tips for Cutting Fat Quarters & Fat Eighths.
Please note: If you customise your quilt and change the fabric layout (as shown on page 4) you may need to cut your fabric using the method outlined for Option 3 Scrappy quilt (depending on how much you vary the design).
Cutting will definitely take longer for this option! So, allow plenty of time, always double-checking block sizes before cutting and check off blocks as you cut them.
This option relies on referring to all four of these pages:
Block Cutting Quick Guide (Page 14) and which provides outlines all the blocks + sizes you need to cut.
Block Placement Guide (Page 15) allows you to see where the cut blocks will go in the design and keep track of the number of blocks as you cut them.
Colouring Page (Page 30)
Scrappy quilt diagram (Page 4) to view labelled fabrics.
TIPS for cutting scrappy:
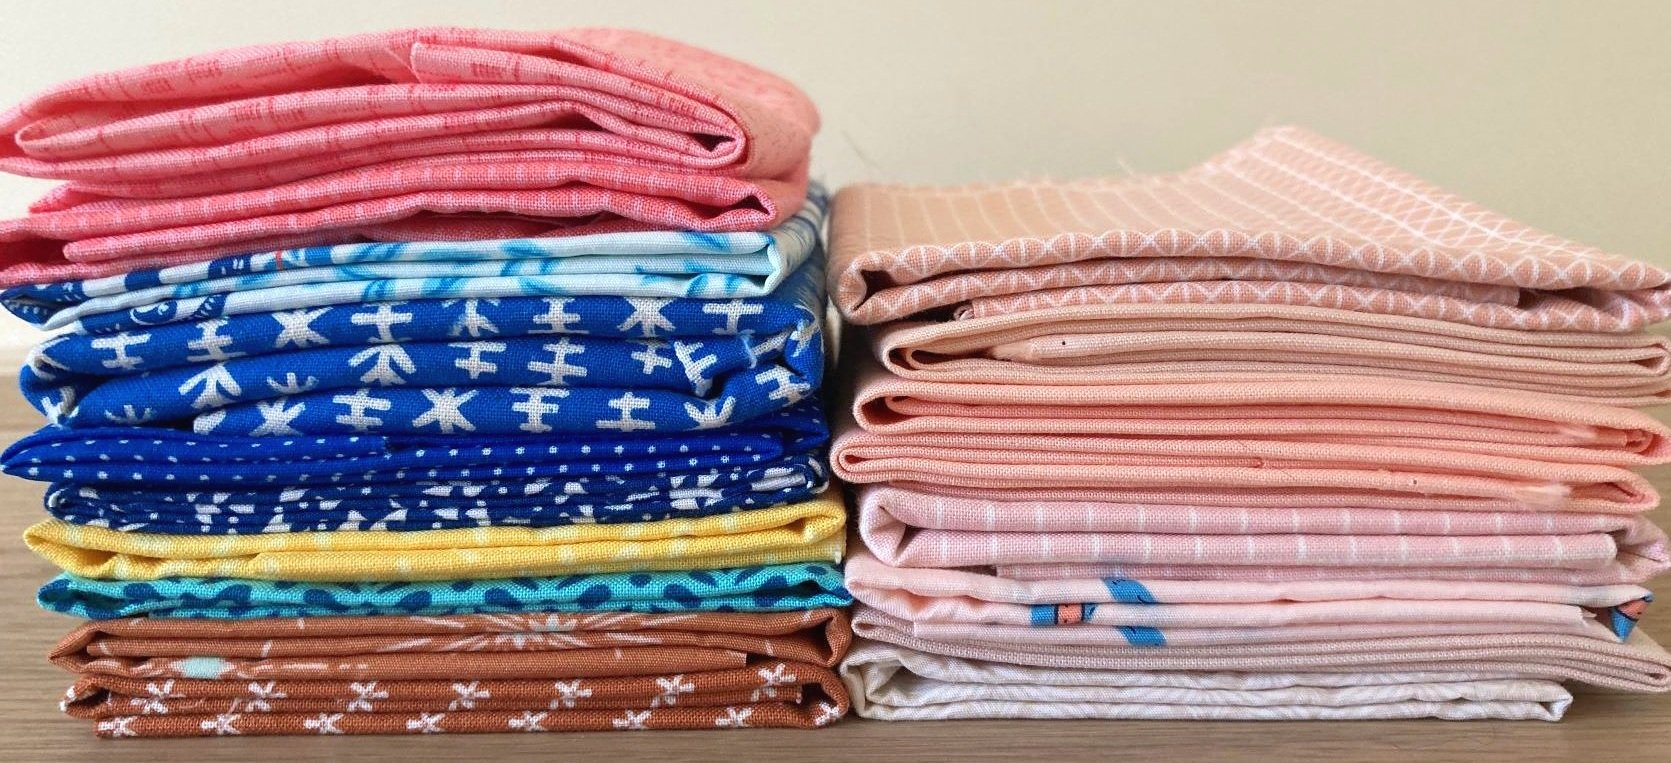
If you have not already done so, sort your fabric scraps into eight colour groups.
A note about half-square triangles: You may find it works better for the scrappier quilt to make all the HSTs two-at-a-time. If you decide to make your HSTs two-at-a-time, then refer to the HT2 block cutting size in the Block Cutting Quick Guide.
Strike through anything on the Block Cutting Quick Guide that is not relevant to the quilt your making, so you don’t mistakenly cut the wrong number of blocks.
Next refer to your Colouring Page and the Block Placement Guide to determine your cutting plan. I suggest you start by cutting all your background fabric, then cutting Group 1 fabric and work through until all the Group 1-7 fabrics have been cut.
Always double check your block size before cutting.
Keep track of the number blocks you have cut by:
Colouring in the blocks on the Block Placement Guide as you cut them.
And/or checking them off the Block Cutting Quick Guide as you cut them.
Once you finish cutting, double check you have the correct number of blocks cut. Refer to the Scrappy column of the Block Cutting Quick Guide for the total number of blocks.
A quilt design wall or laying out your quilt blocks somewhere might help too. Just bear in mind that the half-square triangles, flying geese and square-in-a-square blocks have not yet been made.

How did I cut my fabric?
As I was using fat quarters from my stash, I referred to the Option 2 scrappy quilt cutting guides along with the Block Cutting Quick Guide for the block sizes.
I fussy-cut my S2 squares, so I crossed them off the cutting diagrams so I would remember not to cut them twice. But this meant I had to get a little creative in cutting my fat quarters for the background fabric!
I also customised the star in my quilt, so I had to refer to the Block Placement Guide to colour in the blocks (in particular the blocks that make up the central star and the surrounding S3 blocks).
At the end, I double checked that I had the correct number of blocks by cross referencing the Block Cutting Quick Guide and found I missed one!
PART 1 WINNER: The winner of the Cosmic Cactus Quilt Pattern is @susanmarkhamvirtualassistant!!!
Don’t forget to share your cut fabric with your block labels on Instagram using the hashtag #CosmicCactusQAL for your chance to win a copy of the Cosmic Cactus pillow pattern!
Please note cut off time for entries is 12pm, 4 July 2022, AEST - Sydney, Australia time.
Now that you’ve cut your fabric, stayed tuned for Part 3: Make half-square triangles.