
Cool Tools for your Quilting Toolbox
Disclosure: This blog post contains some affiliate links, which means if you make a purchase through these links, we may receive a small commission at no extra cost to you. All of the product opinions and suggestions are unbiased. As an Amazon Associate I earn from qualifying purchases. This is one of the ways I’m able to support myself and continue writing free content.

As quilters it’s only natural we want to make the process of quilting easier and for this there’s a whole world of quilting tools out there. Do you find yourself tempted to buy what can only be described as cool tools?
‘Yes’, you say and you’re not alone! I’ve been to quilting shows and those demonstrations make it ever so tempting to buy yet another cool tool. Some of them are quite justified purchases, but how many ‘cool tools’ do we really need?
While it’s fun to buy the ‘latest and greatest’, it’ll save you a whole bunch of money if you only buy what you need and it’ll leave more in the budget to buy other things, such as fabric! Or other necessary quilting purchases…
I have been selectively adding some ‘cool tools’ to my quilting toolbox this year and here are some of my new favourite quilting tools.
Quick Links
Clover Fork Pins
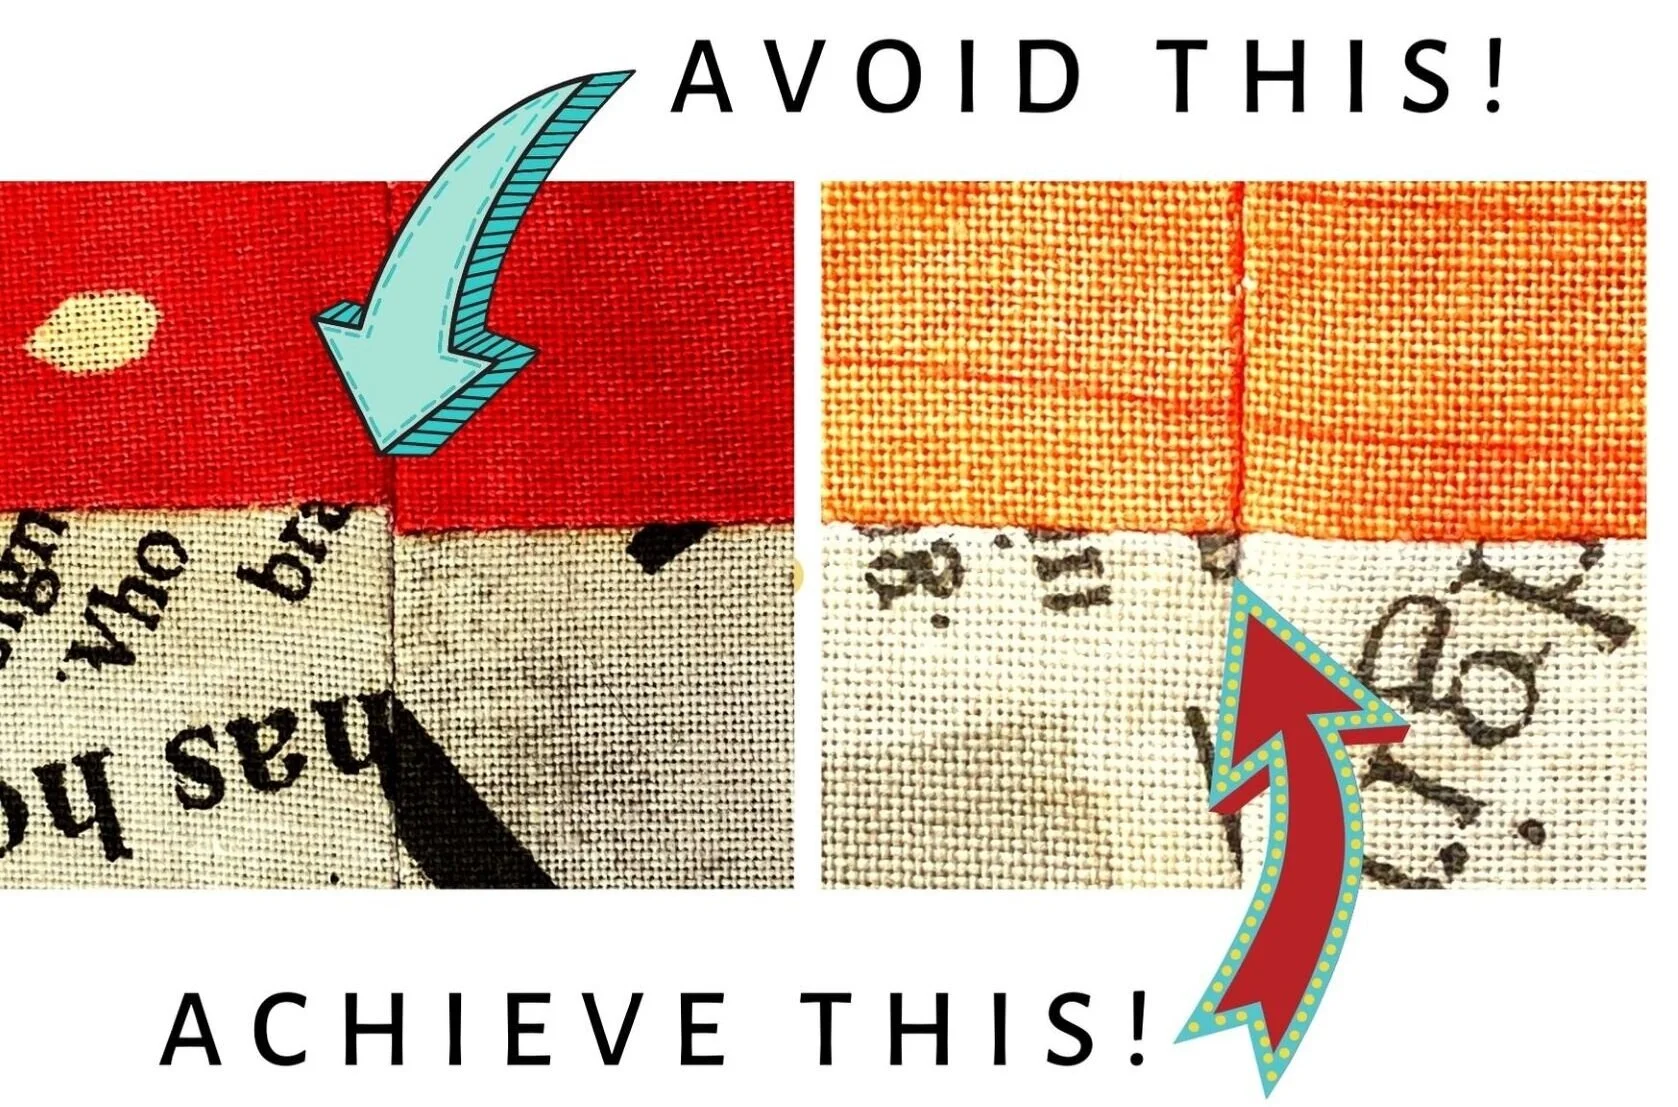
Like many people out there, I’m super frustrated with my seams not always matching. I carefully match or nest the seams, then feeling confident that it’s perfect, I go ahead and sew. But no matter how well I match, then pin, it doesn’t always turn as I’d hoped. So when my fork pins recently arrived, I was super excited to try them out!
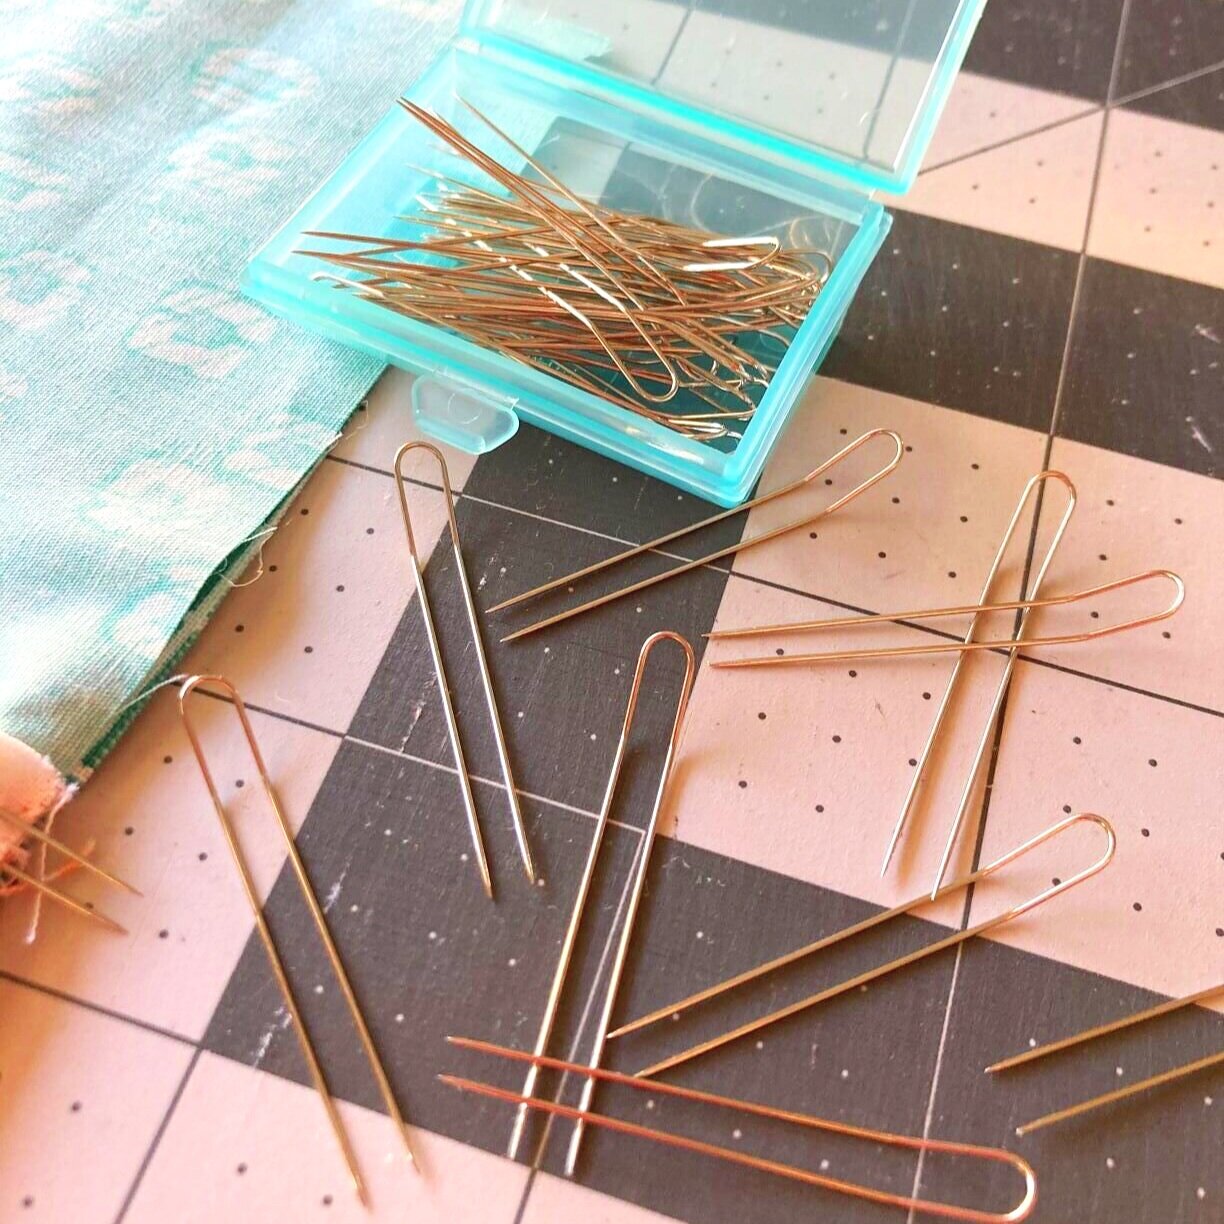
Fork pins allow quilters to achieve perfectly matching seams or points every time! The pins are designed to stop seams moving during the pinning or piecing process.
Fork pins are a sharp, fine (0.56mm), double pronged pin 40mm in length. The bent end allows you to easily handle the pin when inserting or removing from fabric. Each box contains 35 pins.
Find out how to use Fork Pins and achieve perfectly matching seams every time!
1 1/4 Inch SasherTM
When living in Colorado, USA I went to a Quilt Show in Denver and was delighted to check out lots of cool quilting stuff. There I discovered some Aussies demonstating and exhibiting their wares at the show, Pauline Rogers and her team from Pauline’s Quilters World. I was obviously excited to meet some other Aussies in the quilting world, so stayed to watch the demonstations and have a chat. Pauline’s Quilters World design and produce a range of sashers and precision quilting that are made in Australia.
I bought this sasher and love how you can easily make your quilt binding without burning your fingers! Designed so it can withstand the heat of the iron, it keeps your fingers out of the way as you push the sasher along with the your iron (the curve in the sasher fits neatly into the side of a mini iron). Please note for this size sasher you start with a 2 1/2” wide strip of fabric.
If you’re not convinced you can see a demonstration here by Pauline’s Quilters World: https://youtu.be/WcYuen2oevU

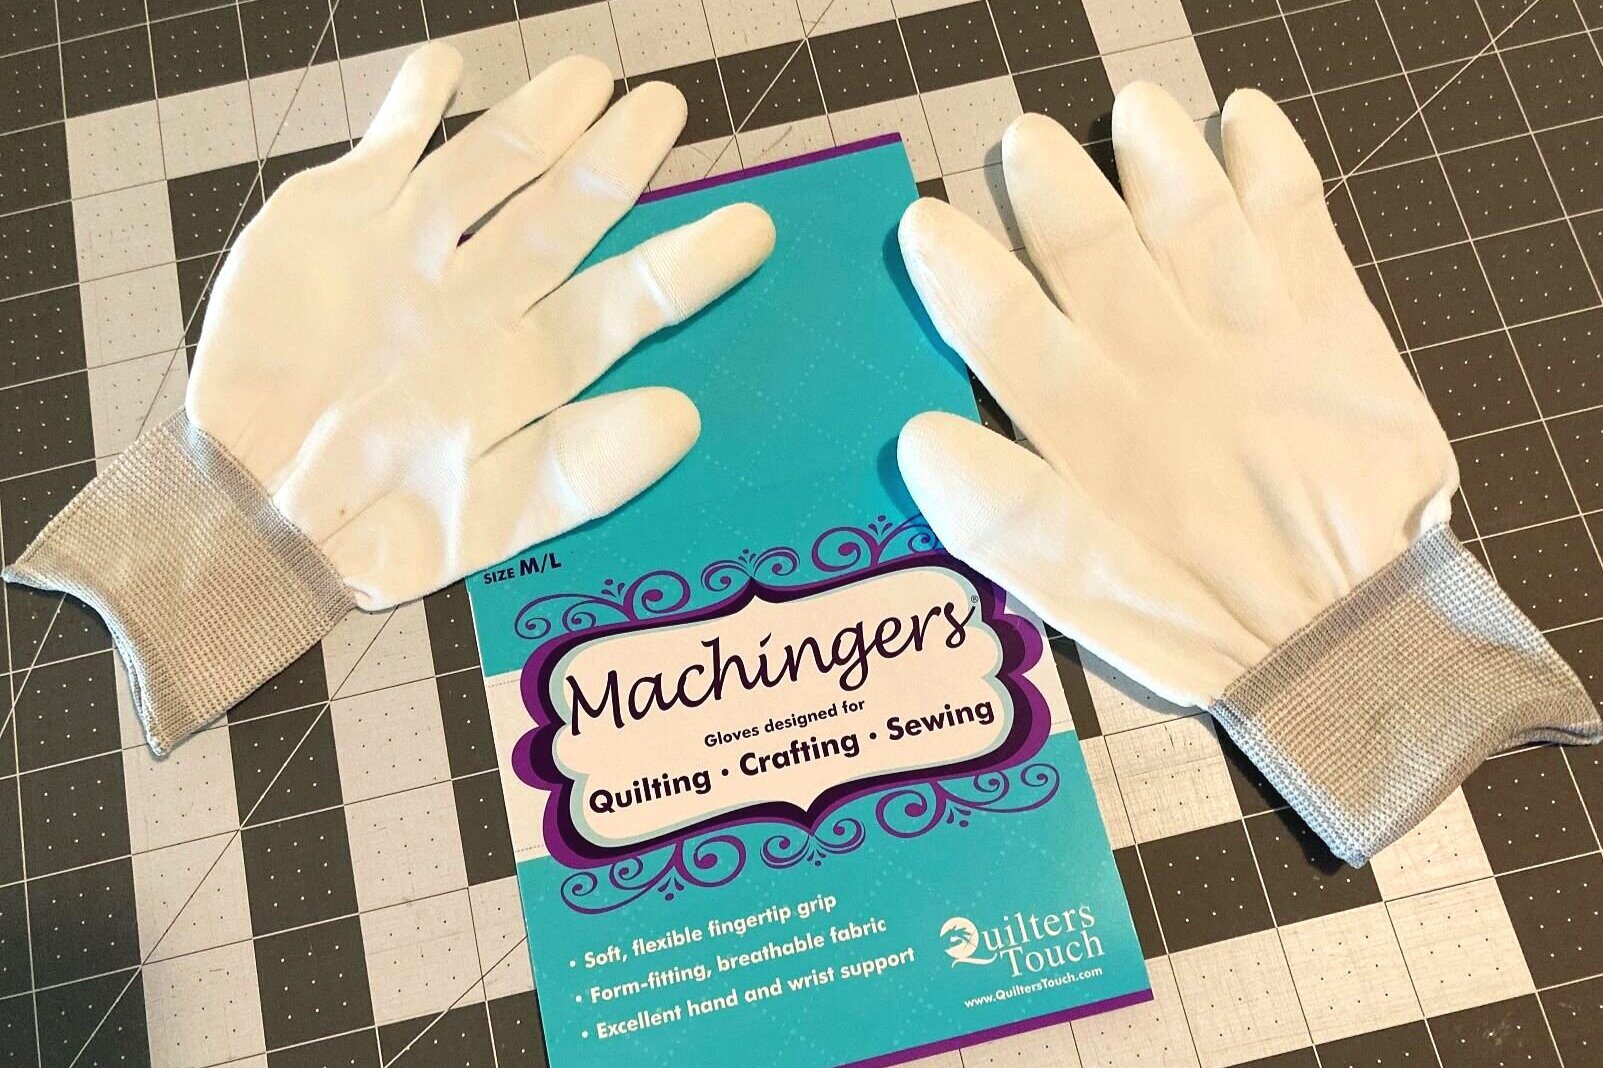
Quilters Touch Machingers Quilting Gloves
To be honest I wasn’t expecting much when I purchased these gloves. But when I recently sewed binding onto a HUGE king size bed quilt, I really did appreciate the benefits of wearing the gloves.
Quilters Touch Machingers quilting gloves are designed for machine quilters. They are soft, flexible, form fitting and breathable gloves with fingertip grips, which assist in providing a firm grip on the quilt. This means it can help in reducing muscle fatigue of the fingers and wrists. Another added benefit is having greater control over the movement of the quilt, giving you precision and leading to a better result when quilting.
Clover Hera Marker
This tool is made from a hard piece of plastic with a curved edge and won’t let you down by running out! No need to worry about ink, chalk or pencil residue not coming off either. The hera marker simply leaves a crease or mark on woven fabric. Use the marker by applying adequate pressure and run the marker along your fabric to leave a crease. As a machine quilter this is ideal for marking lines or a simple pattern on your quilt sandwich in preparation to quilt.
You can mark the lines by freehand or using a quilters ruler. I recommend doing the marking before pinning or basting your quilt sandwich. The best part is that the marks should last as you move your quilt around! The crease marks will disappear completely after quilting or washing.

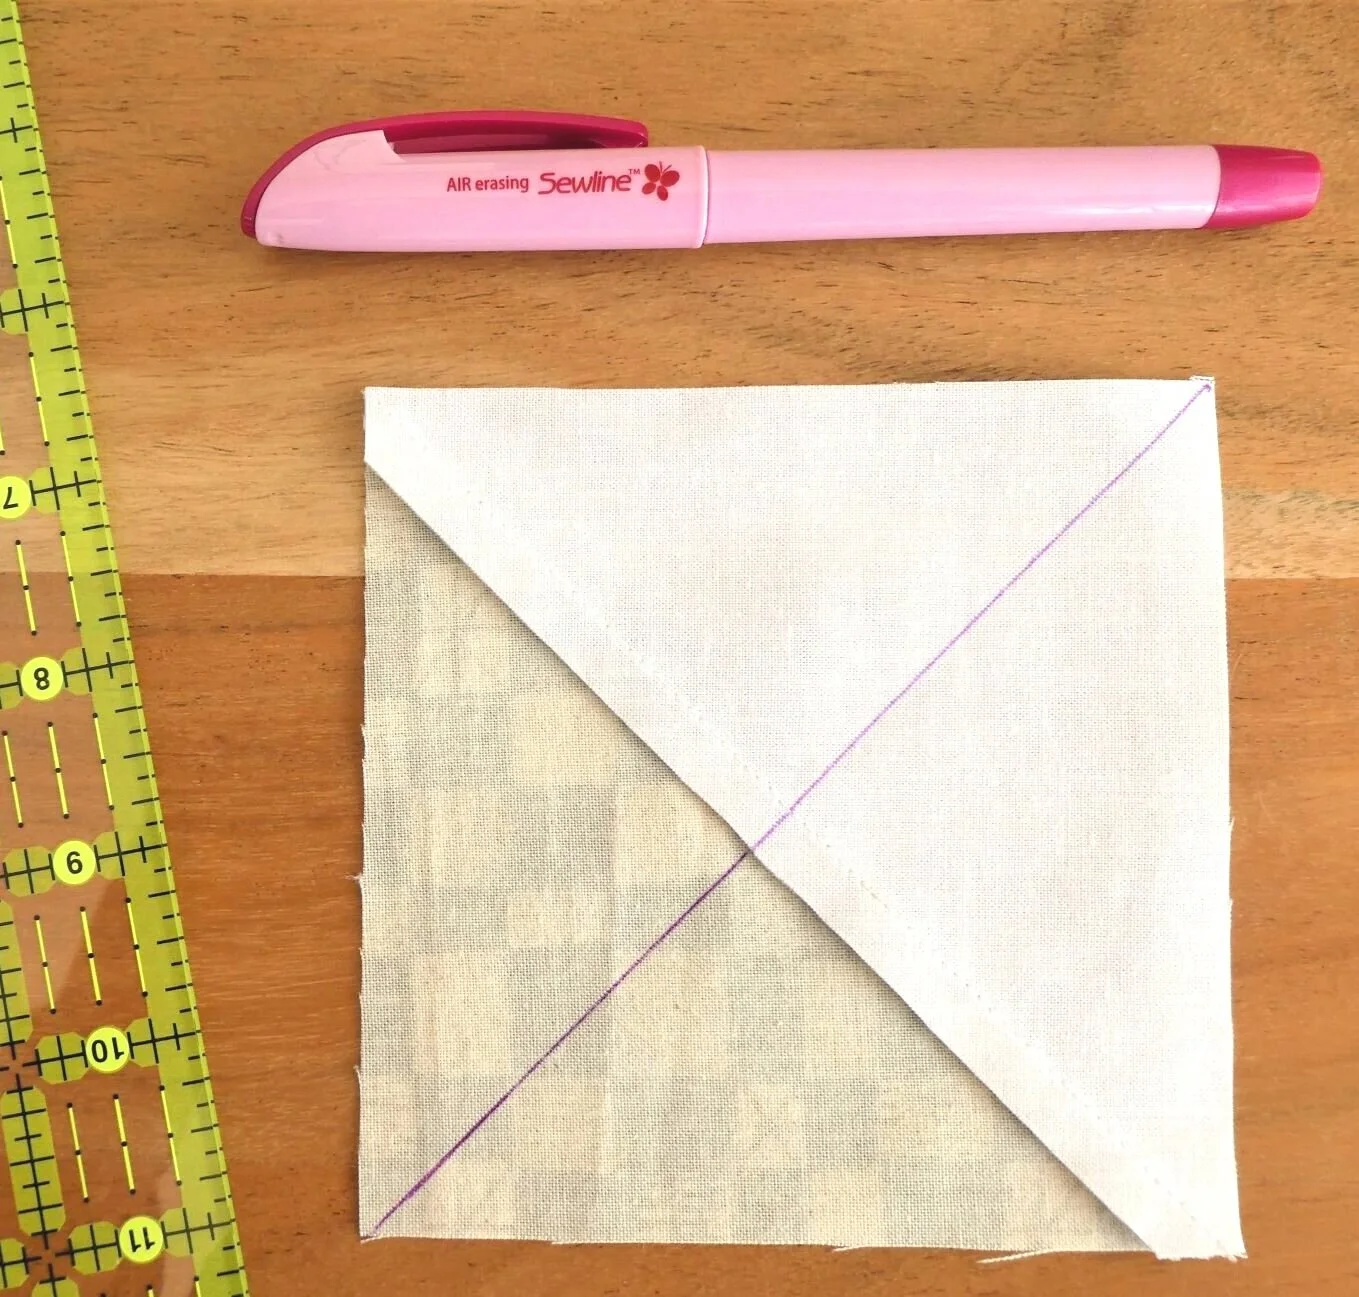
Sewline air-erasible Fabric Pen
This is no ordinary fabric pen! I’m really impressed with how sharp and fine the lines are. Now I’ve had fabric pens, but nothing that does fine lines like this pen. That’s because the Sewline fabric pen comes with a super fine 0.8mm ceramic roller ball that draws lines in purple ink. Are the markings erasible? YES! The other great feature is the pen is air-erasible, so all your markings will disappear within 2-10 days (disclaimer: on most fabrics). Don’t want to wait for the ink to disappear, then simply apply some water and the ink will be erased. I found the ink started to visibly fade a few hours after marking the fabric and was almost completely gone after two days.
Disclaimer: The manufacturer recommends you test the pen on a fabric sample and also remove pen markings before ironing.
Clover 482 Seam Ripper
Let’s face it, we all make mistakes when sewing! For quilters, to our rescue is the seam ripper. My old seam ripper was due for replacement (as the blade was not cutting as well as it used to). So with my new seam ripper and a mistake I made in a quilt block, there was no better time to try it out!
This little ‘ripper’ (no pun intended, but ‘ripper’ is also Aussie for great; fantastic) is something you’ll definitely want in your quilters toolbox. The first thing I notice is the resin handle is much larger than my old one. This makes it so much easier to hold as your ripping through those seams. A sharp cutter also allows you to effortlessly rip through seams, basting thread, seams under button holes and more.
My only criticism is about the plastic sleever cover it comes with. I would have preferred a sturdy hard plastic cover and it probably want be long before I loose the one it came with.

Sew Hot Iron Rest
This silicon heat proof mat not only looks great in the minty green, but this protects your surfaces from the hot iron. I bought this for when using my small ironing board so I could protect my table top from the hot iron. But if you’re one of those people worried about the iron tipping over, you can place the iron plate directly on the surface of the mat too. And do you know what, it works a treat! It comes in a 7” x 10.875” (17.75 x 26.6cm) size and can withstand up to 500° F (260° C).

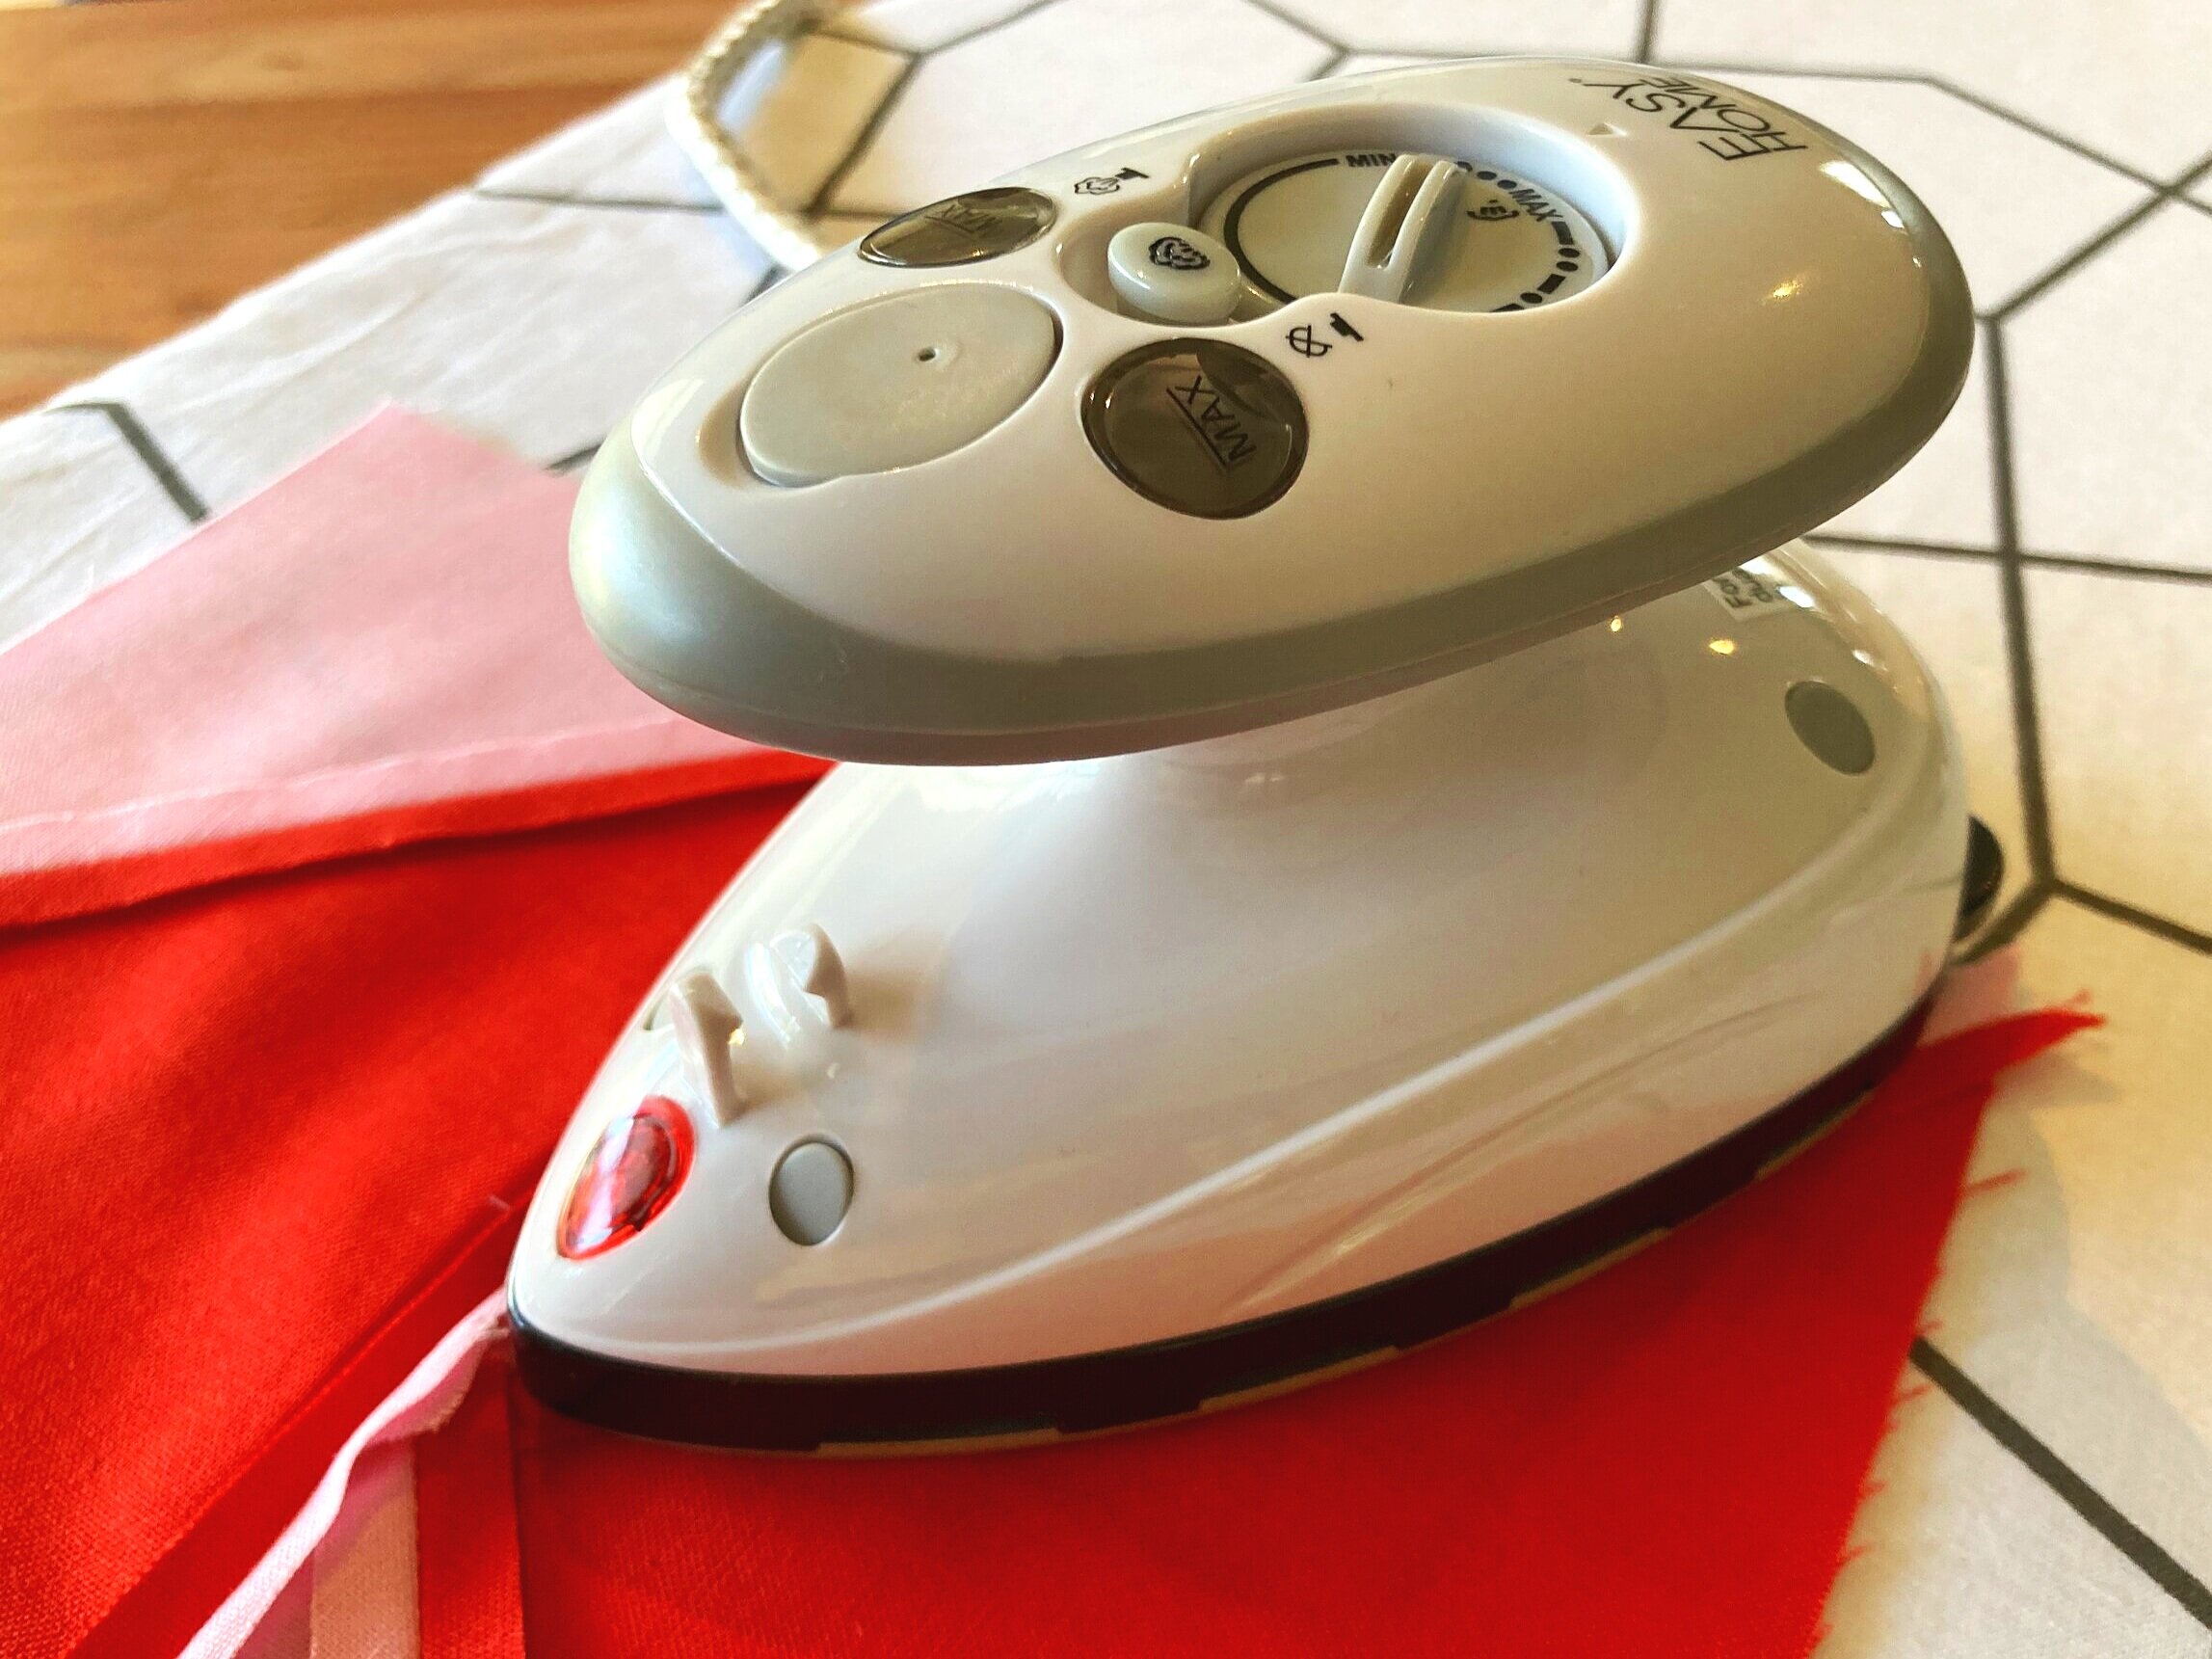
Easy Home Crafting Mini Iron
I’ve never used a mini iron until recently and now I wouldn’t live without it! Firstly it’s important to note how light weight this iron is. This is great for everyone using the mini iron, but especially important for anyone with arthritis or dexterity problems. It’s small size also makes it great as a travel iron to take to sewing classes or retreats, but also allows you to fit an ironing station next to your sewing machine. This saves you time and allows you to attend to those small ironing tasks straight away.
The mini iron glides along easily with one hand, allowing you to press your quilt seams and binding with ease. It’s both a fully functioning continuous steam or dry iron, with a non stick soleplate and variable temperature settings. Stands up on plastic feet or use with a heat proof silicon mat to place the iron plate face down for safety and quicker ironing.
Unforunately the Aldi mini iron is a seasonal item, but you can find a similiar mini iron by clicking on the button below.
Ikea Ironing Board
This isn’t just any ironing board! It’s small, light weight and budget friendly. The best part, it has a hook for hanging as well. I found a great spot for mine in my utility caddy. It’s really handy for putting on my table top and ironing my quilt seams. I’ve not had any problems but just a word of caution when ironing: do not push down on the board to hard as it’s little stand legs may not take the pressure.
