
Cosmic Cactus Quilt Along PART 6: Assemble Blocks

In Part 6 we will be assembling Blocks B-F, with no assembly required for Block A. The blocks in the Cosmic Cactus quilt will require you to match seams and maintain those lovely half-square triangle, flying geese and square-in-a-square points.
For a beginner this is a great time to learn and practice these new skills. A more experienced quilter should find putting these blocks together fairly straight forward.
If you have any further questions or need a little help completing your blocks, please ask our community of quilters by joining our Facebook group.
Before you start sewing your blocks, I suggest reviewing:
If you don’t already have a copy of the pattern, be sure to grab a copy from our shop.
I hope you are enjoying the leisurely pace of our QAL and I can’t wait to see your finished blocks!

BLOCK ASSEMBLY ESSENTIALS
Use a stitch length of 1.8 for block piecing.
Sew a consistent 1/4 inch seam. You can review how to sew a 1/4 inch seam here.
You may need to sew a scant 1/4 inch seam near some of your half-square triangles, flying geese and square-in-a-square blocks to preserve the point. What is a scant 1/4 inch seam? Requires you to sew just under 1/4 inch, which is typically a thread or two within your normal 1/4 inch seam.

Press your seams as directed in the pattern. The pattern requires you to press nesting and open seams. Remember that pressing is different from ironing. When you press, you are lowering and lifting the iron from the fabric. Ironing is the back-and-forth motion of the iron on the fabric that can cause the fabric and seams to distort.

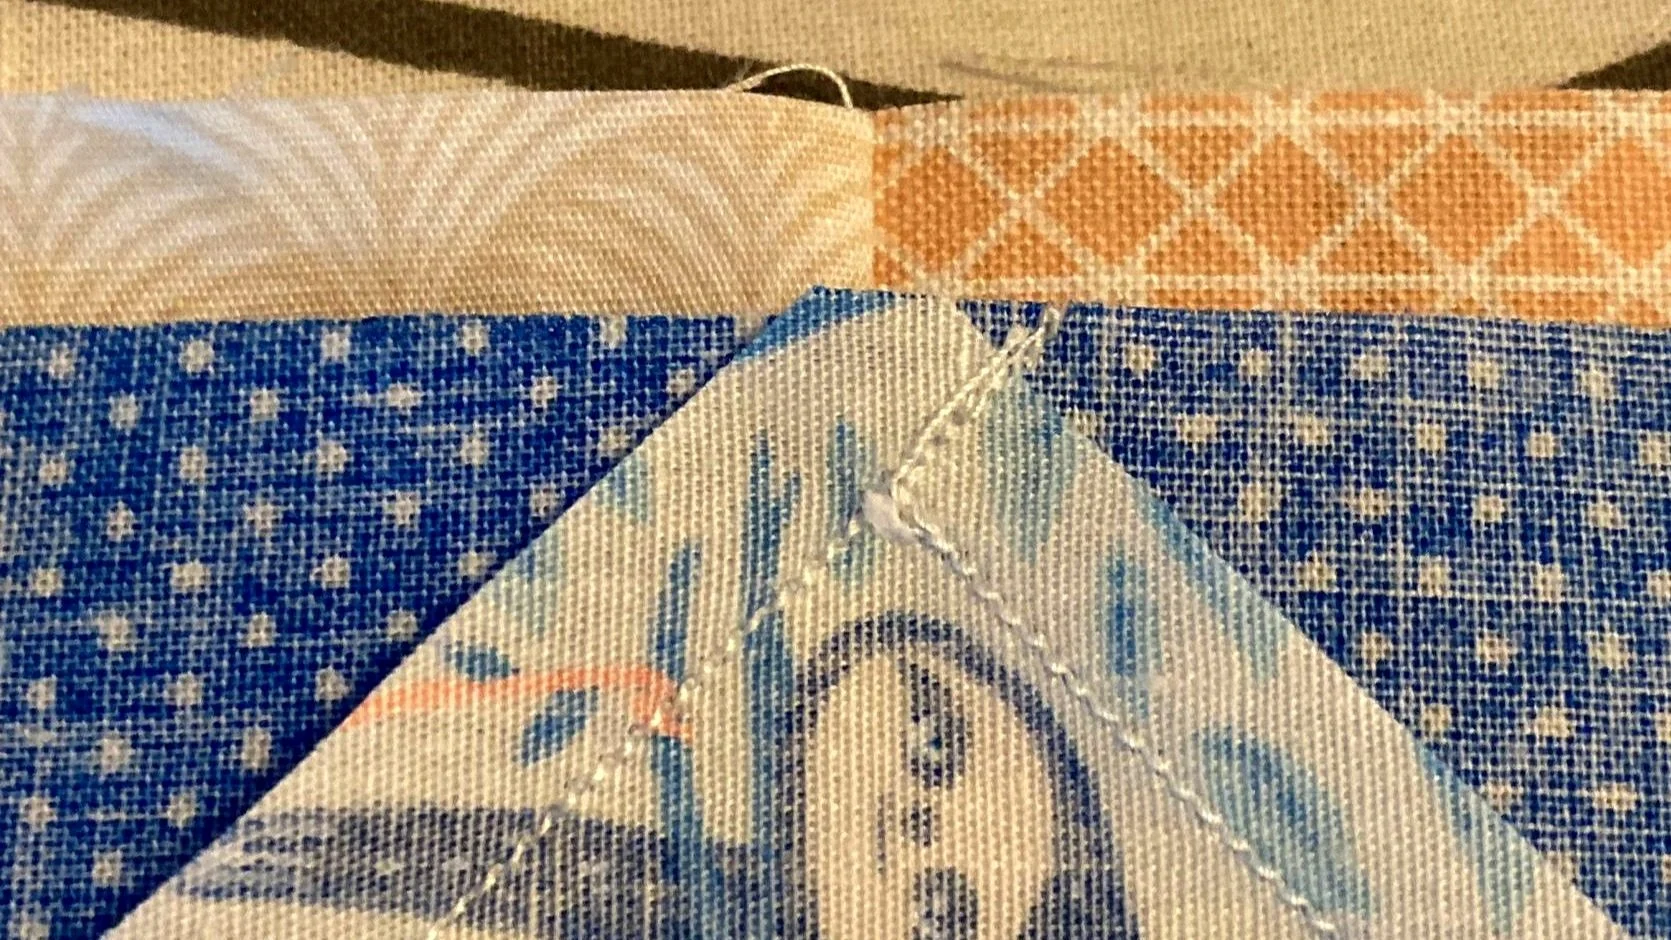
Read this tutorial for Tips for Matching Seams and Perfect Points. It covers everything you need to know about nesting seams, matching open seams, plus how to achieve perfect points for you half-square triangles and flying geese.

Use your Fork Pins as outlined in this tutorial. They will make matching your seams and points so much easier!

Chain piecing will save you time! Consider chain piecing where possible for the two-colour, four-colour and scrappy (option 1) quilts. But for scrappy (option 2 & 3) quilters, you may find less opportunities for chain piecing as you try to maintain your design and keep track of block parts . Need a refresher, refer the Chain Piecing Guide.

TIPS FOR SCRAPPY QUILTERS + MOTIF ORIENTATION
If you are making scrappy quilt (option 1), you can continue to Assembling Blocks B-F as you are using the yardage outlined in the pattern.
Tips for Scrappy quilters (option 2-3):
Layout your scrappy quilt:
Referring to the Block Placement Guide in the quilt pattern, layout your quilt on your design wall, table, floor or other option you have available to you! Find out how you can make a simple quilt design wall like mine here.
If you are doing a scrappy background, swap around any of the fabrics until you are happy with the look of your overall quilt.

Layout your quilt and check you are happy with it. Oops! Can see some Block B half-square triangles aren’t orientated the right way!
Tips for sewing + pressing your scrappy quilt:
Systematically assemble what you can of each block B-F* and place each block part back on your design wall after sewing to maintain your scrappy design.
Set up a pressing station nearby and press everything you have sewn so far, taking each piece off the design wall and placing it straight back.
Continue this way until you have completed each block.
*Start with Block B and assemble what you can, then move onto Block C and so on. That way you can keep track of the sewing and pressing instructions as you go.

Set up a pressing station near where you are sewing.
Fussy-cut blocks orientation:
Consider the orientation of the motif in your finished quilt when sewing your blocks. You may need to lay out your entire quilt to ensure the correct orientation before sewing.
ASSEMBLING BLOCKS B-F
Follow the directions in the pattern for piecing Blocks B-F.
Some additional tips are provided here for each block as follows:
Block B: Just make sure your HSTs are correctly orientated. It makes a difference to the look of the finished block and can easily be overlooked until after sewing them!

Block C: At Step 3 when sewing the R1 side blocks to the flying geese block unit, mark the tip of the flying geese point, as will be hidden under seam.


Mark where the tip of the flying geese point is, as will be hidden under the seam.
Block D:
At Step 2 when sewing the half-square triangle block unit to the other block unit, I find it easiest to start in the corner without the half-square triangle seam and sew towards the corner with the seam.
At Step 5, pin the large R3 block at each end, then ease in the rest of the block.

I find it easiest to sew towards the half-square seam where possible.
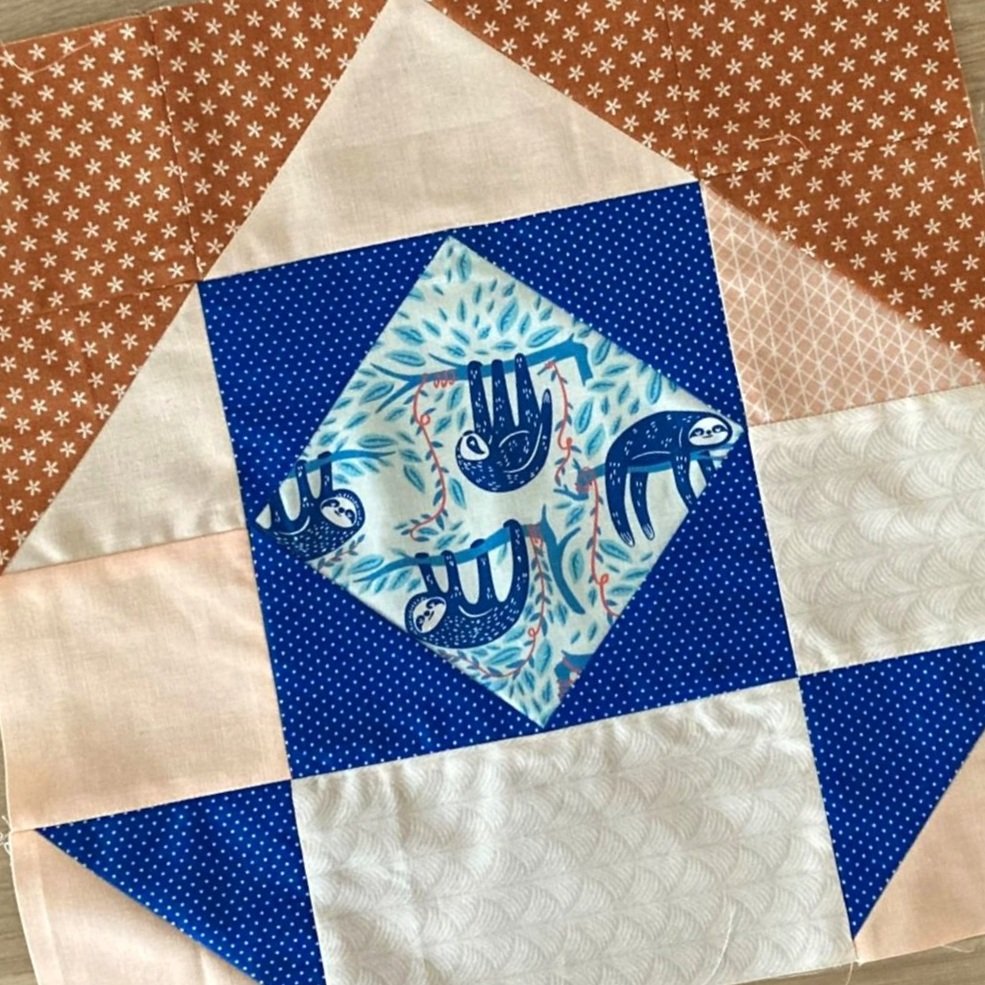
Block E:
At Step 3 when sewing Row 2: Match up the square-in-a-square block point with the seam of the block unit.
At Step 4 when piecing Row 1 to Row 2: As the star is the central focus of the quilt, take extra care when pinning + matching your half-square triangle points with the flying geese points. You want to have that continuing line from the half-square triangle block through to the flying geese block.

Match up the square-in-a-square block point with the seam.

As the star is the central focus of the quilt, take extra care when pinning + matching your half-square triangle points with the flying geese points.
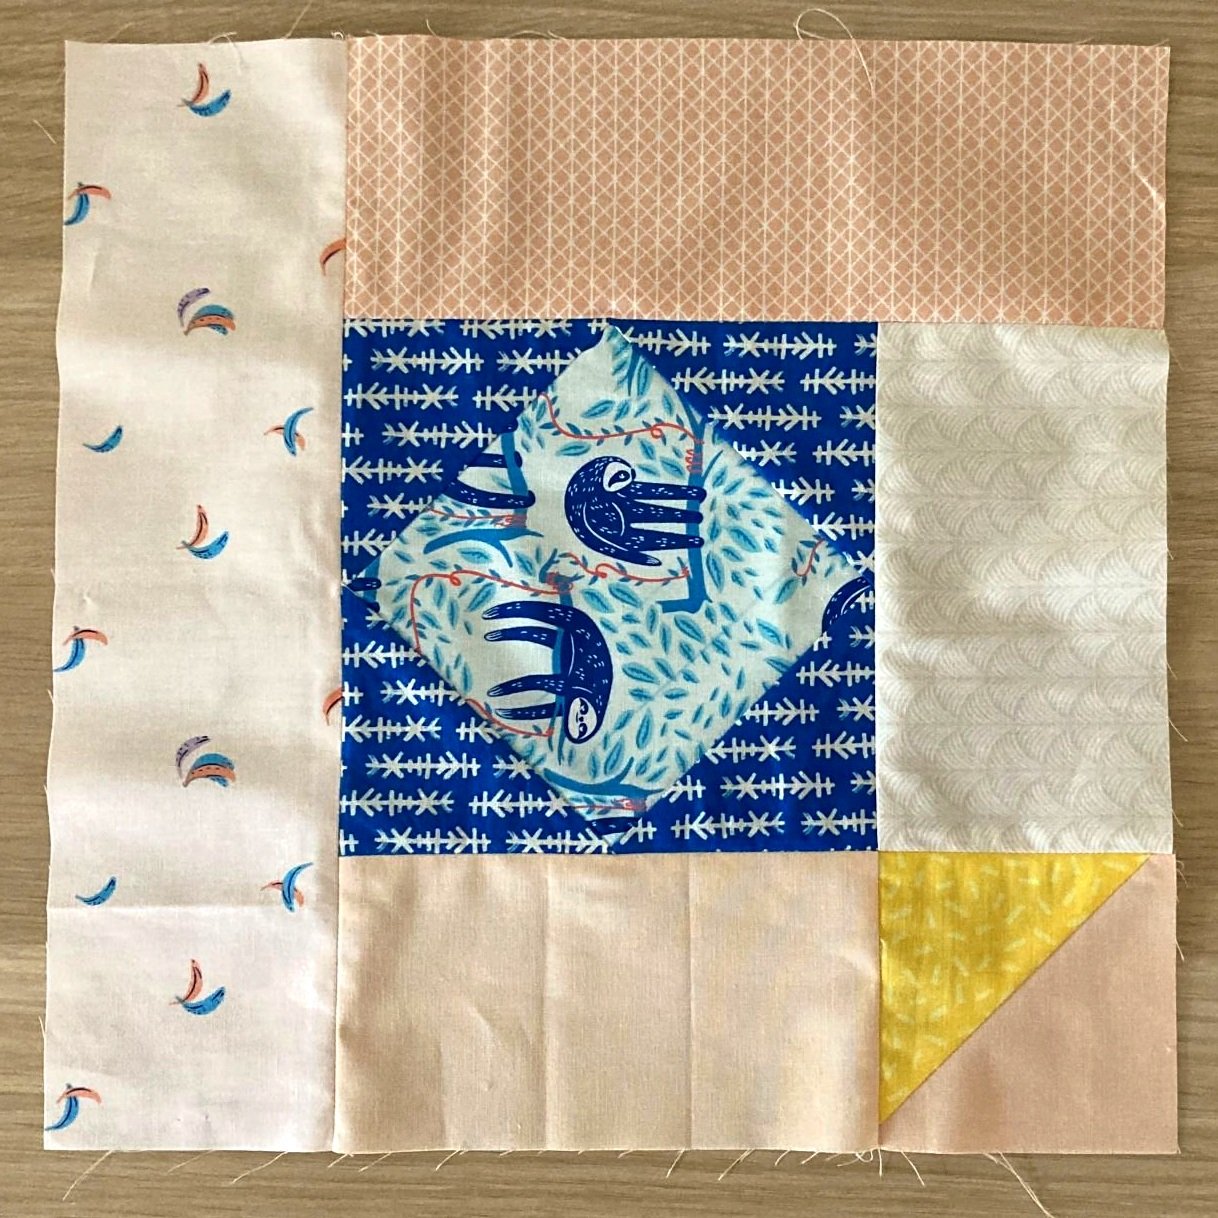
Block F:
This is the centre piece of your quilt! Just watch the orientation of the HST blocks and matching seams.
How did you go piecing your blocks? I really enjoy this part of the process and you can really see this quilt coming together. The scrappy option does take a little longer to piece and I found it easiest to sew one block at a time to maintain your finished quilt layout. But I think it’s totally worth it!

With the finished blocks on the design wall, you can really see how this finished quilt will look like!
If you have any further questions or need a little help completing your blocks, please ask our community of quilters by joining our Facebook group.
PART 5 WINNER: We how no entries this week, so no prize has been awarded.
Now that you have assembled your blocks you are ready for Part 7: Assemble Quilt Top.