
Cosmic Cactus Quilt Along PART 7: Assemble quilt top

We are almost there, with only the quilt top to assemble. It’s so exciting to finally see this quilt come together! Where to start? Take a look at the Quilt Top Assembly Instructions in the pattern and read on for additional tips.
Don’t let your quilt turn into a UFO (unfinished object)! Join me next time for the optional Part 8: Finish your quilt.

Refer to the pattern Quilt Assembly Instructions on Page 23 for arranging your blocks, sewing and pressing instructions.
If you have not already done so, layout out your quilt on your design wall or on the floor. If you are making a scrappy quilt background, you may want to move your blocks around until you are happy with it. At this point, check your blocks are in the right orientation, referring to the Quilt Assembly Instructions diagram on Page 23.

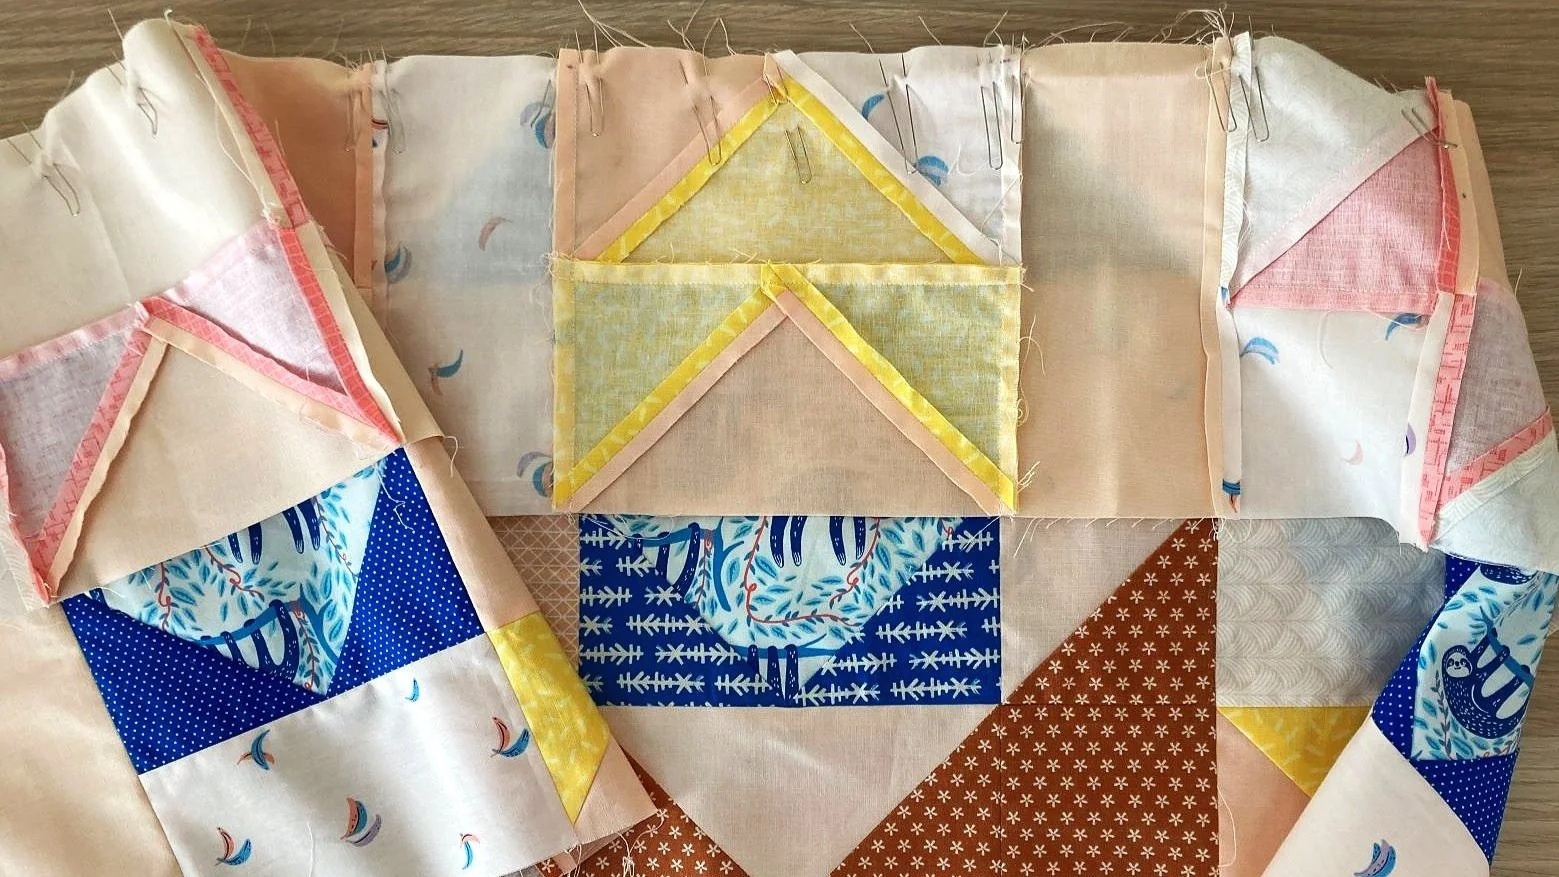
Layout the quilt blocks on your design wall or floor.
There are a number of seams, half-square triangle and flying geese points to match. Have your fork pins ready and refer to this tutorial for Tips for Matching Seams and Perfect Points and Quilt Top Assembly for some working examples.
Use a fabric marker to mark your points so you can see them easily when you sew near them.
For best results, take your time pin your rows, matching seams and marking half-square triangle and flying geese points. The time you spend at this stage will give you better result and lessen the changes of needing to use the ream ripper.
Take time to pin your blocks and rows.
Save time by pinning a bunch of your blocks into rows and chain piecing them together!
Once you have your rows completed, I found it easier to pin and sew each row separately (as there is a reasonable amount of pinning, matching of seams and marking points). If you are confident and prefer to sew all your rows, then go right ahead!
Don’t want to chain piece? For scrappy quilters, to keep track of your blocks you may find it easier not to chain piece (which is what I did). I took two blocks down, pinned and sewed, then placed them back on my design wall. Don’t have a design wall or floor space? Taking a photo of your final layout is another option too.
Use a stitch length of 1.8 for sewing your blocks and rows together.
Sew a consistent 1/4 inch seam.
You may find you need to sew a scant 1/4 inch seam near some of your half-square triangle, flying geese and square-in-a-square blocks to preserve the points.
What is a scant 1/4 inch seam? Requires you to sew just under 1/4 inch, which is typically a thread or two within your normal 1/4 inch seam.
Watch out for seams that may want to tuck under as you sew your blocks and rows together. It’s no big deal if you do, but it’s best to avoid them if you can.

Remember to trim your threads as you sew each of your block together, then the rows. This is something I often neglect, then find myself trimming them all before making the quilt sandwich.
Press your seams open as directed in the pattern.
I sewed all my blocks into rows and then pressed them all at the same time.
Then I sewed all my rows together and then pressed all my seams once the quilt top was completed.
Remember that pressing is different from ironing. When you press, you are lowering and lifting the iron from the fabric. Ironing is the back-and-forth motion of the iron on the fabric that can cause the fabric and seams to distort.

If you have any further questions or need a little help completing your blocks, please ask our community of quilters by joining our Facebook group.
QUILT TOP ASSEMBLY
My process for sewing my blocks together:
Start with Row 1 and decide which corner you will start at (either LHS or RHS).
Next sew Block A + Block B and Block C + Block B together.
Then sew these two units together and sew the final Block A on.
Where possible sew with the half-square triangle, flying geese and square-in-a-square block on top so you can see where you marked the point. See some working examples with photos below.
Tip: Decide which row has more points and seams to match, then place this row on top. If there is a point underneath you can’t see, make a mark on the row on top, then you will know where the point is that you have to sew near.
Everyone is different, so if this doesn’t work for you then find a system that works for you!

You can't see the flying geese point underneath, so make a mark so you know where this point is.
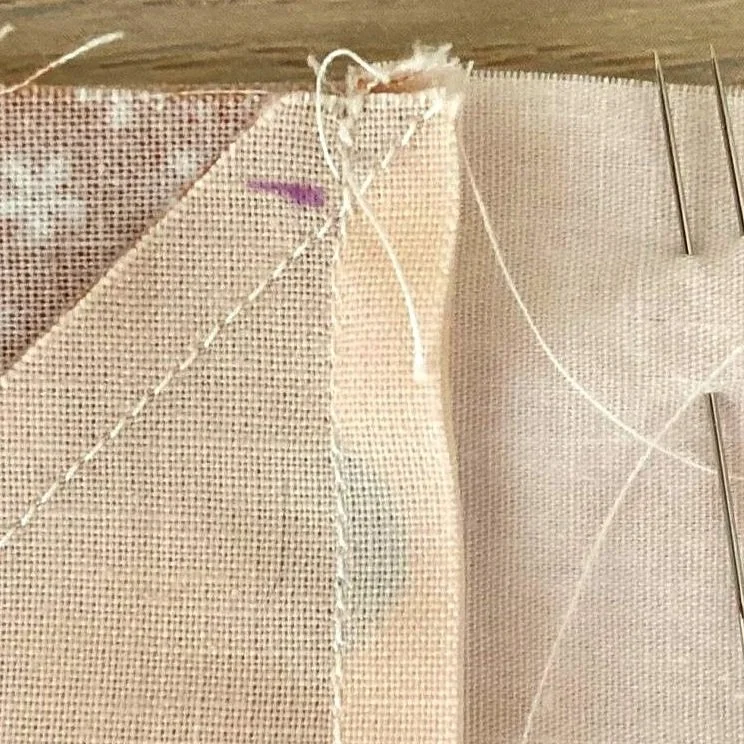
I find it hard to see the white thread, so I make a mark where the half-square triangle point is.

Make a mark where the half-square triangle point is, so you can easily see it.
My process for sewing my rows together:
In each row, match and pin the seams of each block together, then come back and pin the remainder of the block, matching the seams and points.
Sew Row 1 to Row 2 + Row 4 to 5: There are more points in Row 1, so I found it easier to have this row on top of Row 2 for pinning and sewing.
The same applies for pinning and sewing Row 4 to 5.

Sew Row 1 to Row 2 + Row 4 to 5
Sew Row 2 to Row 3 + Row 3 to 4: There are more points to match in Row 3, so I found it makes it easier to have this on top of Row 2.
The star is the focal point for this quilt, so pay particular attention to matching and pinning the seams of the star points.
The same applies for pinning and sewing Row 3 to 4.

Sew Row 2 to Row 3 + Row 3 to 4
How did you go assembling your quilt top?
I’ve made this quilt top a few times now and it’s always a pleasure to assemble. The scrappy (option 2 or 3) quilt is now my favourite! Don’t get me wrong, I love them all! Sometimes we do want to keep our quilt making simple, and the two-colour and four-colour quilts provide this option. It also makes a striking and minimalist quilt which some people are looking for.
But I do love a challenge, so playing around with different fabrics colour combos (before deciding on one) and creating a low volume scrappy background was so much fun! There are a number of possibilities for changing the look for the centre star too, with some ideas outlined here. Plus adding a motif to the square-in-a-square block is fun too.

See the colour of the lounge chair? This is the colour that was the starting inspiration for my quilt colour palette.

I took a gamble with this colour palette! But now I just love the combination of the vibrant blues, orange, tan and yellows with the low volume background.

The star is the feature of this quilt and doesn’t it look awesome!
If you have any further questions or need a little help completing your blocks, please ask our community of quilters by joining our Facebook group.
Part 6: winner: We how no entries this week, so no prize has been awarded.
Don’t let your quilt turn into a UFO (unfinished object)!
Join me next time for the optional Part 8: Finish your quilt.
This will cover everything to finish your lovely quilt, including making your backing, quilt sandwich, quilting (plus ideas for quilting) and binding your quilt.